SFTP connection: SSH key generation and Filezilla configuration
The SFTP protocol enables files to be transferred over a secure, encrypted connection using a protocol called SSH, which replaces the use of passwords with a key set consisting of two elements:
- A private key: a file containing a long string of characters. It must never be shared, and will always remain on the same device. It acts as a password, enabling you to authenticate yourself.
- A public key: Also a file containing a long string of characters, associated with the private key. This key is intended for the machine you wish to connect to. You can communicate it by e-mail with confidence.
It is necessary to generate these keys from each device with which you wish to connect to SFTP.
SSH key generation
- Download PuTTYGen here: http://puttygen.software.informer.com/download/
- Run the downloaded program “puttygen.exe”.
- Make sure that the “RSA” or “SSH-2 (RSA)” button (depending on version) is checked and that the “Number of bits in a generated key” is set to 2048. Then click on “Generate”.
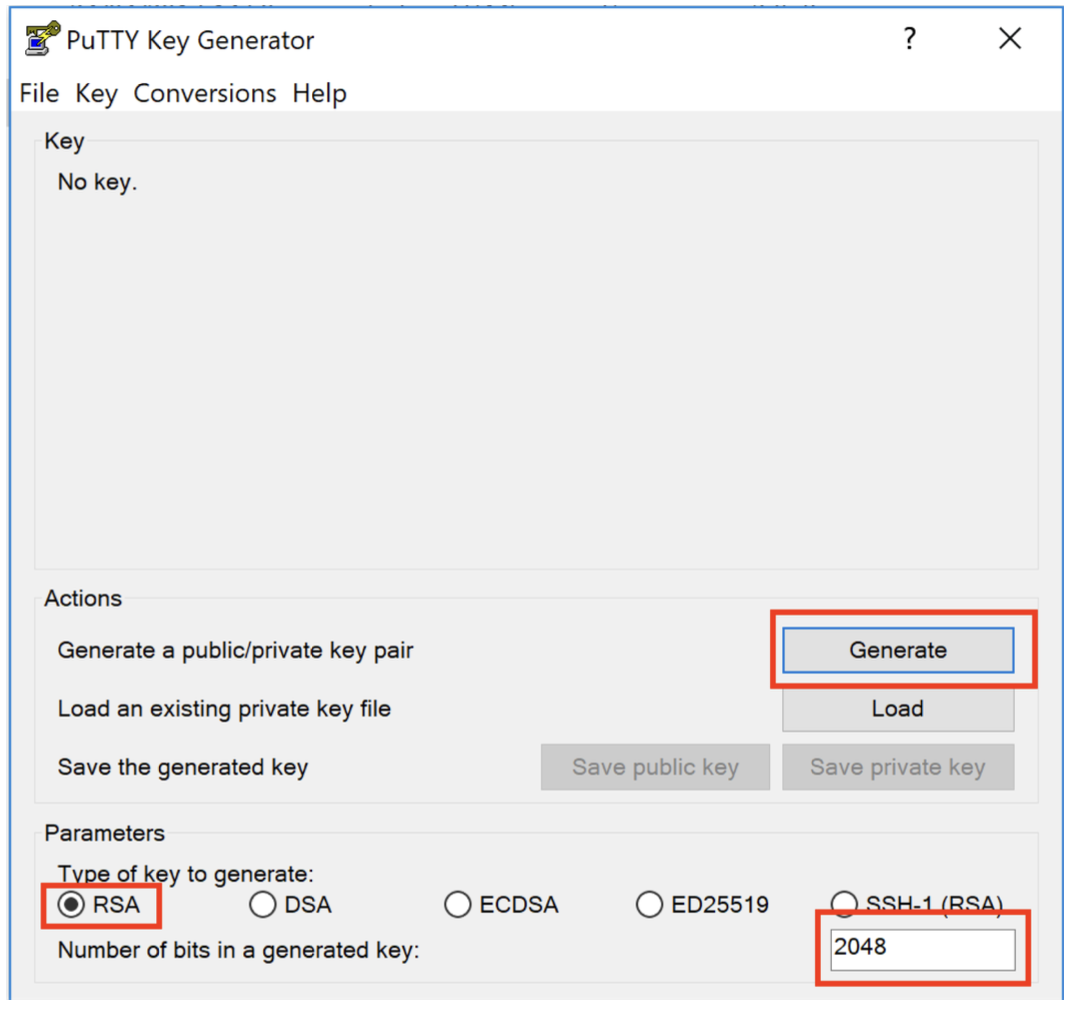
- Do not fill in the “Keypassphrase ”and “Confirm passphrase” fields, as authentication is done via keys.
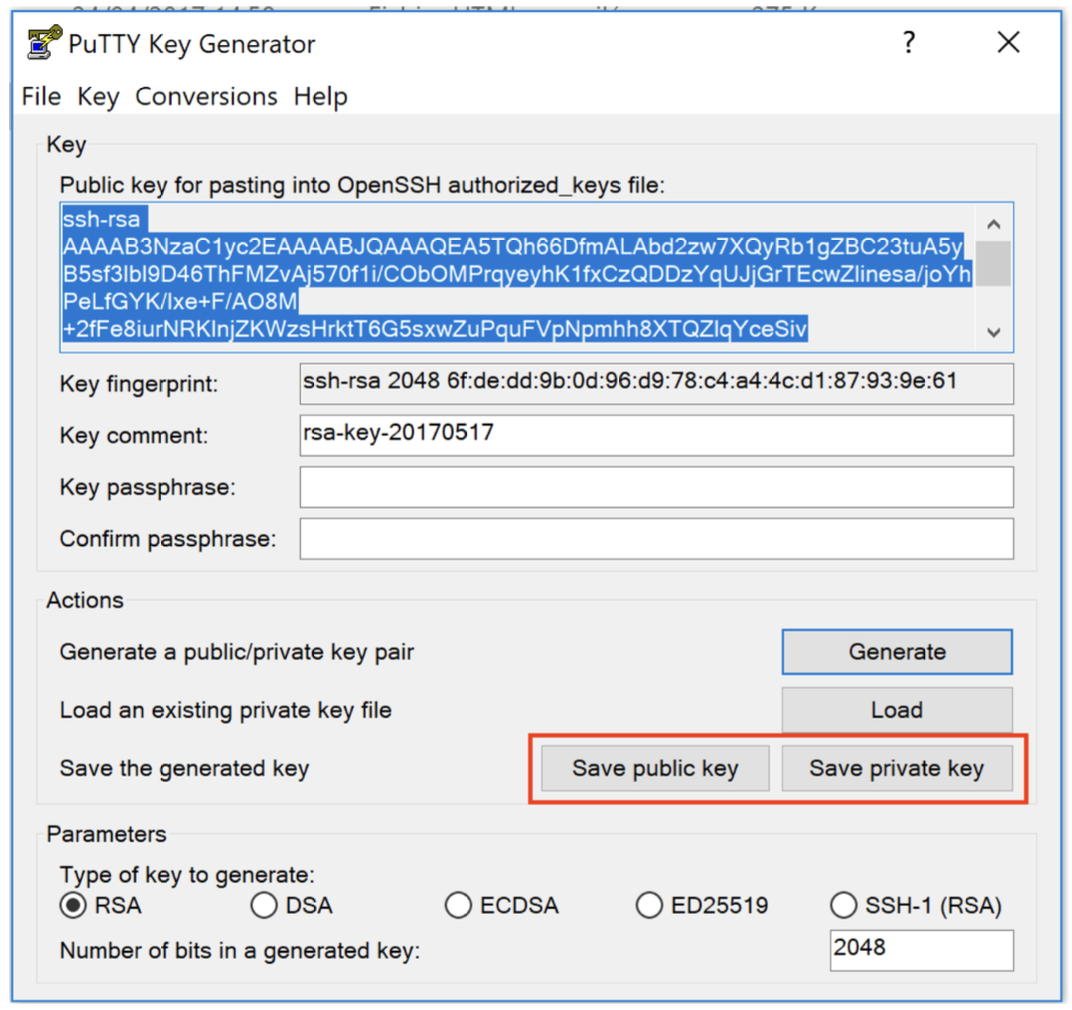
- Save the public and private keys by clicking on “Save public key” and “Save private key” respectively, in a repository of your choice (these keys should be kept for as long as you use SFTP). We advise you to give them explicit names, for example
- “sftp_splio_public_key.pub” and
- “sftp_splio_private_key.ppk”, and avoid using special characters (acute accent, space, etc.).
Please note
The key is private and is used for authentication purposes. It must not be shared, either with Splio or with any other user.
Then send the public key file to your Splio contact so that we can create your access.
Before you can log in, we need to integrate your new key. This may take a few hours. Once it's complete, we'll get back to you with your login details.
Please note
Some corporate networks may block connections to unrecognized machines. To access Splio SFTP, the following IP must not be blocked: 34.77.101.67
Please check with your technical team to ensure access to this IP.
FileZilla configuration
Download and install FileZilla from here
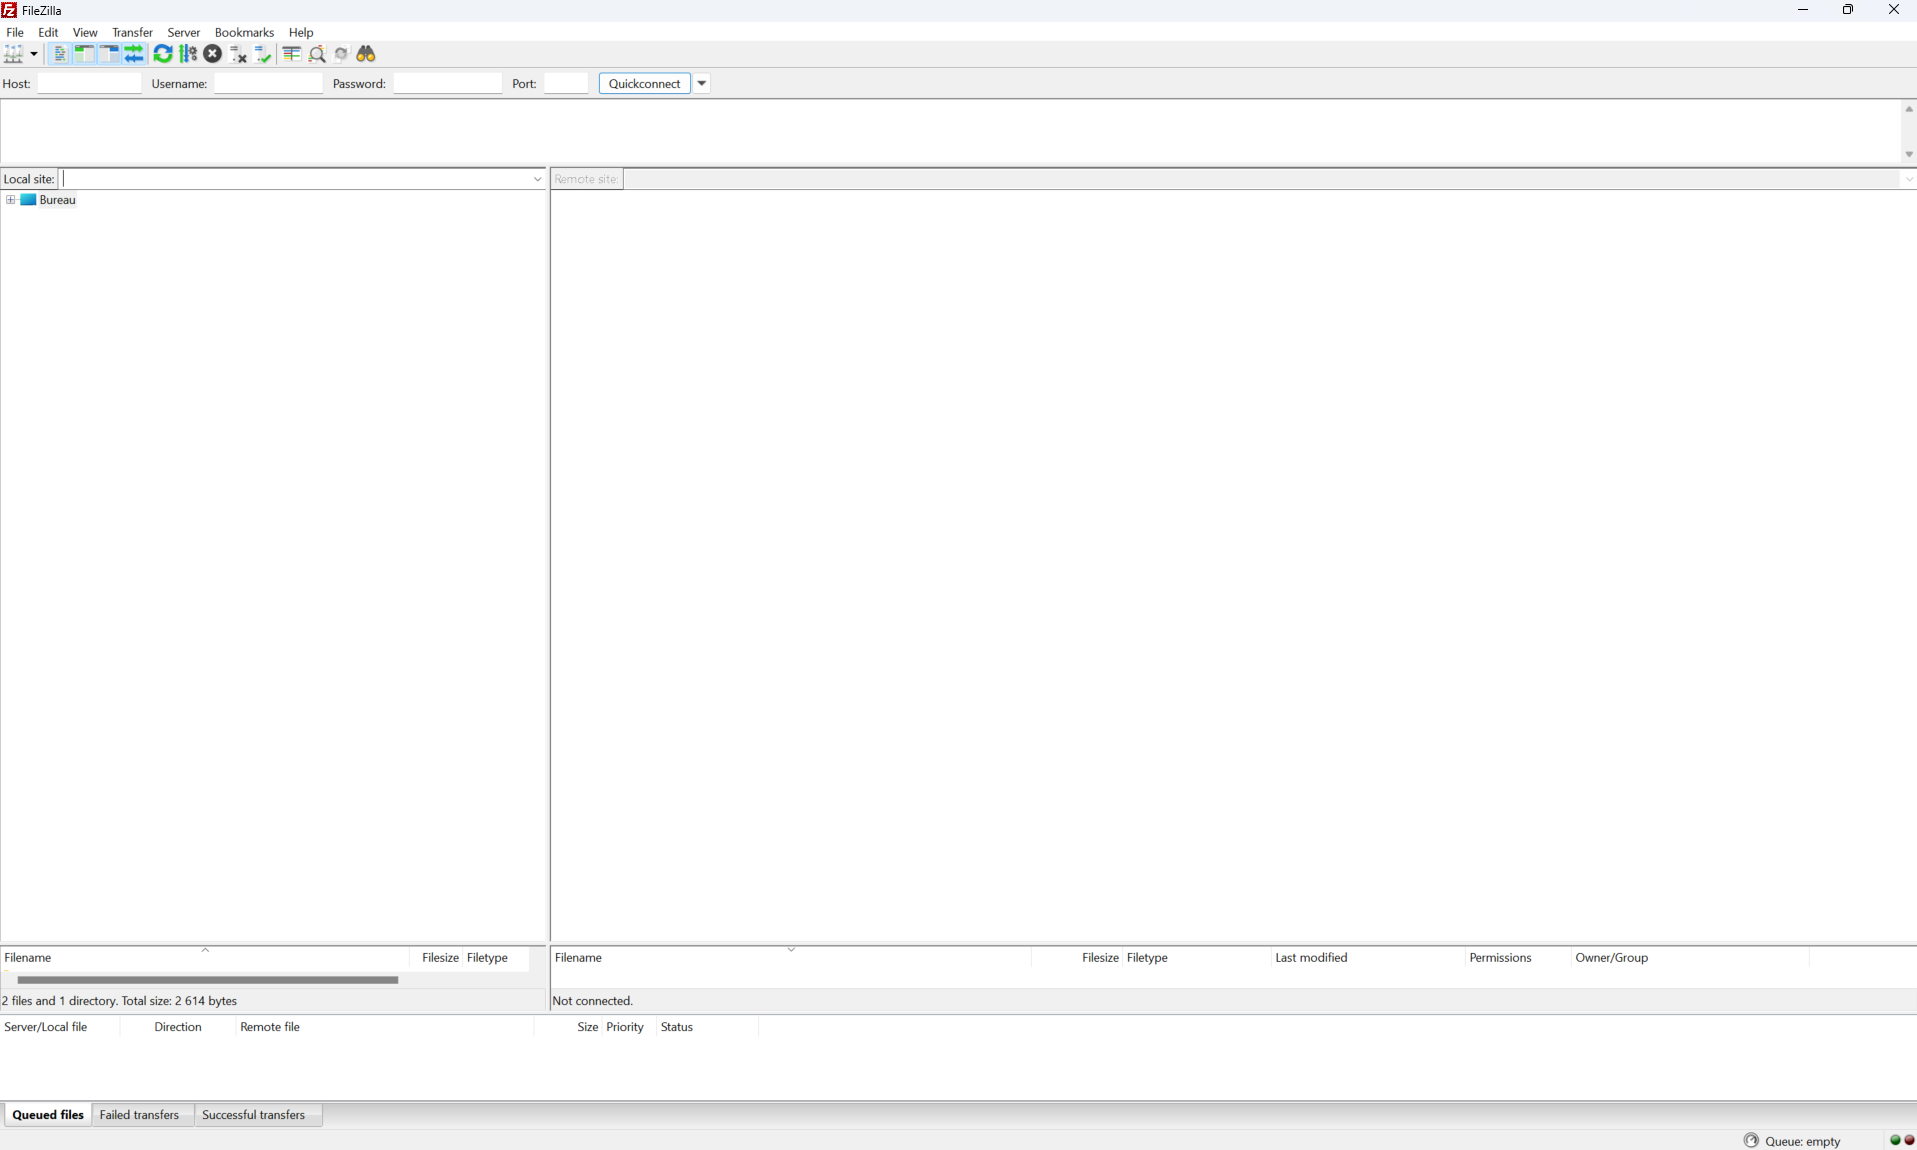
FileZilla interface
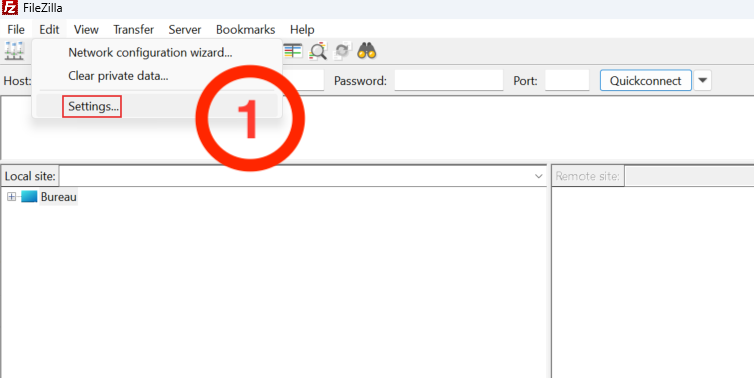
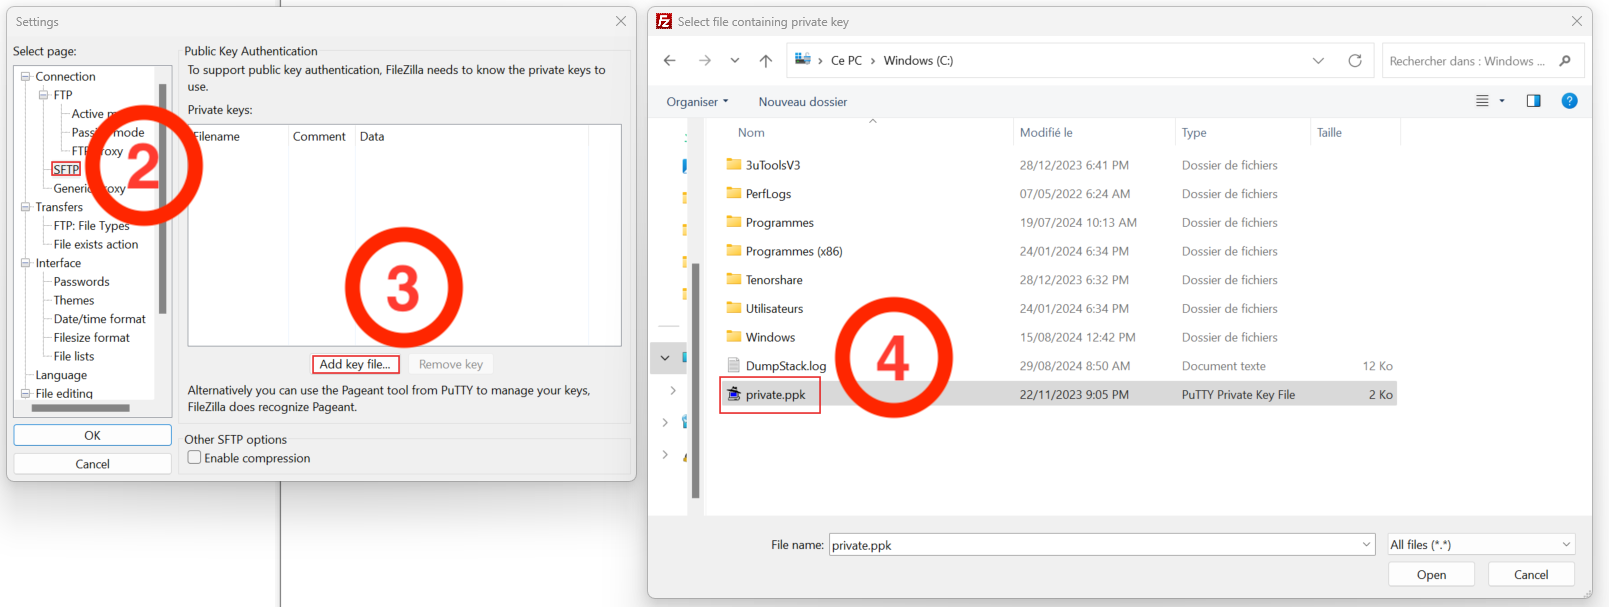
- Go to Edit > Settings
- Select SFTP in the left-hand menu
- Click on “Add key file”
- Choose your private key file and click “Open”.
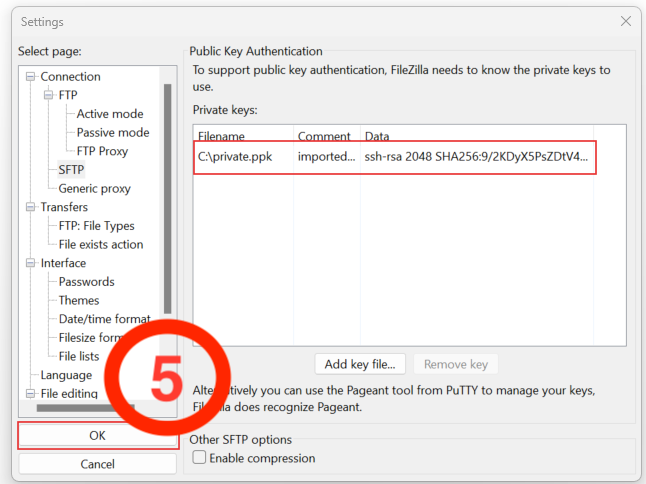
- Once the file has been selected, the key should appear in the list. Then click on “OK”.
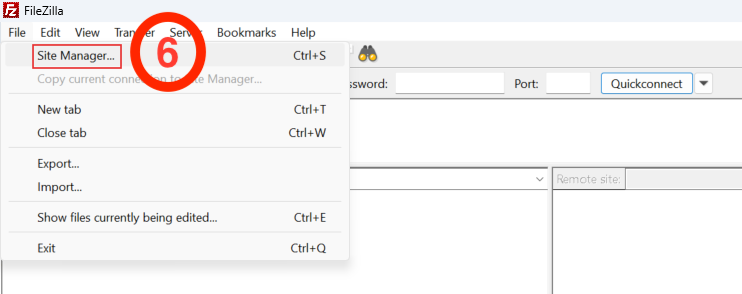
- From the main menu, go to File > Site manager
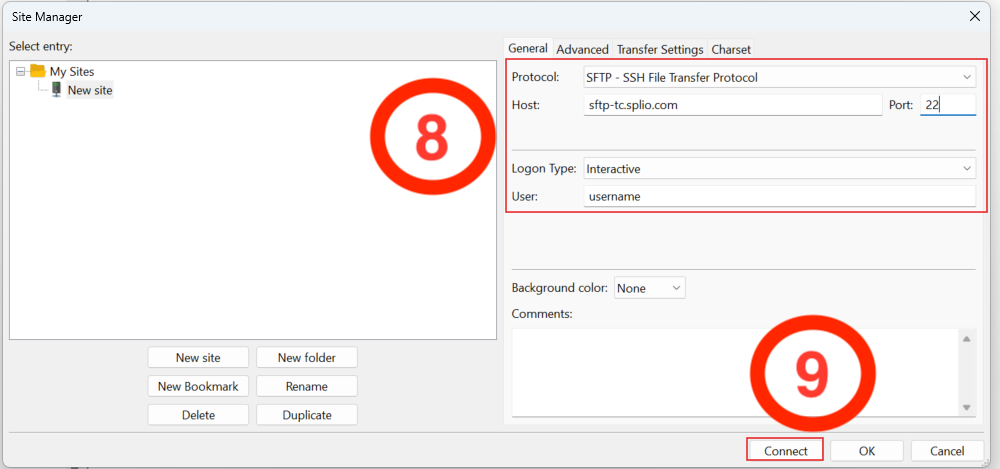
- Click on New site. You can name the site (= the SFTP) to make it easier to find, for example “Splio SFTP”.

- Configure the General tab with the following information:
- Host: sftp-tc.splio.com
- Port: 22
- Protocol: SFTP - SSH File Transfer Protocol
- Logon type: Interactive
- User: Your login (which we'll send you)
- Then click on “Login”.
- On your first connection attempt, FileZilla will ask you to confirm that you know the host server. Check “Always trust this host, add this key to the cache” to avoid this warning and click OK.

You should see the SFTP's contents in the interface's right-hand box. In the “data” folder, you'll find two subfolders:
- to_splio: Here you can upload any files you wish to send us.
- from_splio: If it has been agreed that this SFTP will be used to retrieve extracts generated by the platform, this is where you'll find the files.
Updated 2 months ago