Splio Salesforce Marketing Cloud connector - email data logs
Provided by: Splio
Connector type: source
Third-party system: Activation platform
Available for Splio
• License: Only for CDP
• Add-ons: Predictive AI, Identity Resolution

Overview
In order to leverage your data to improve Splio performance, we need your Salesforce Marketing Cloud account to automatically send your email logs data to Tinyclues.
- During setup, you need to configure an automation pipeline on your Salesforce instance with appropriate settings.
- For data history, you need to send a first batch of email logs data
- Then on a daily basis, your email campaigns are automatically sent to Splio
These email logs are tracking interaction with your email marketing communication: for each email sent and each customer, it will contain attributes such as the sent/open/click/unsubscribe dates.
Create a Data Extension
As a first step, you need to create a Data Extension that will be used to store email logs.
- Click Contact Builder in the Audience Builder tab.
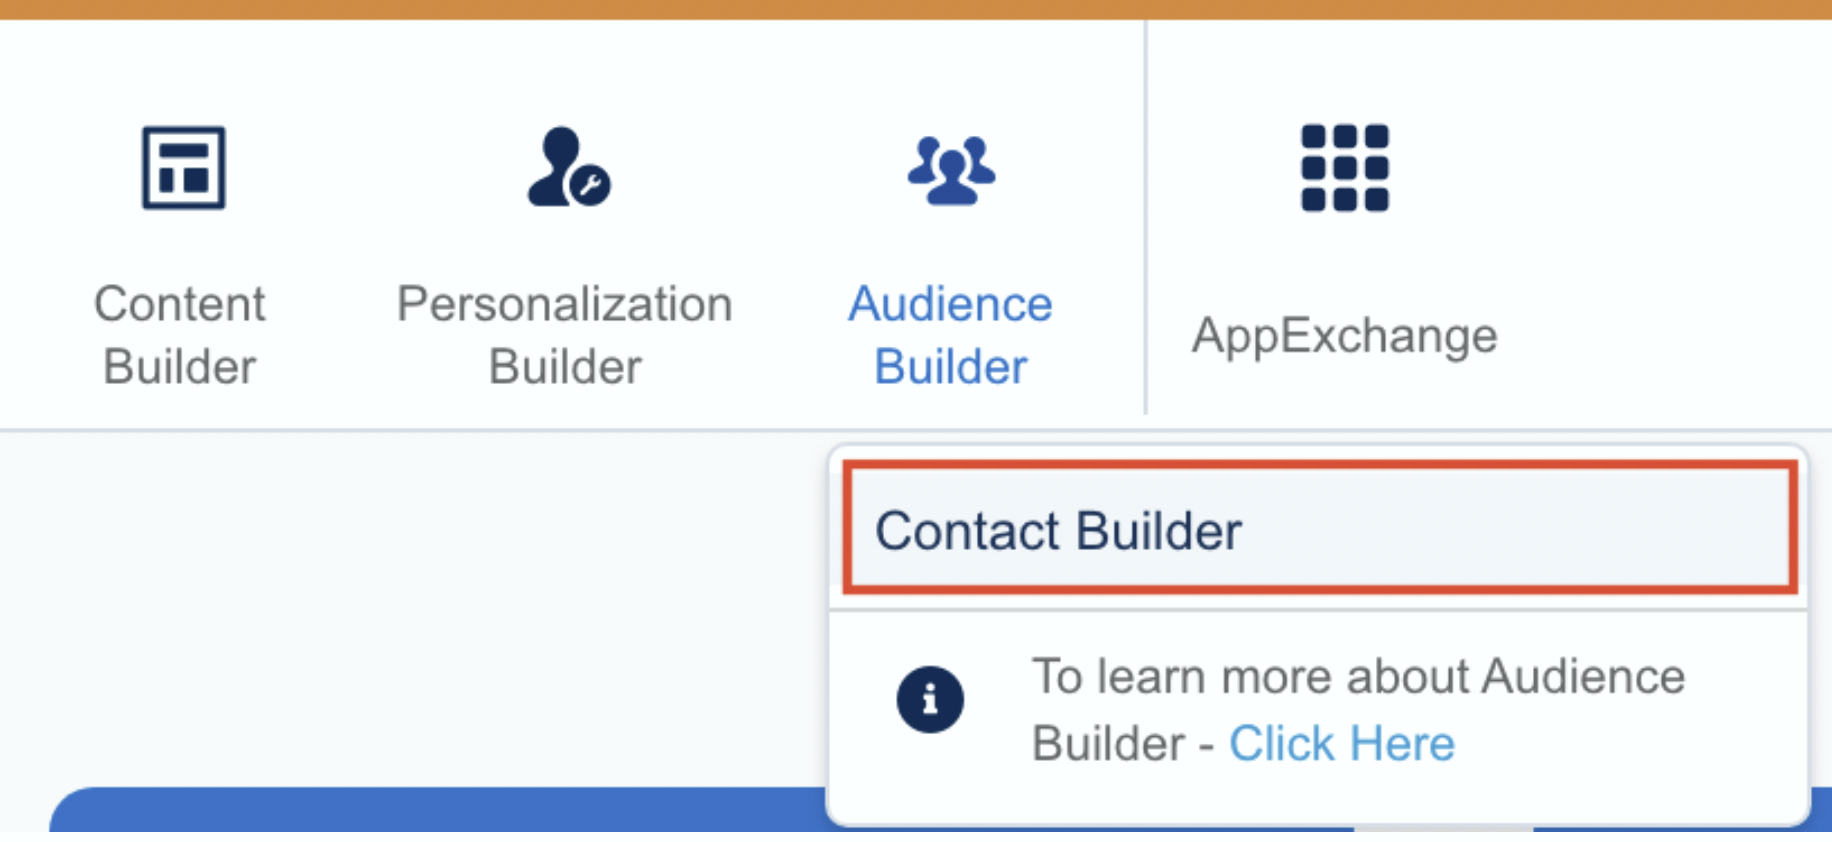
- Go to the Data Extensions tab.

- Click Create in the top right corner.
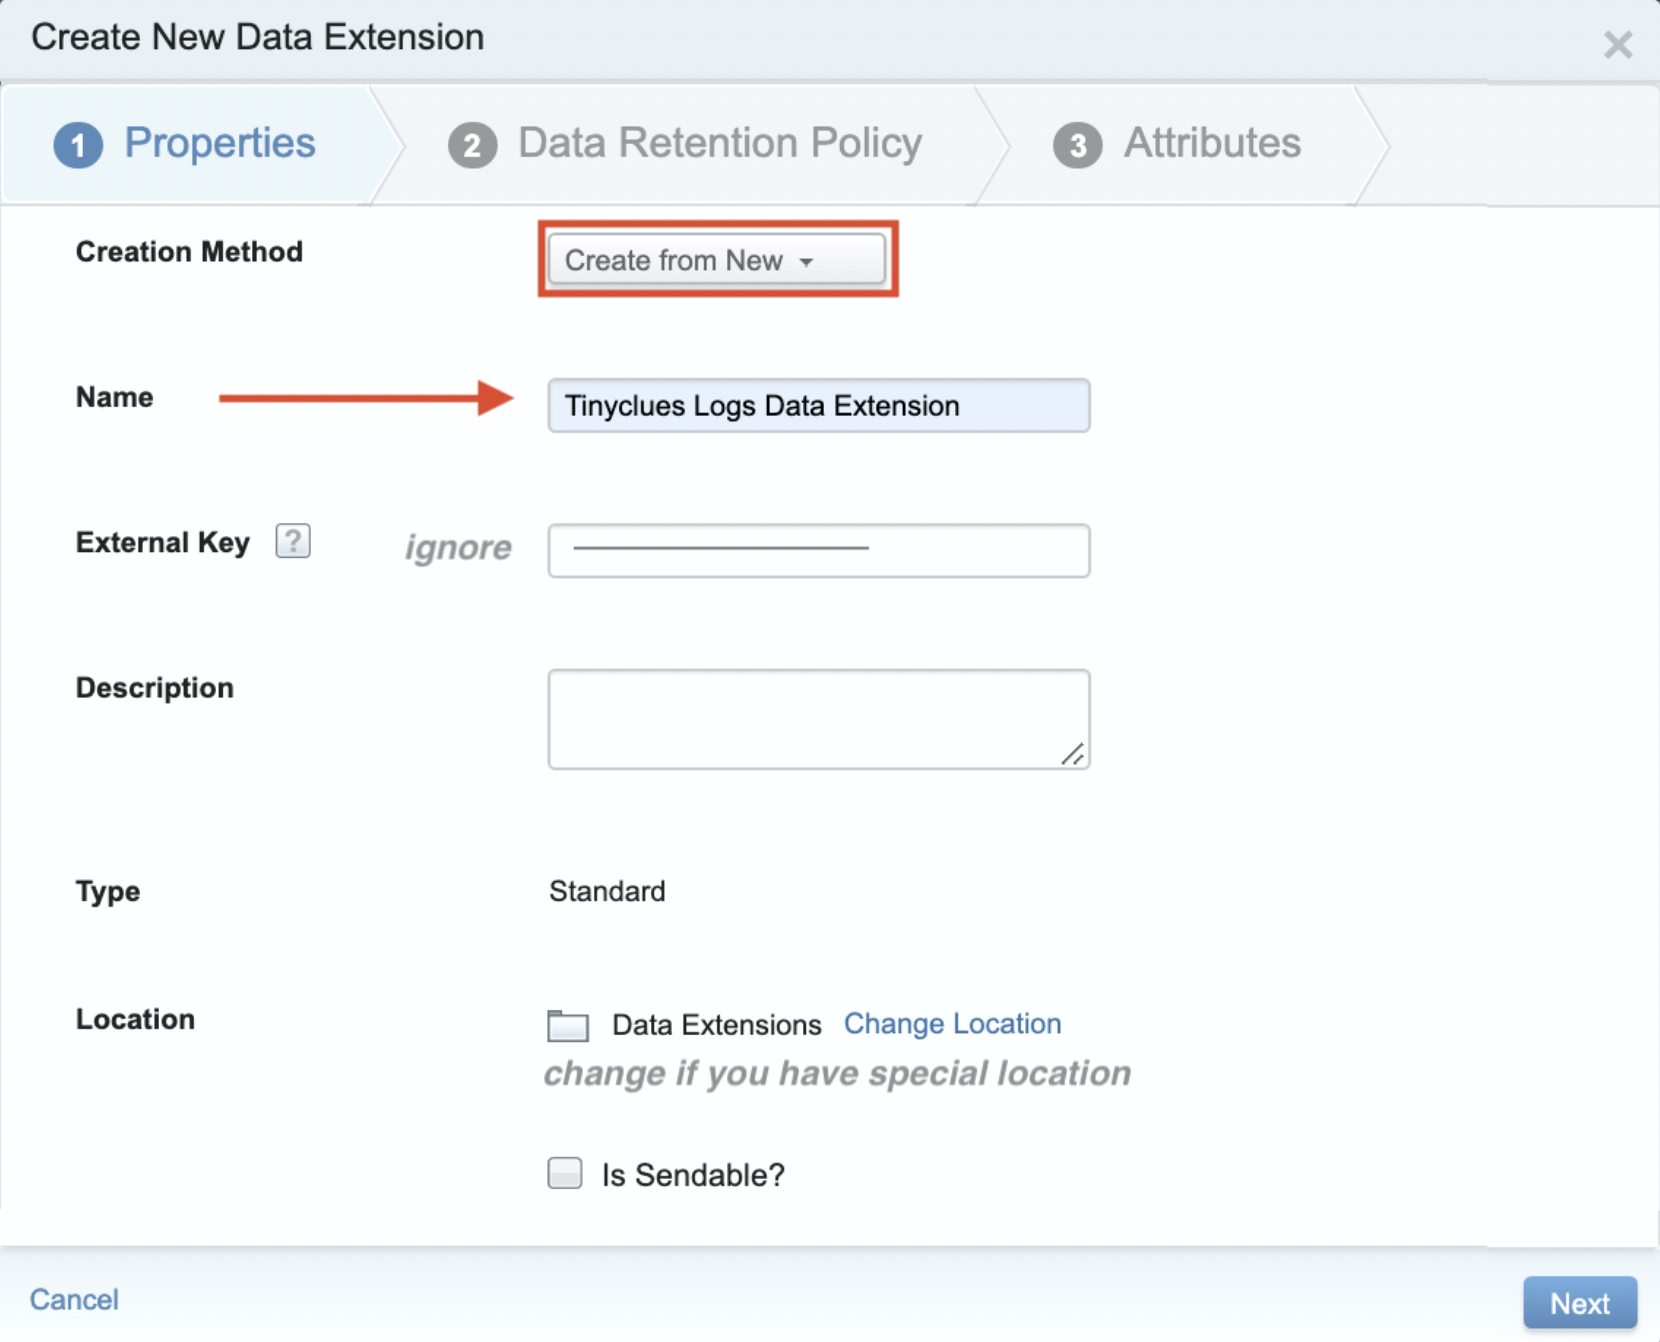
- Fill out the Data Extension as follows and click Next.
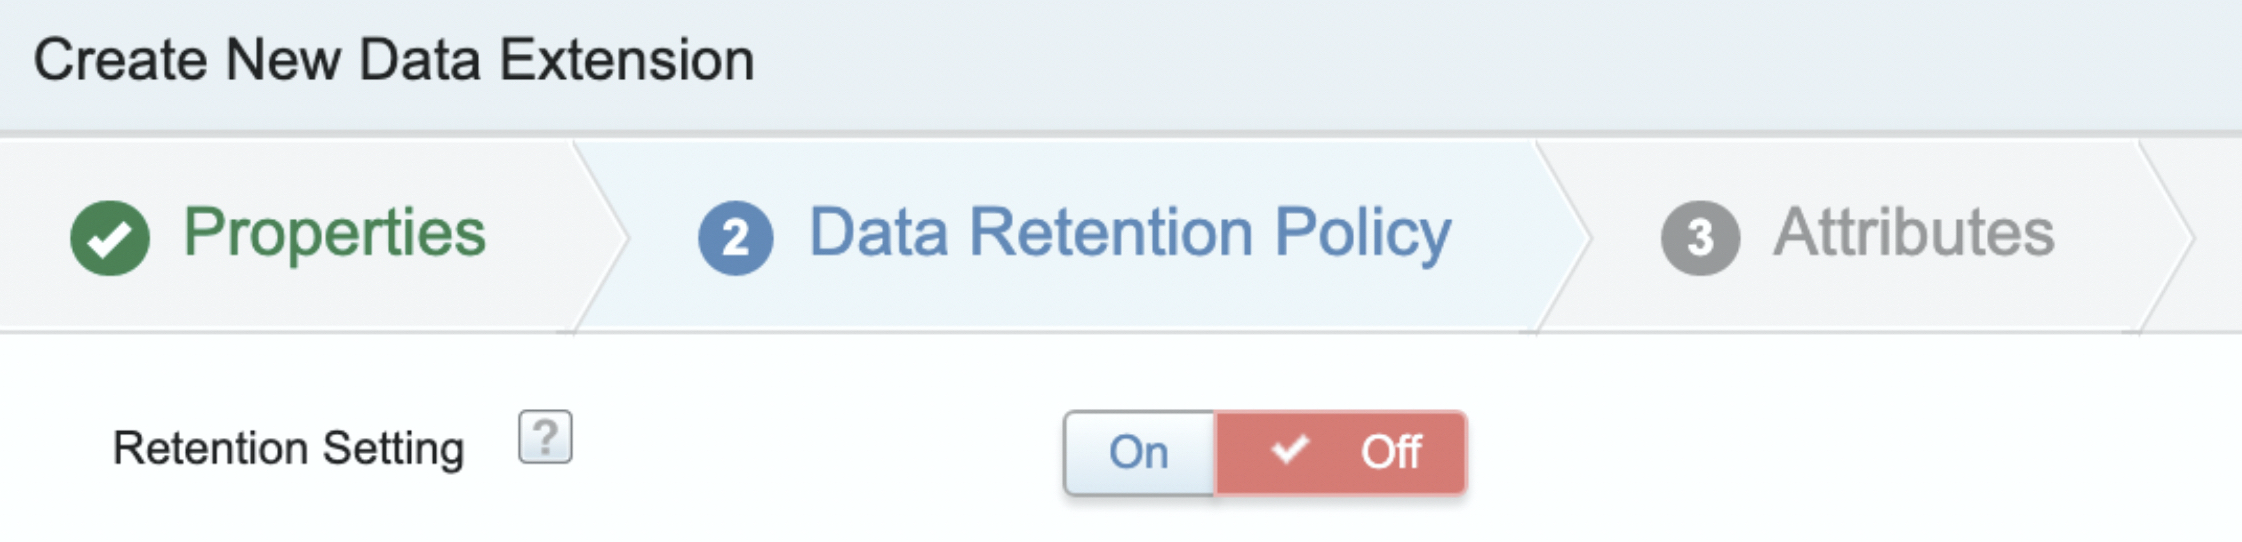
- Toggle Off for the Retention Setting (Splio manages this on its own).
- Fill out the form with the following fields and click Complete.
- SubscriberKey
- EmailName
- EmailSendDefinition
- ListID
- SentDate
- OpenDate
- ClickDate
- BounceDate
- BounceCategory
- UnsubscribeDate
Your Data Extension has now been completed.
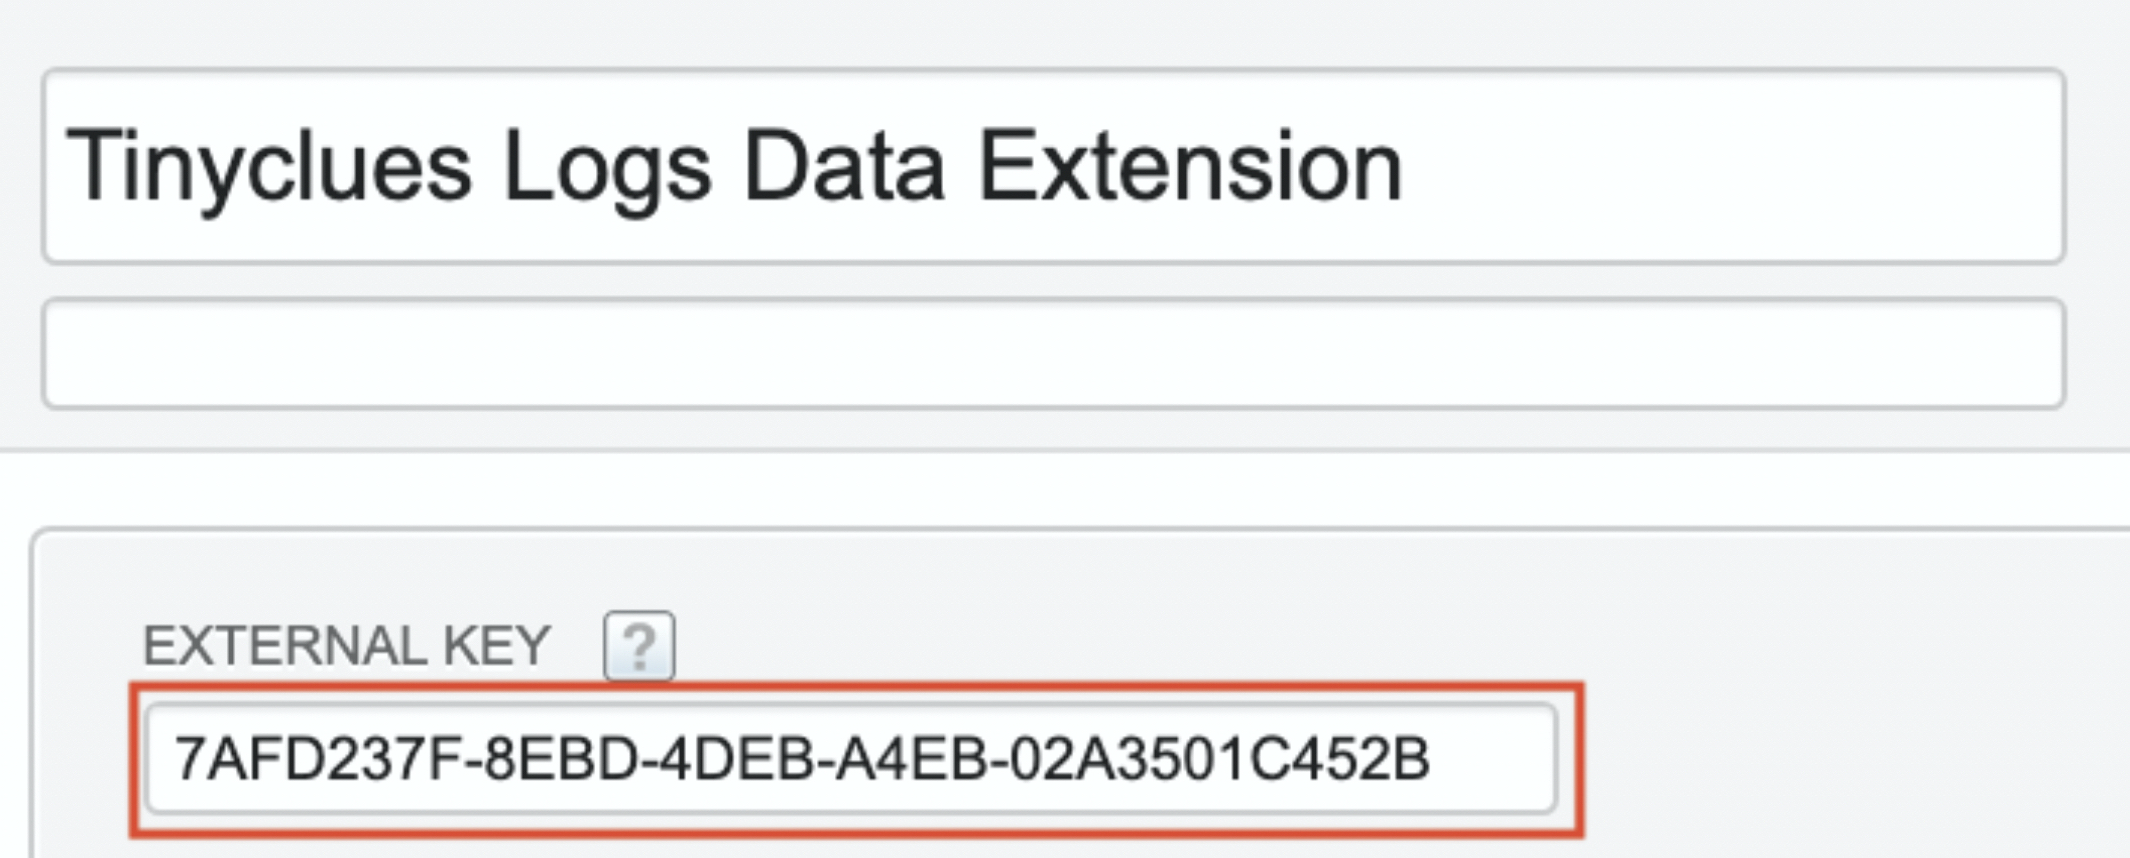
- Click the Data Extension you just created.

- Copy the External Key. You will need it in Part B to set up Automation.
Configure authentication key & file location
Your Salesforce Marketing Cloud account must be able to access Splio's SFTP to push files containing email logs.
Step 1: Create an Access Key
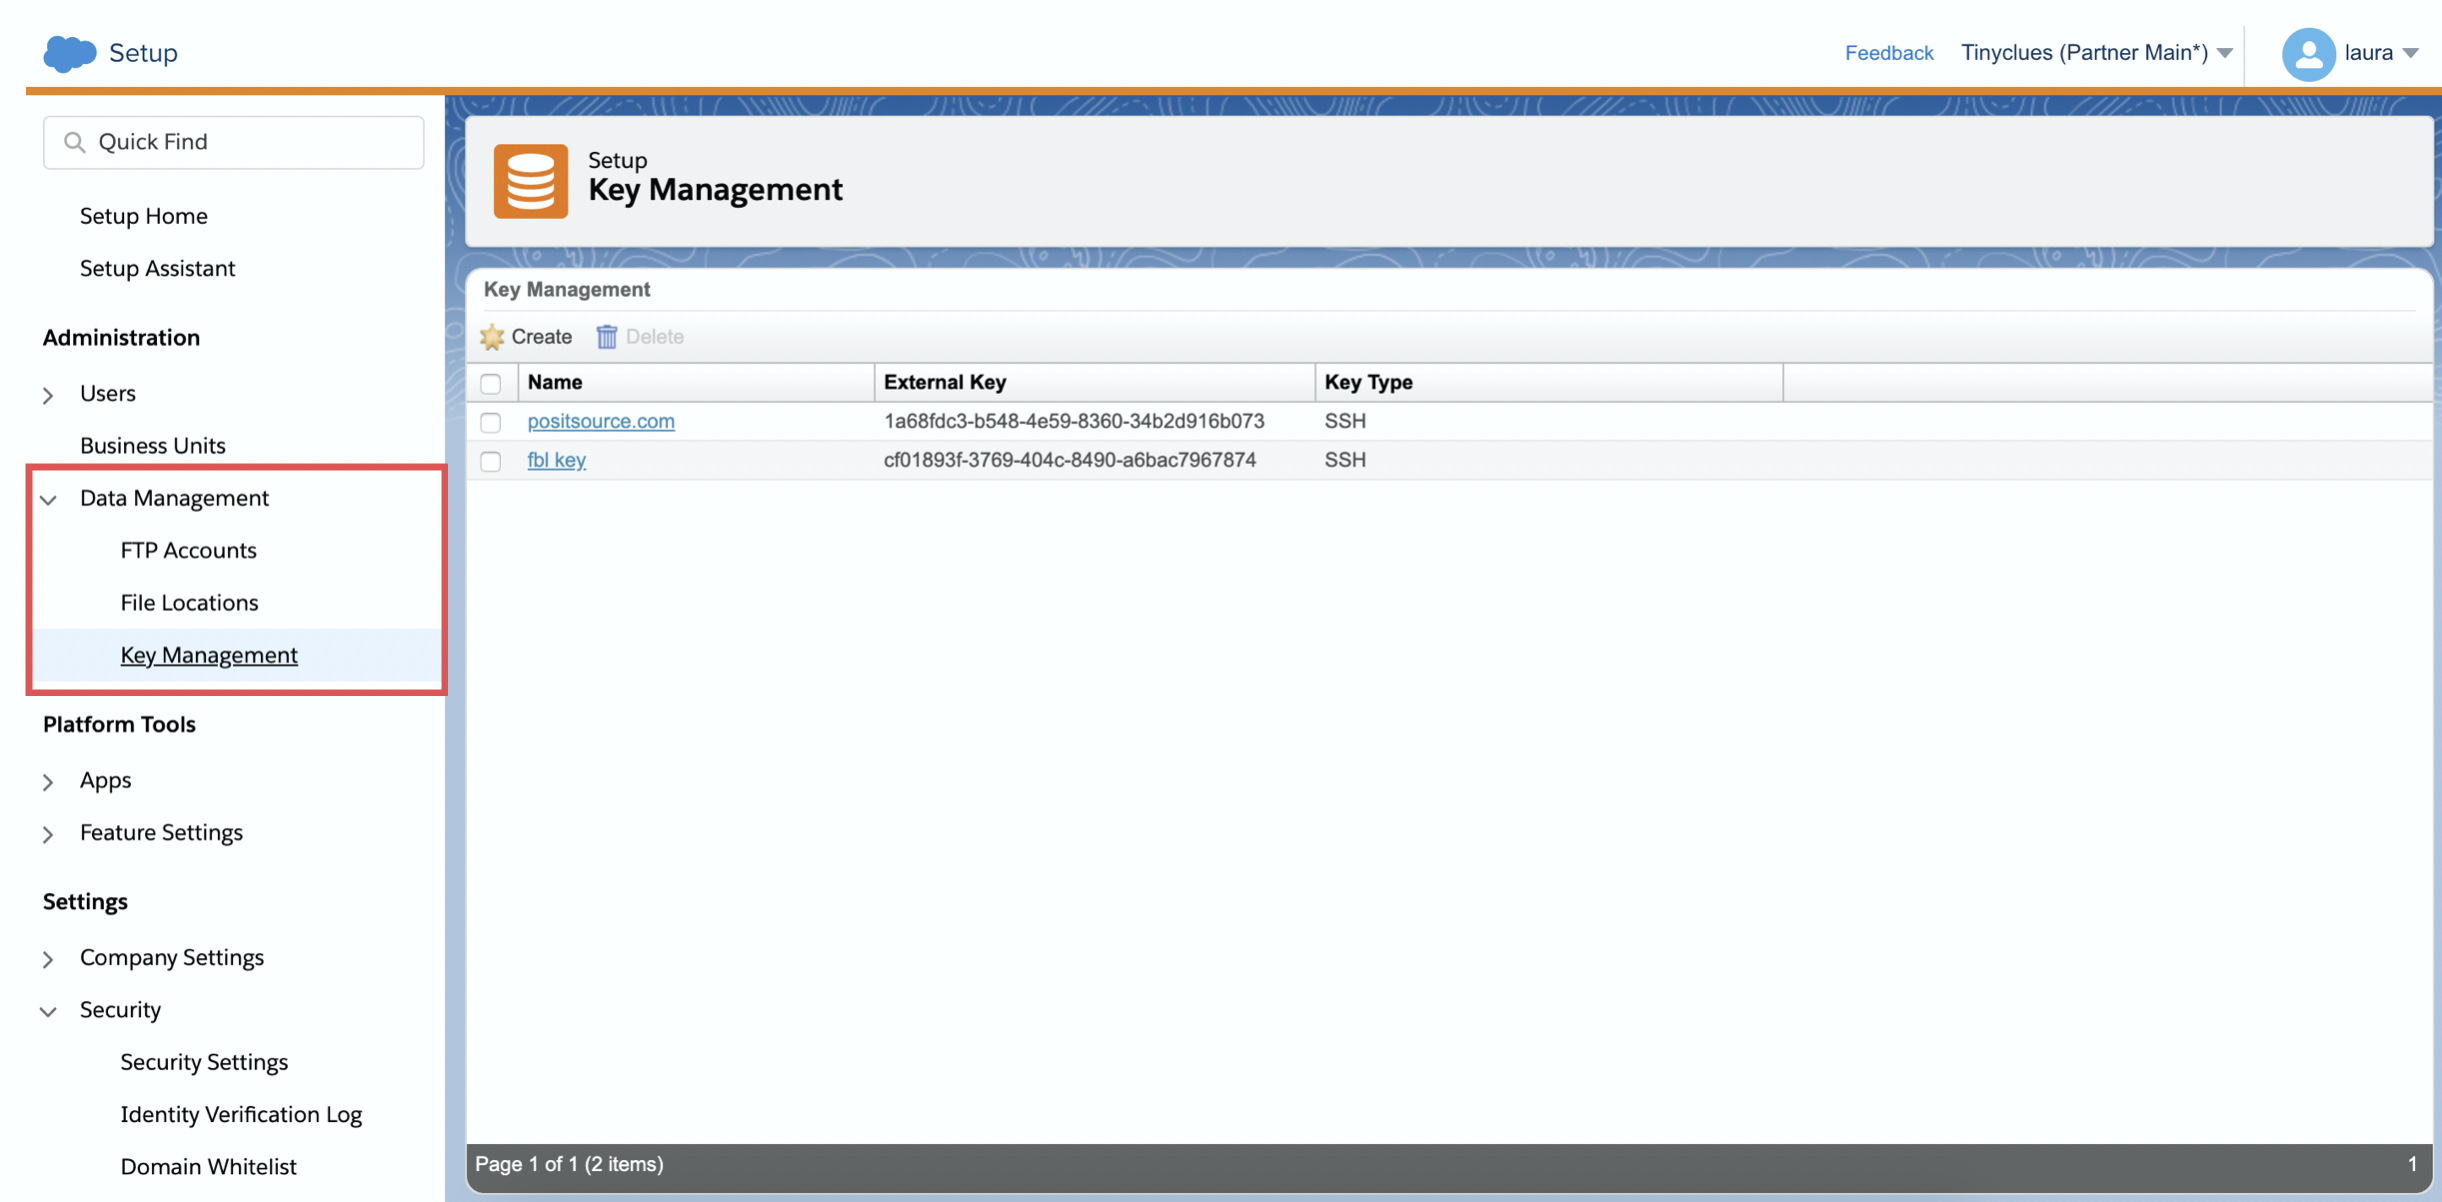
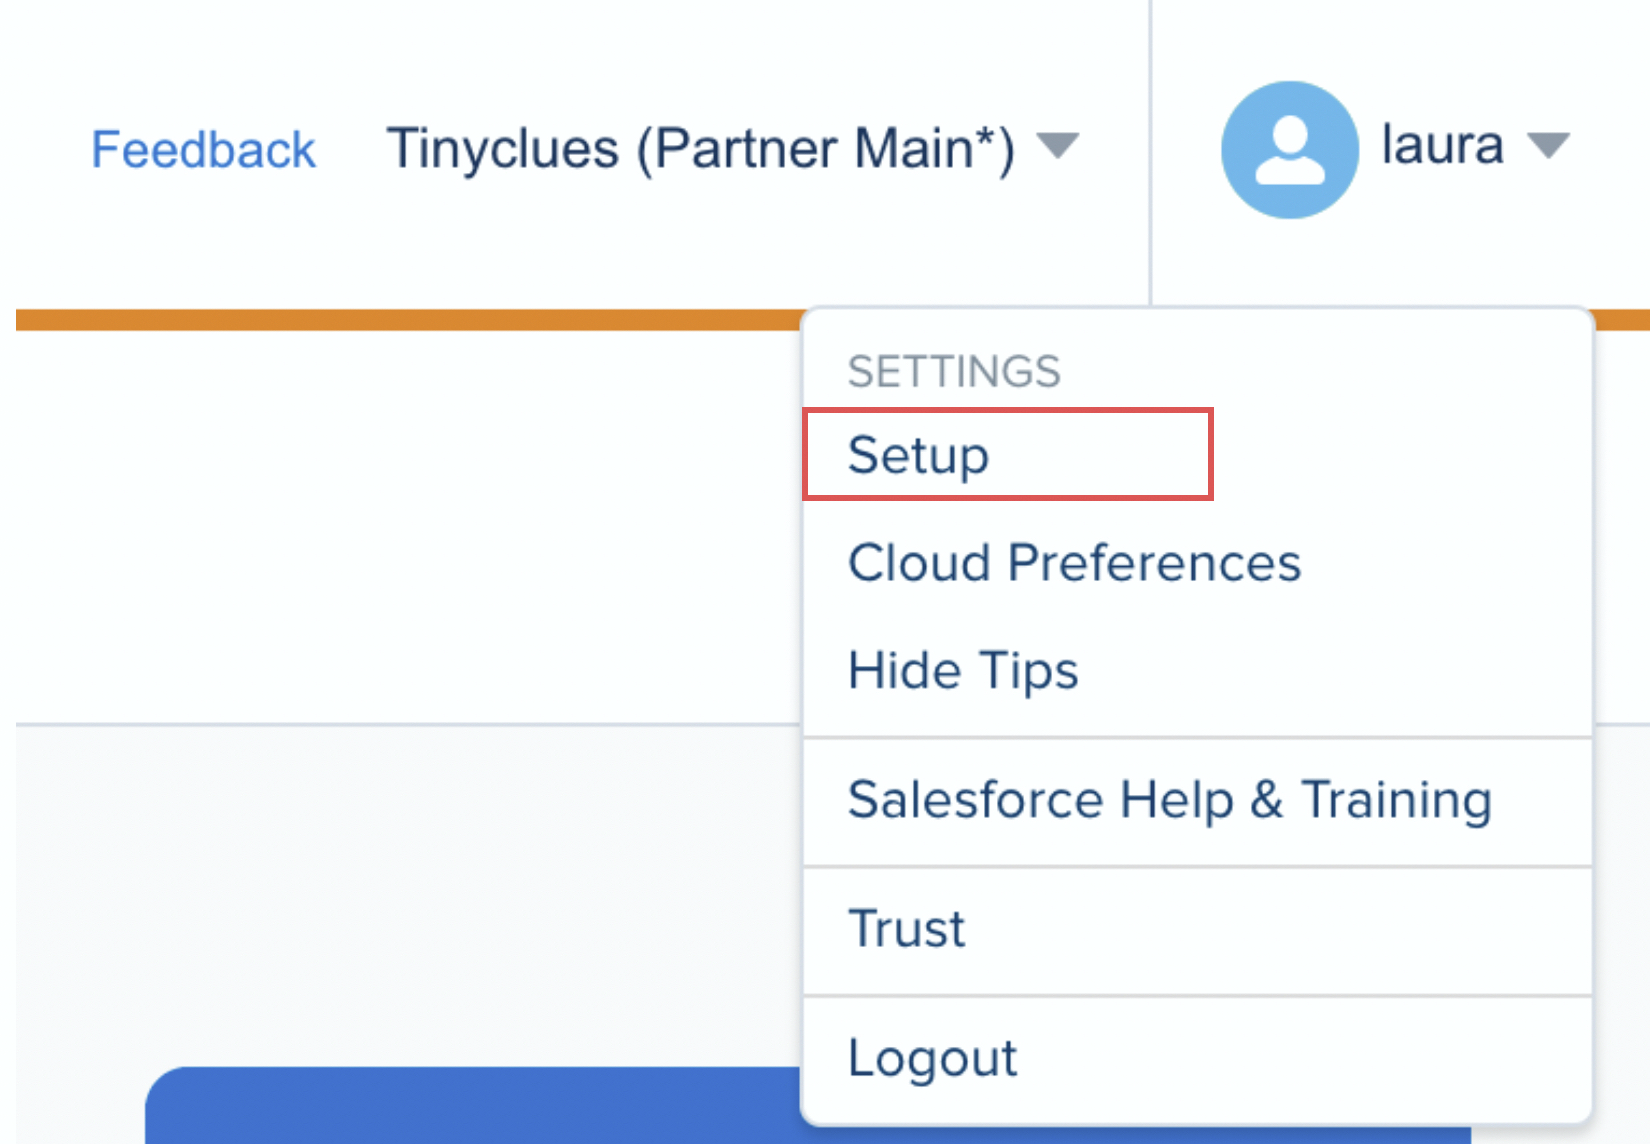
- Go to Settings → Setup → Data Management → Key Management.
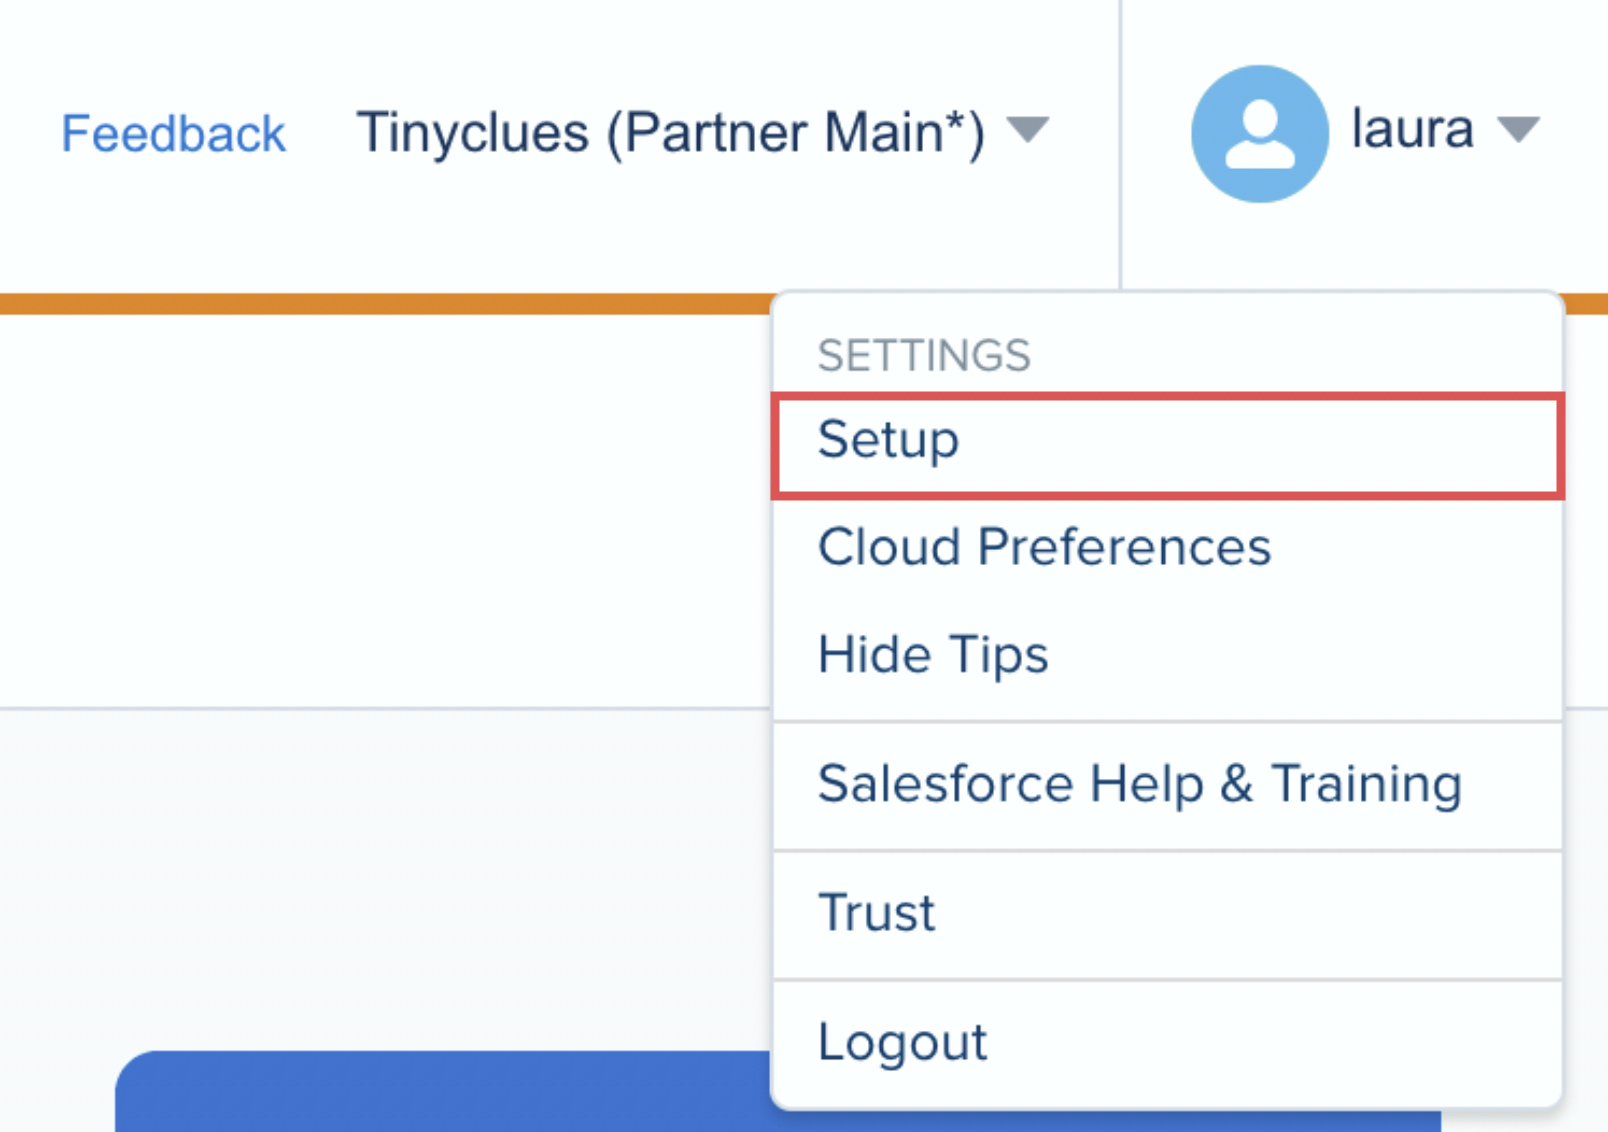
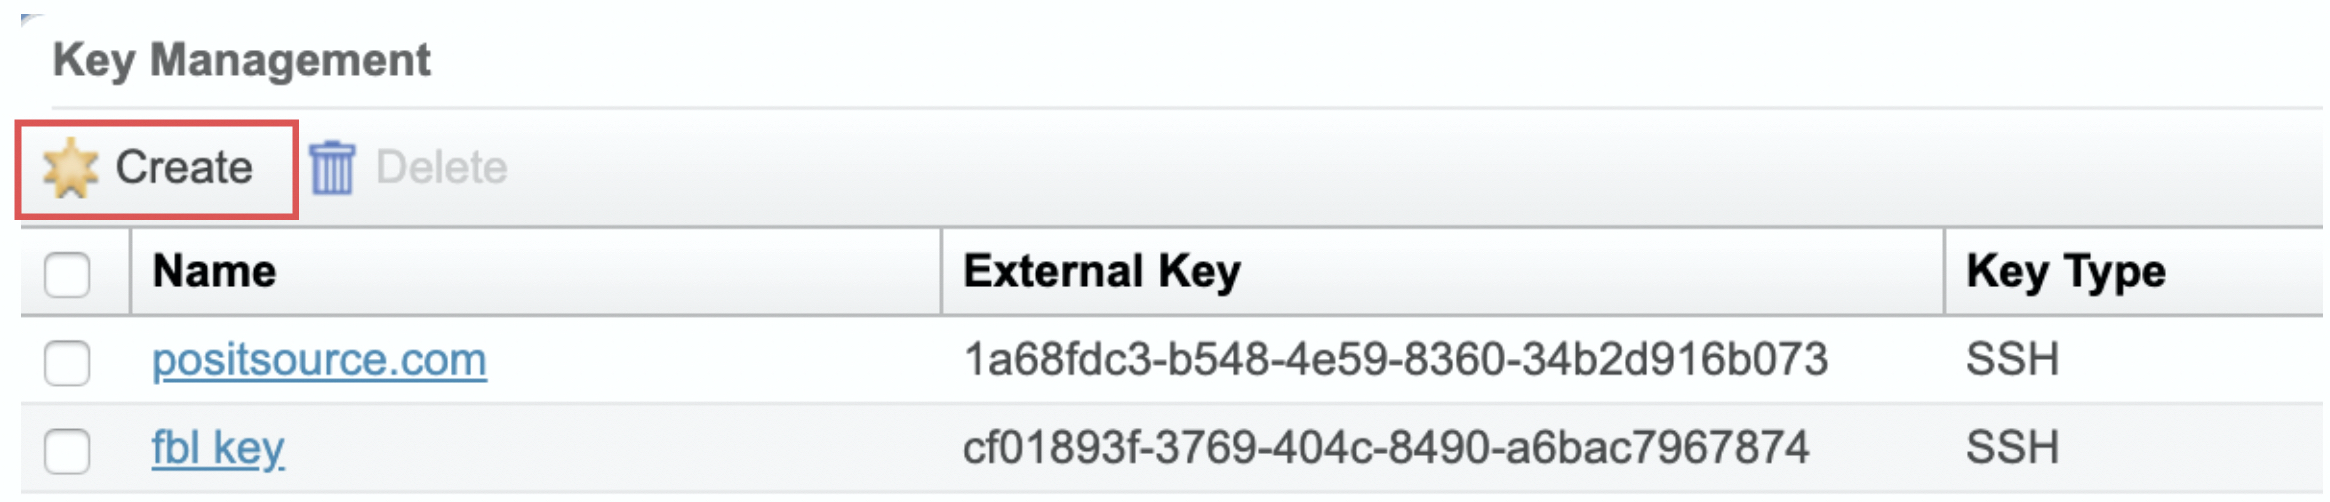
- Click Key Management on the left side and then click on the Create button.
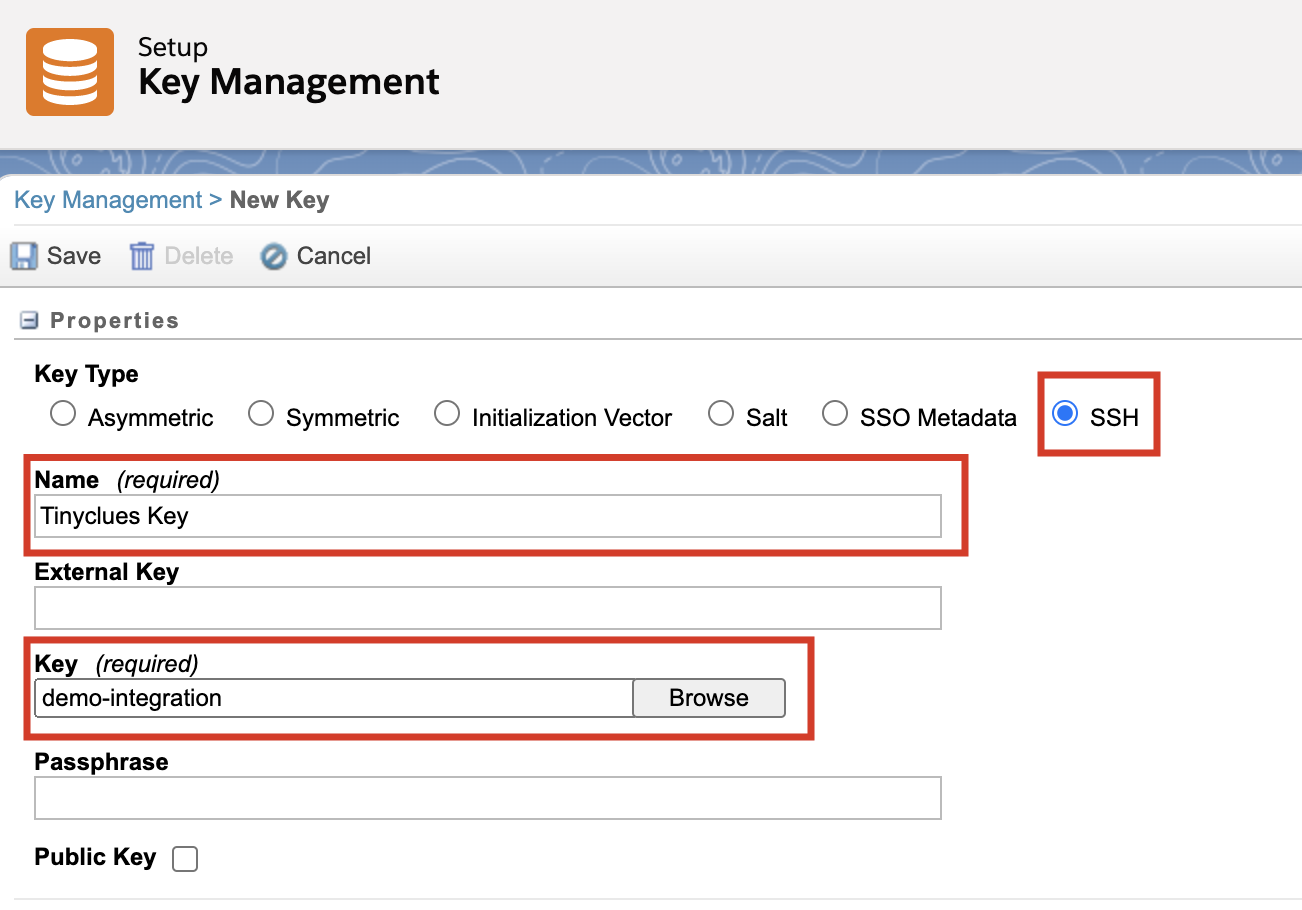
- Fill out the form and click Save.
- Key Type: SSH
- Name: Tinyclues Key
- Key: Your Private key generated with the help of your Data Ops representative
Note: Please do not tick the “Public Key” checkbox.
Please note: if your key is not in SSH format (for ex: a .txt or .ppk file), you can convert it into SSH.
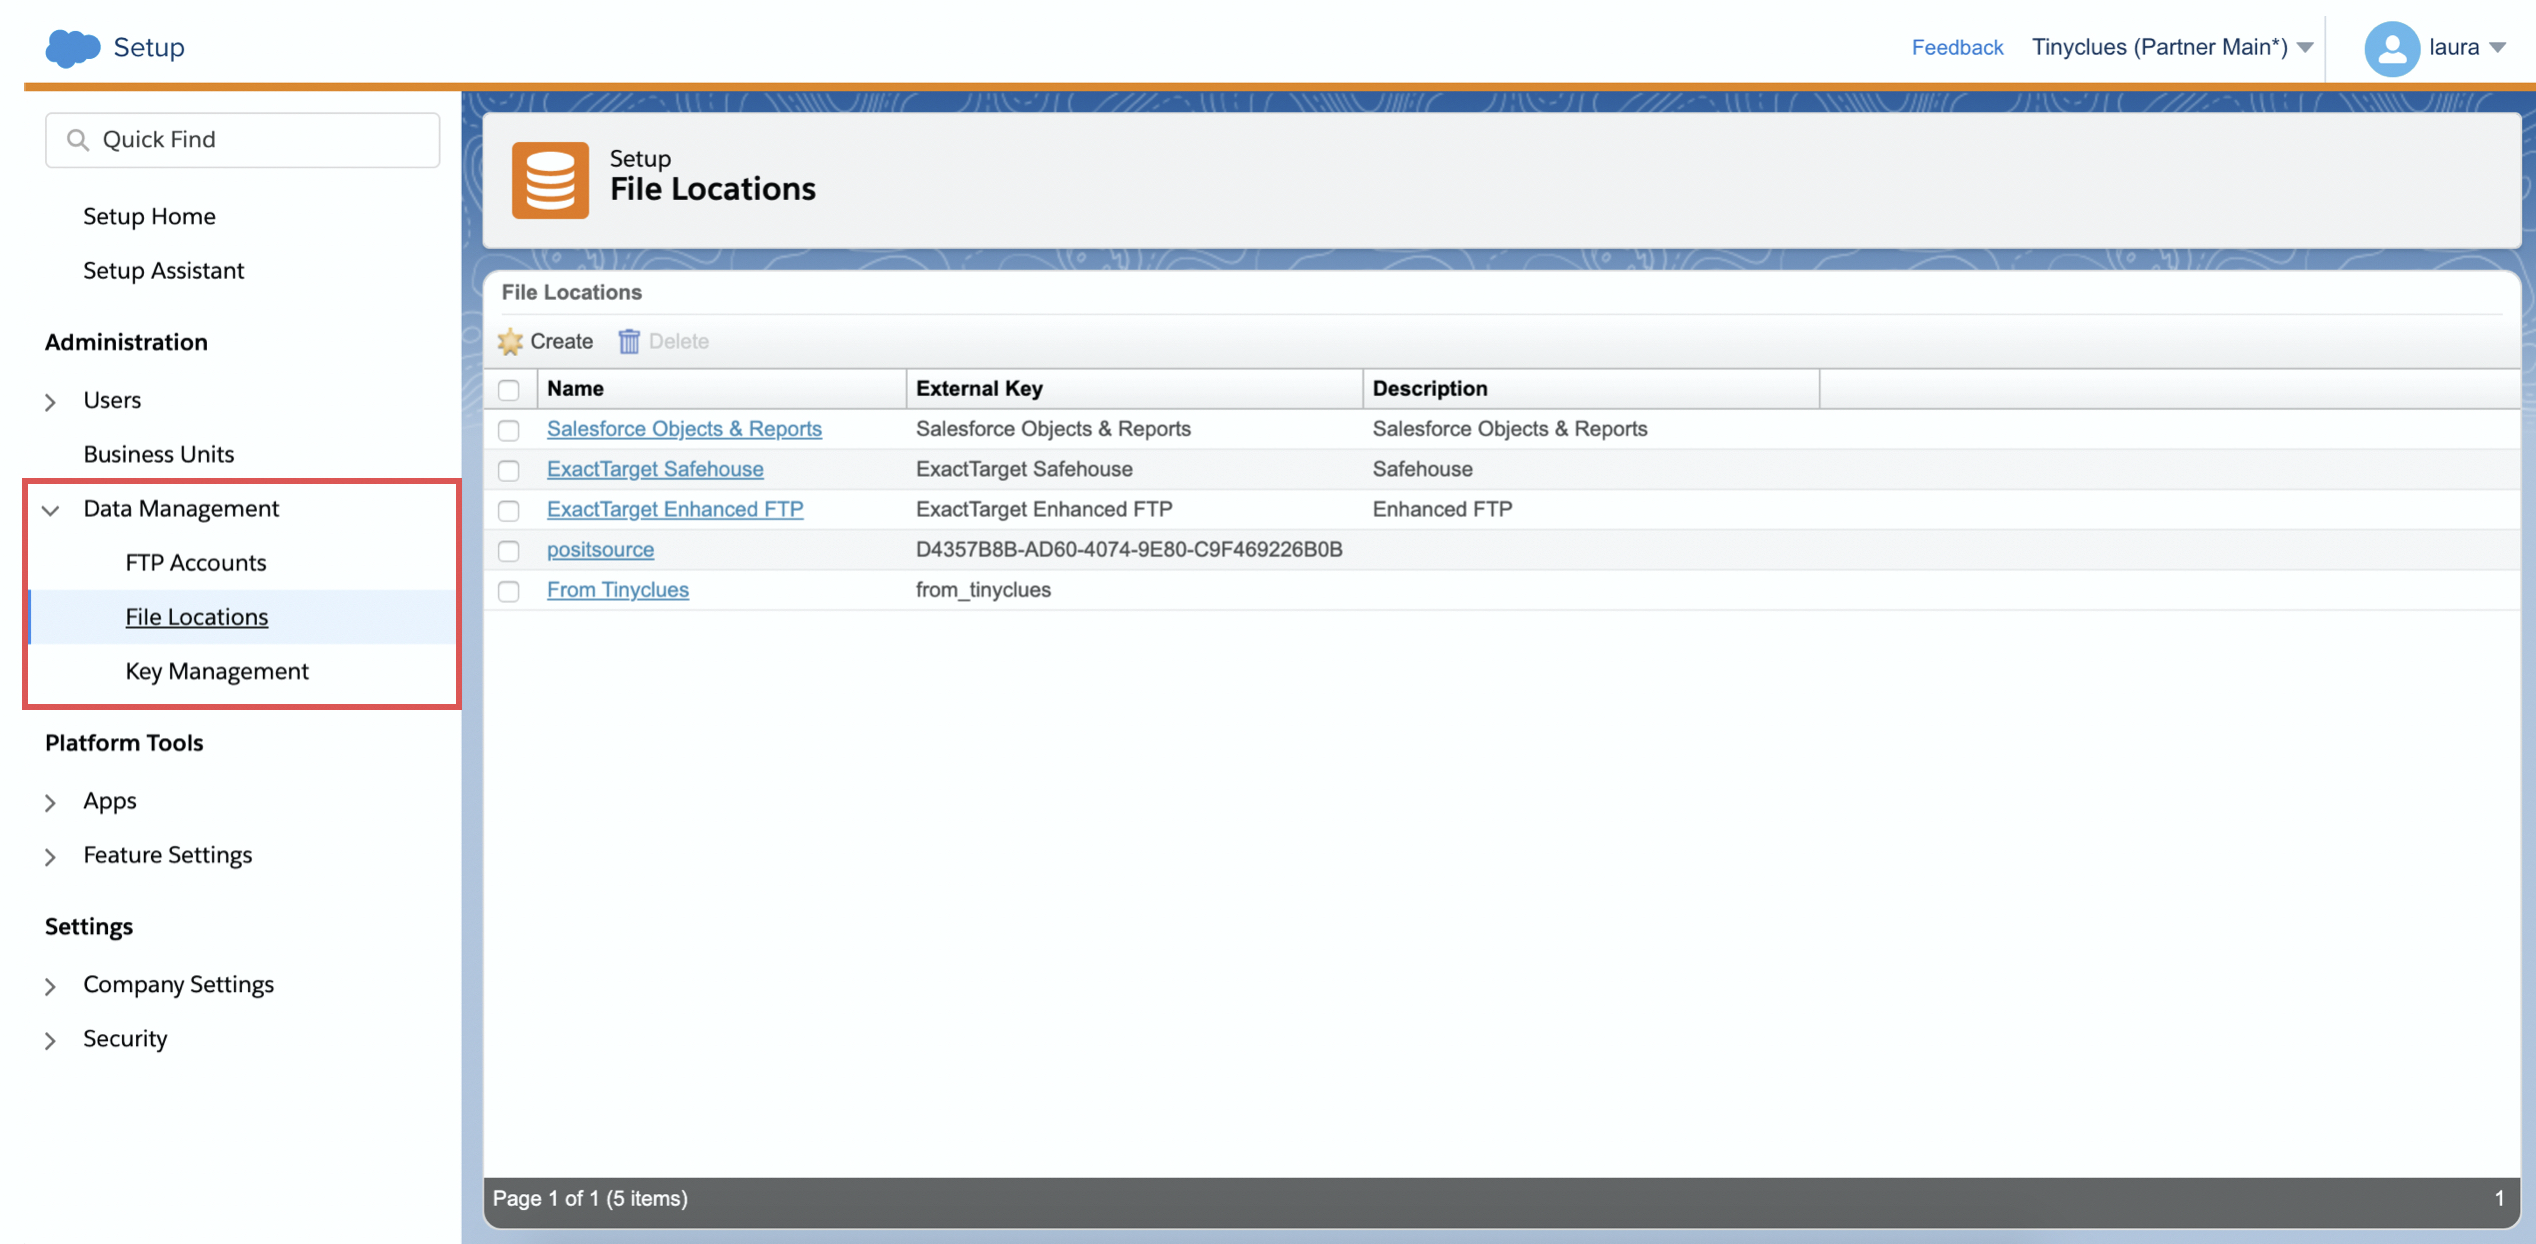
Step 2: Configure File Location
- Go to Settings → Setup → App → File Location
- Click File Location on the left side and then click on the Create button.
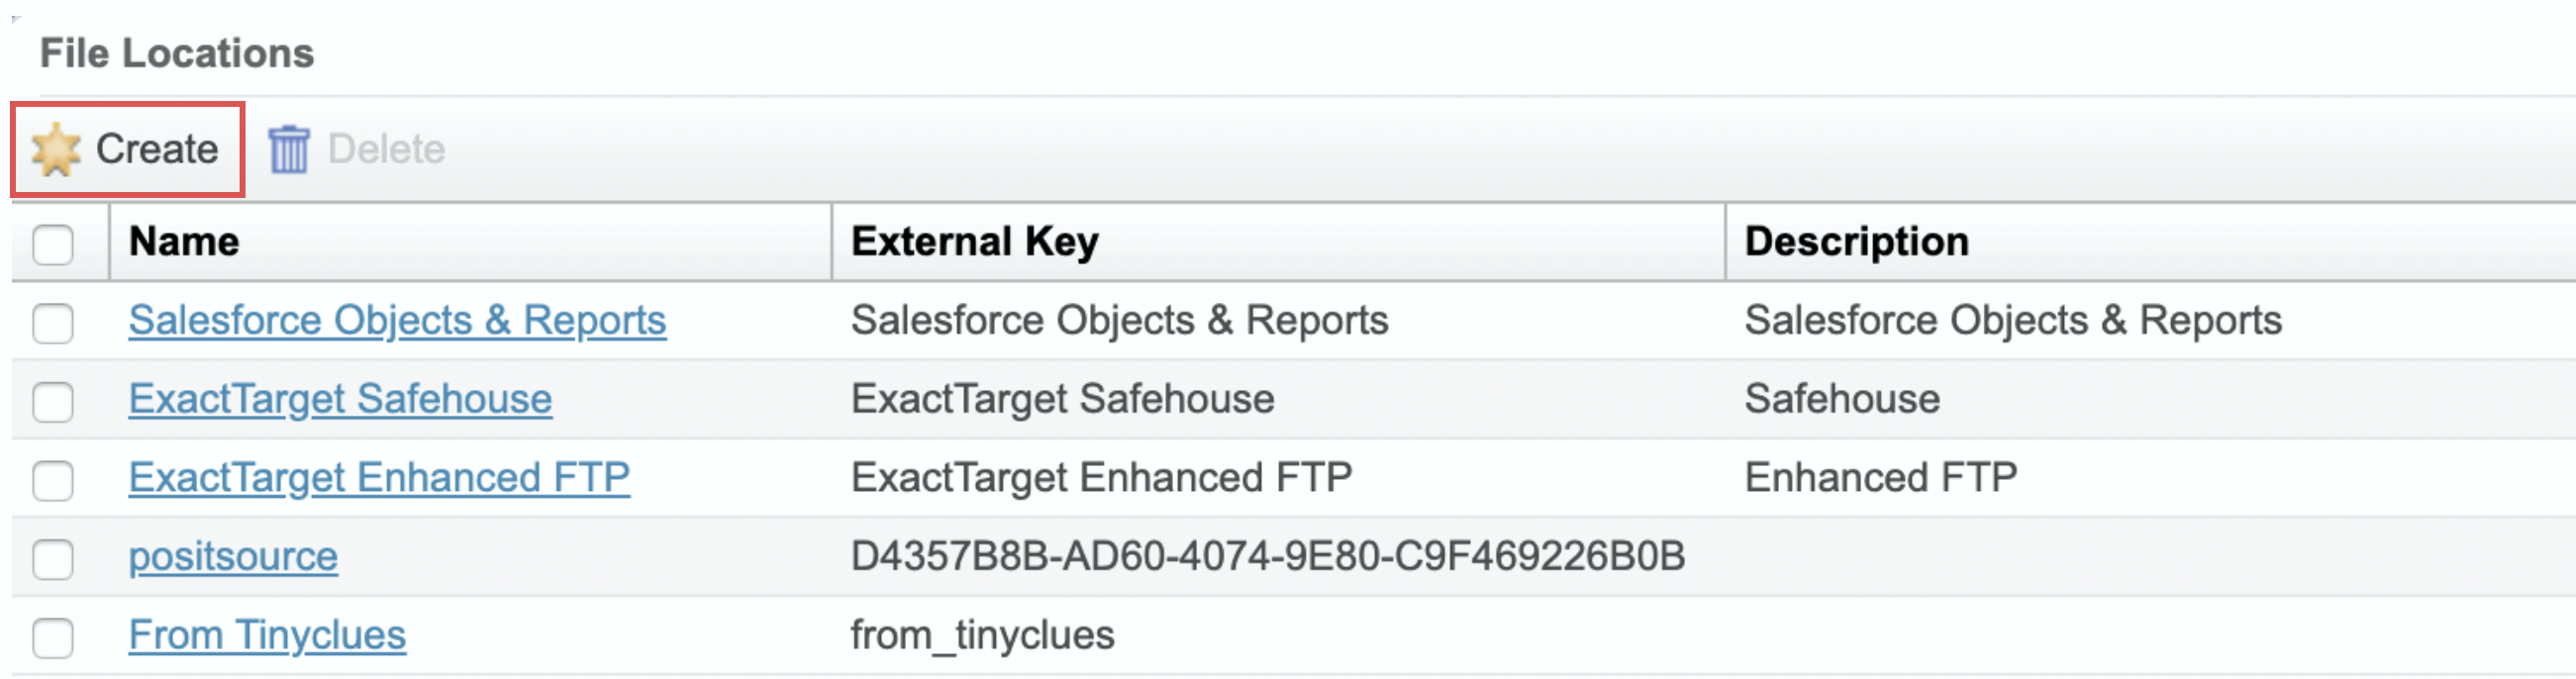
- Fill out the form and click Save.
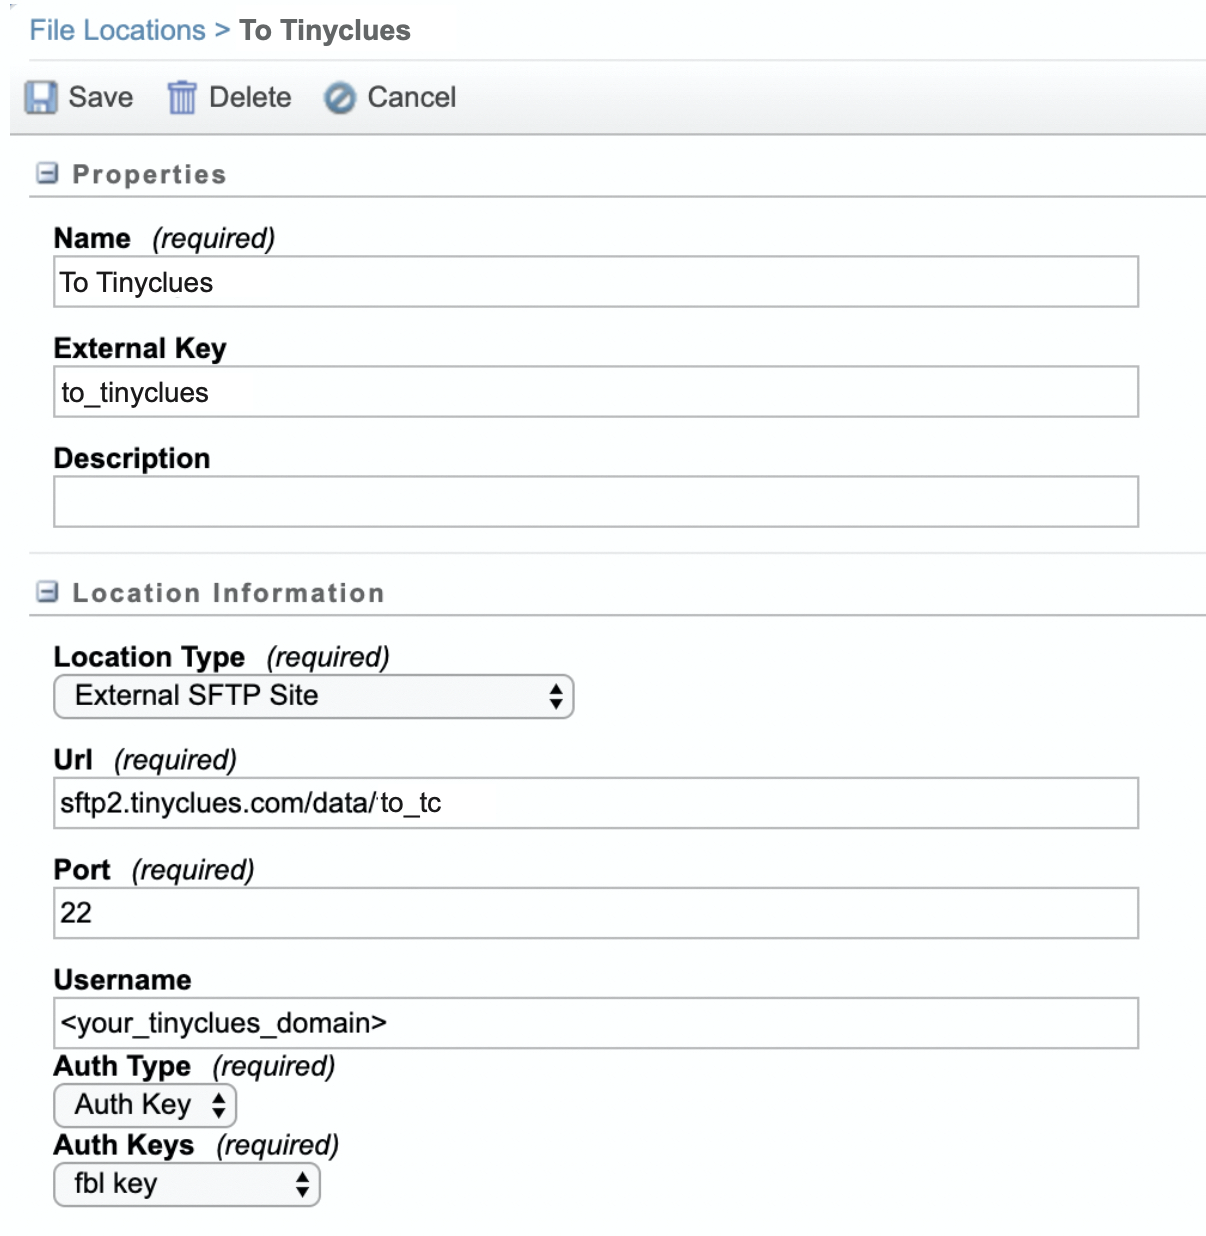
- Name: To Tinyclues
- External Key: to_tinyclues
- Location Type: External SFTP Site
- URL: sftp2.tinyclues.com/data/to_tc
- Port: 22
- Username: Your Splio domain name as provided by your Data Ops representative
- Auth Type: Auth Key
- Auth Keys: Select the one configured in Part A.
Setting up the automation pipelines for daily updates
At this stage, you need to create the automation job that will automatically push data to the Data Extension created earlier and send this data to Splio using the File Location created afterward for all historical data and daily updates.
Automation pipeline for daily updates
Step 1: Initiate automation
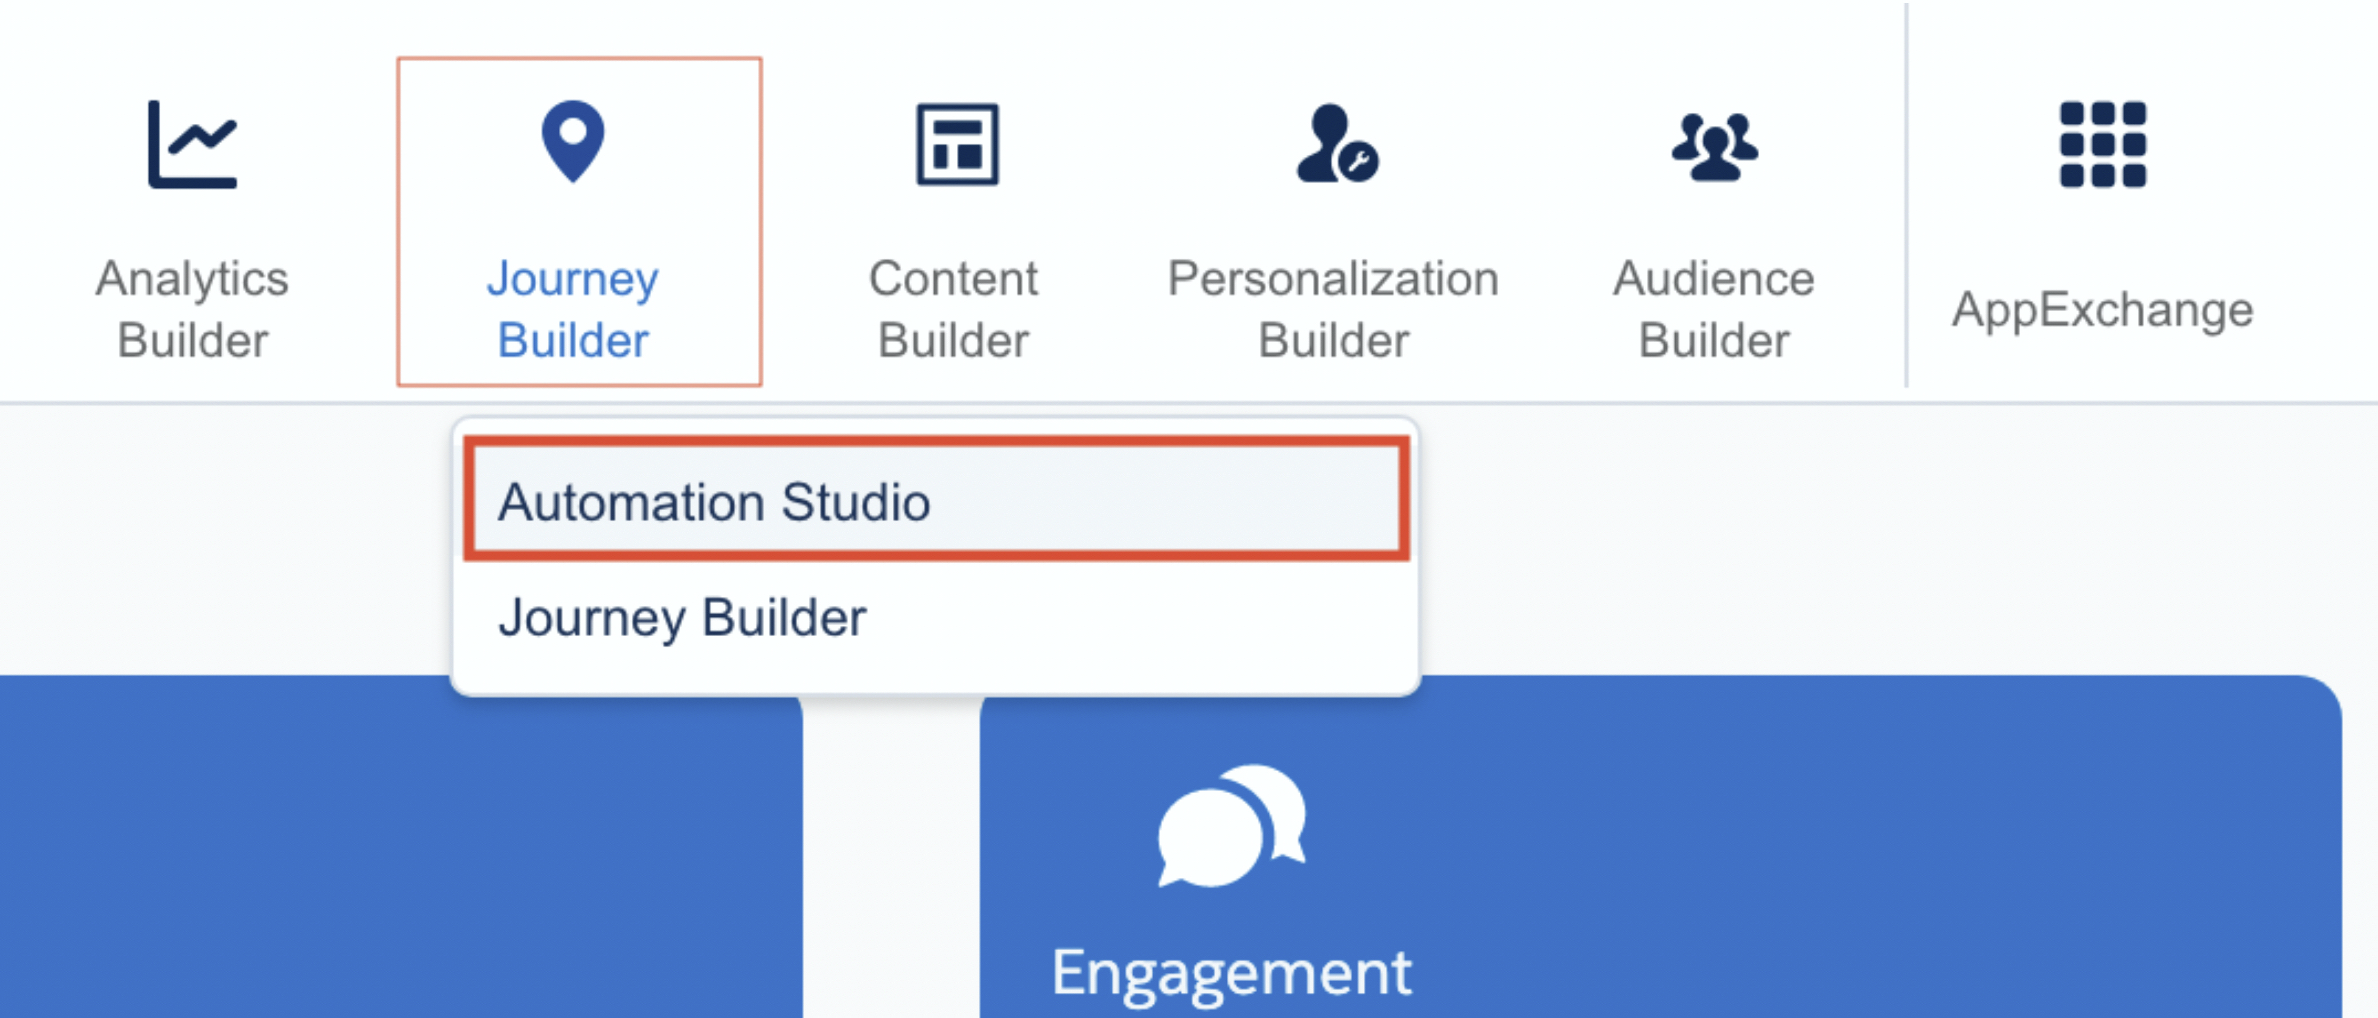
- From the Home page, go to Journey Builder > Automation Studio
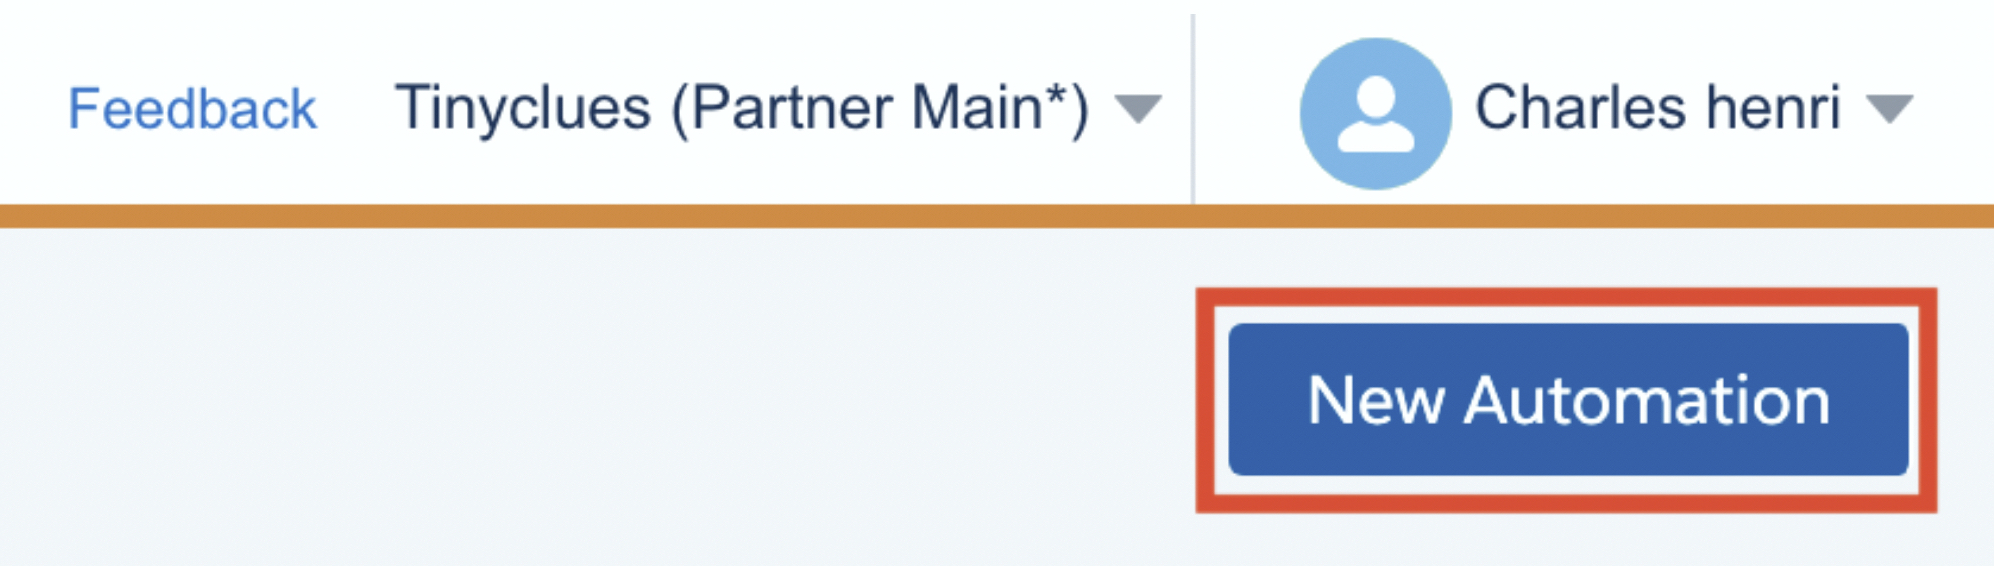
- Click New Automation

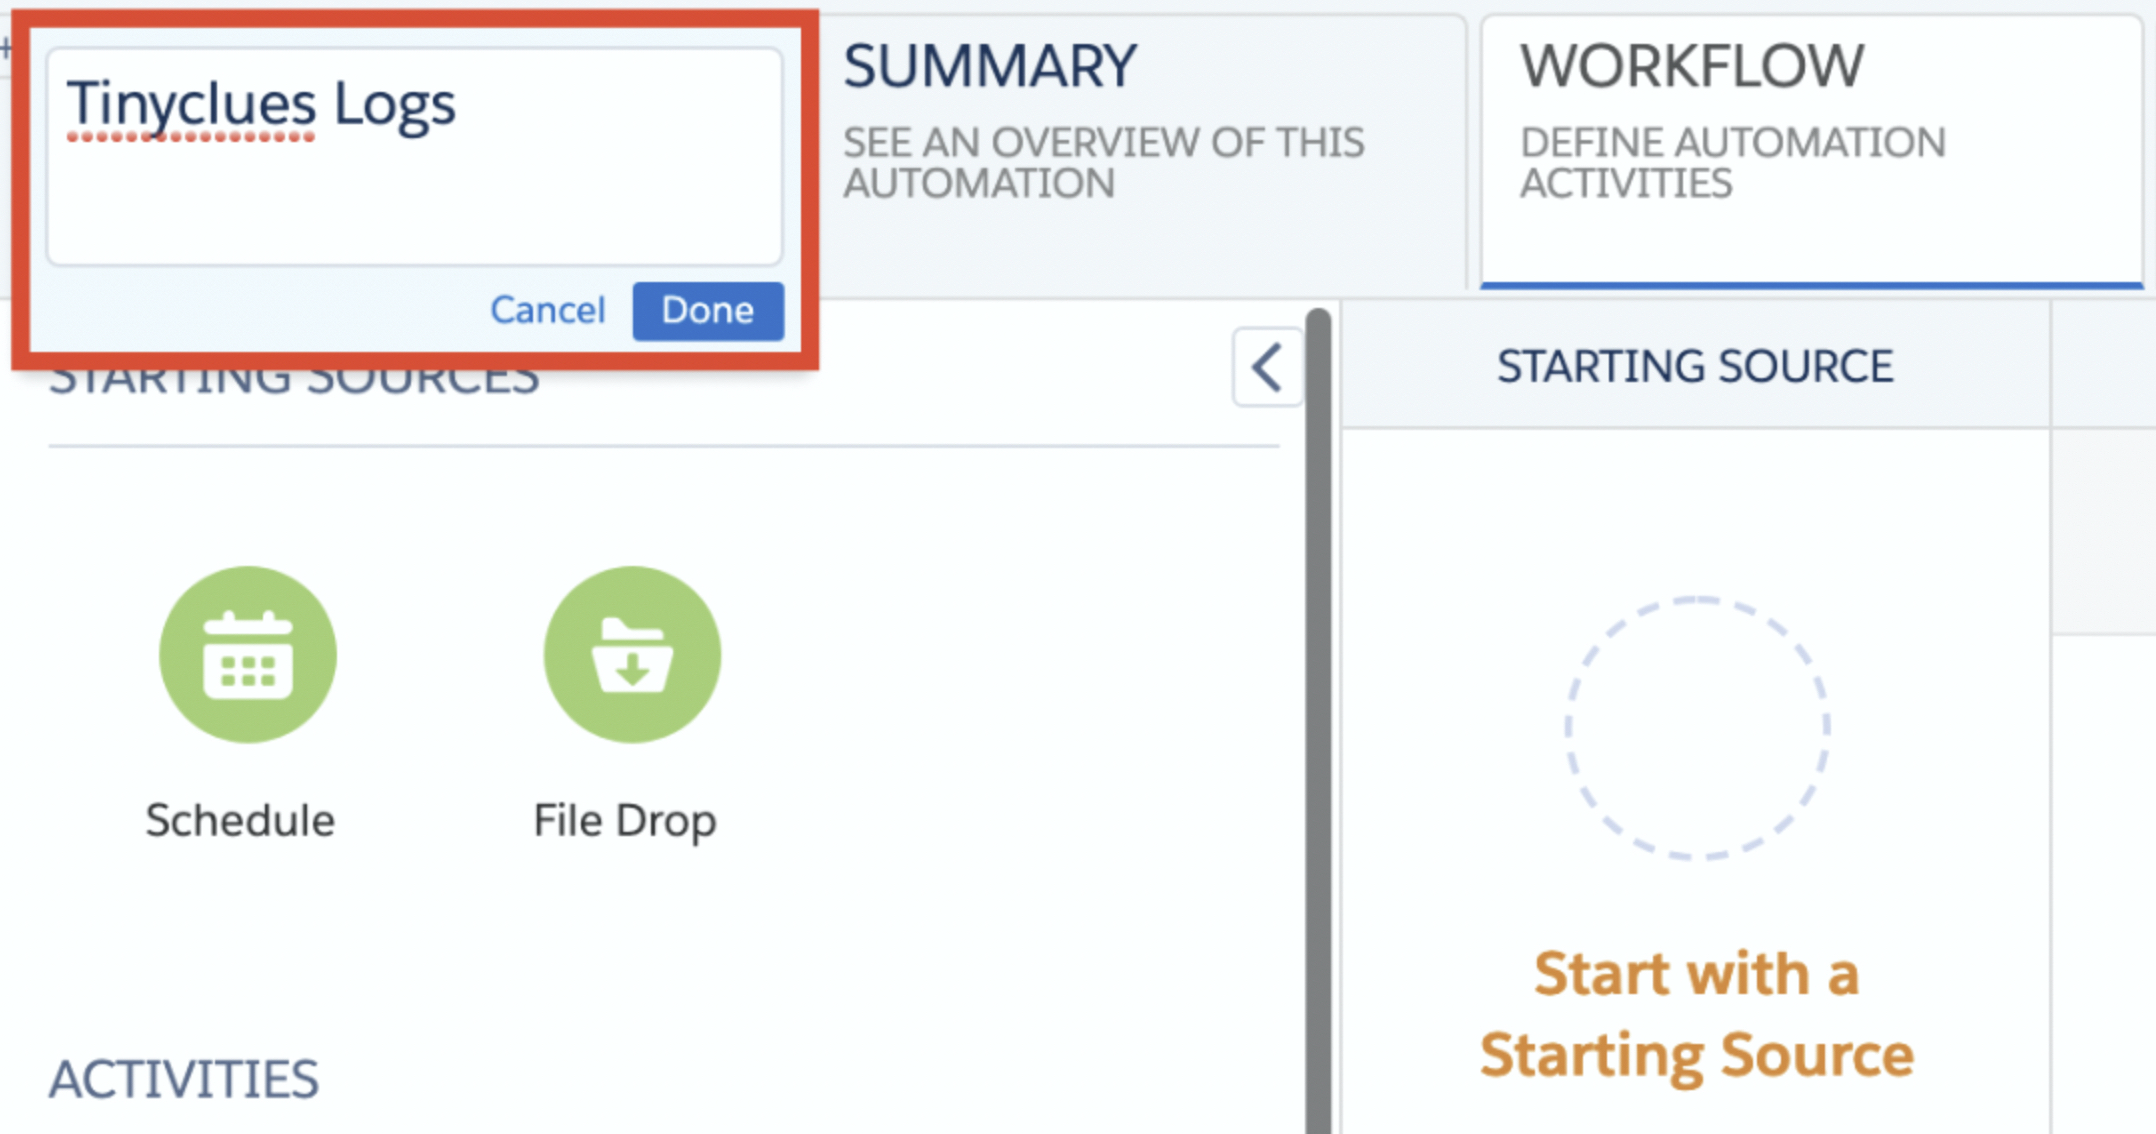
- Name this Automation. For example, "Splio Logs."

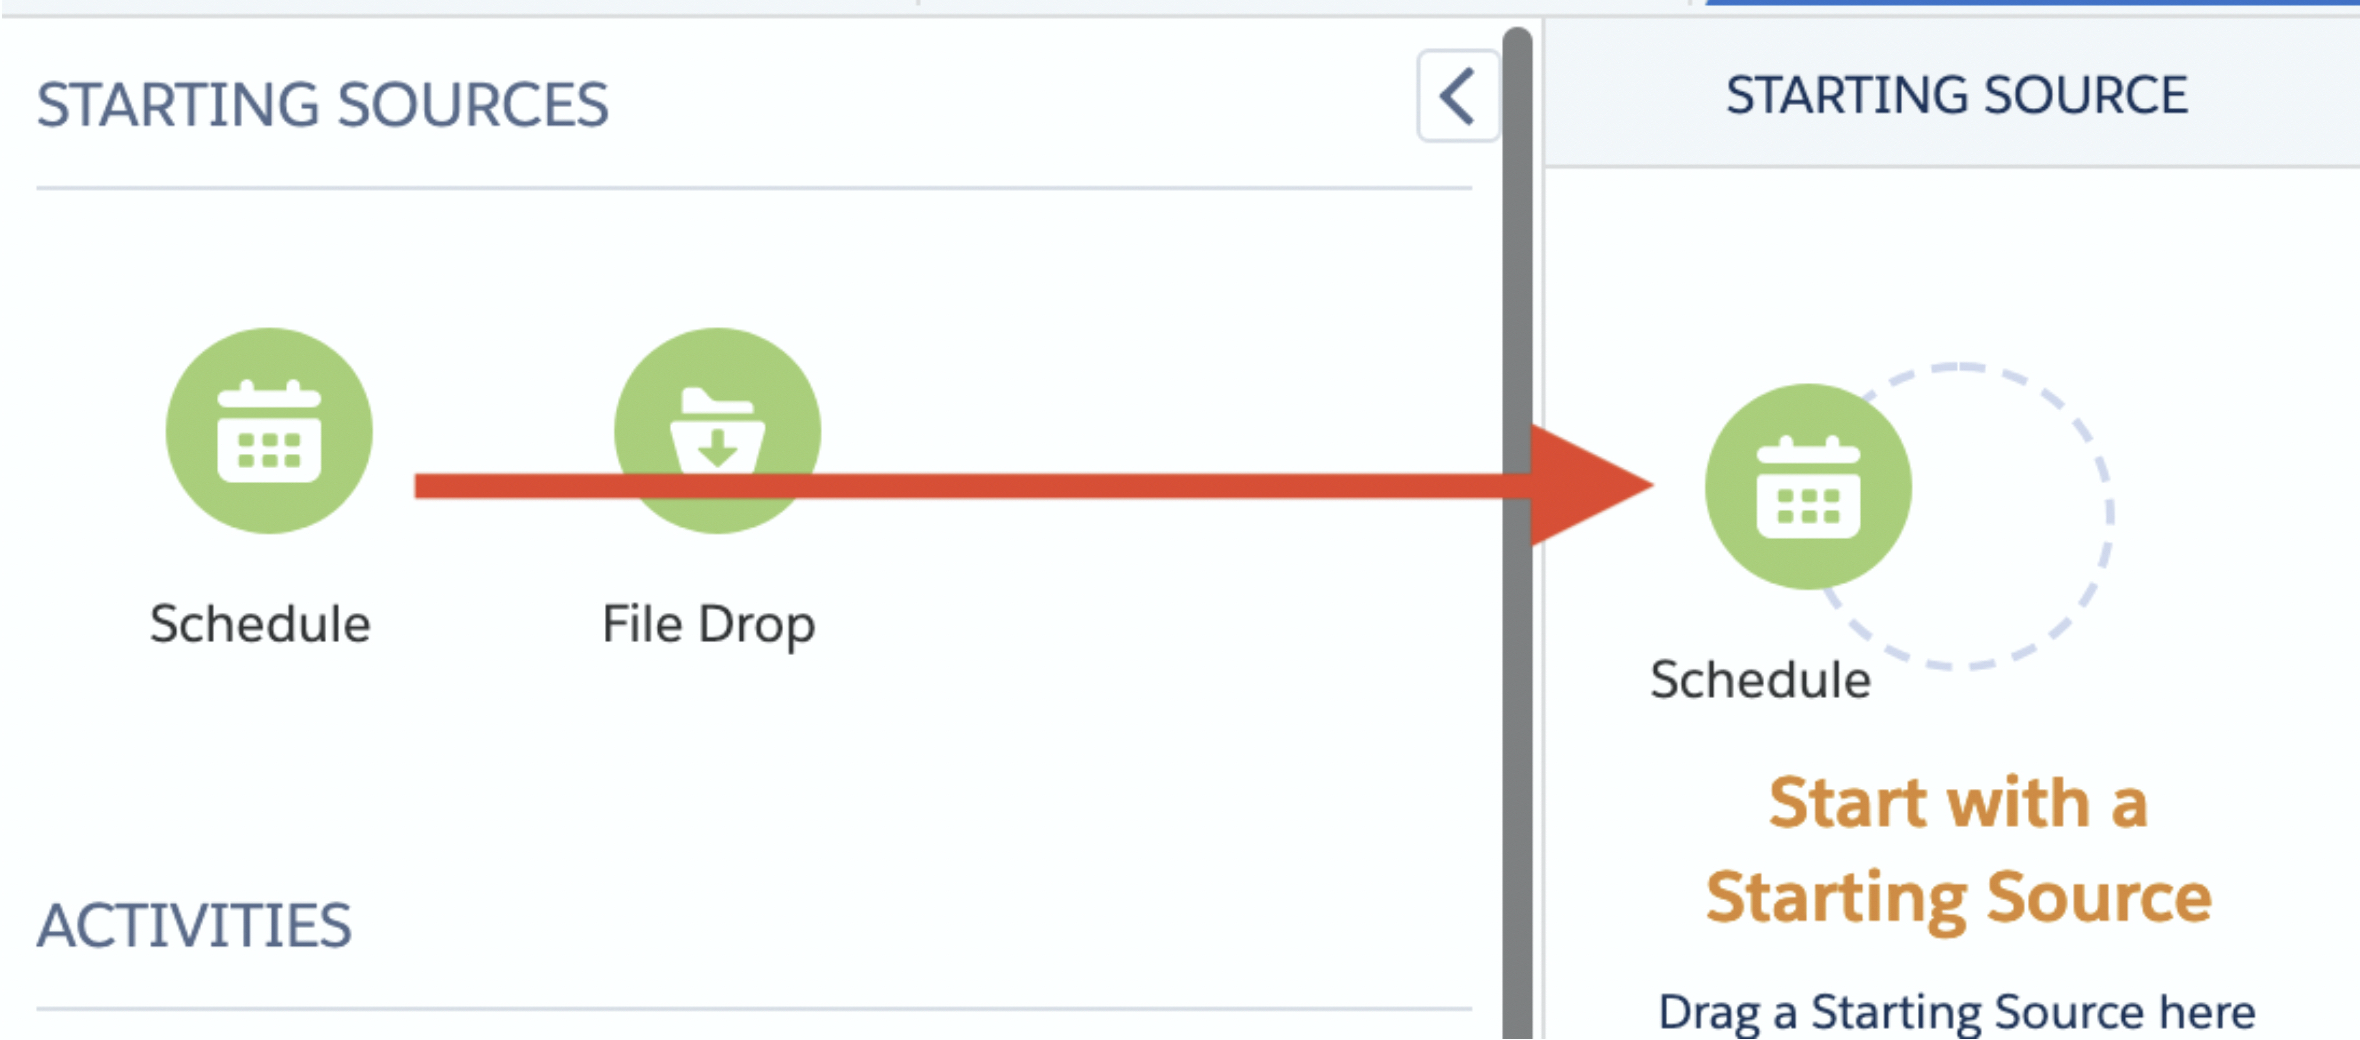
- Drag and drop the Schedule icon into the Starting Source.
- Click Configure.
- Define the Schedule Settings as follows:
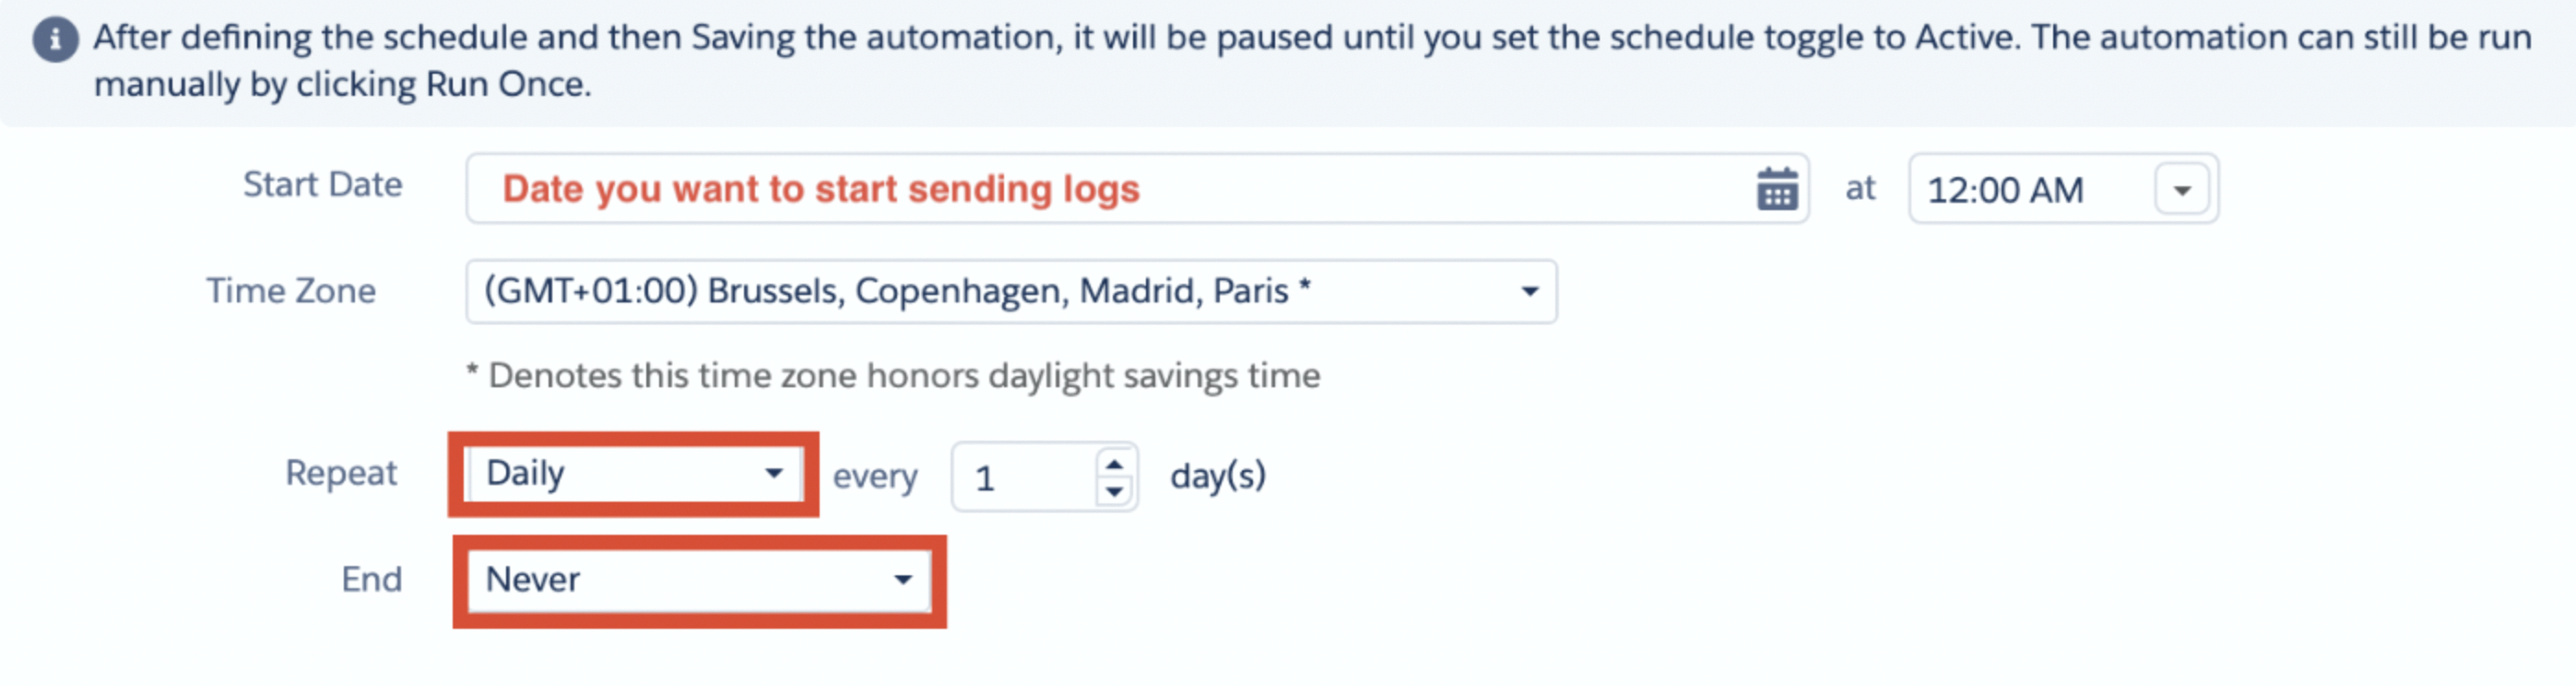
- Click Done.
Step 2: Retrieve Data (SQL Query)
Note that in order to get data in the proper schema, SQL activity (rather than just a Data Extract) needs to be used. It will allow you to output one single ready-to-be-used file that will be automatically sent to Splio systems.
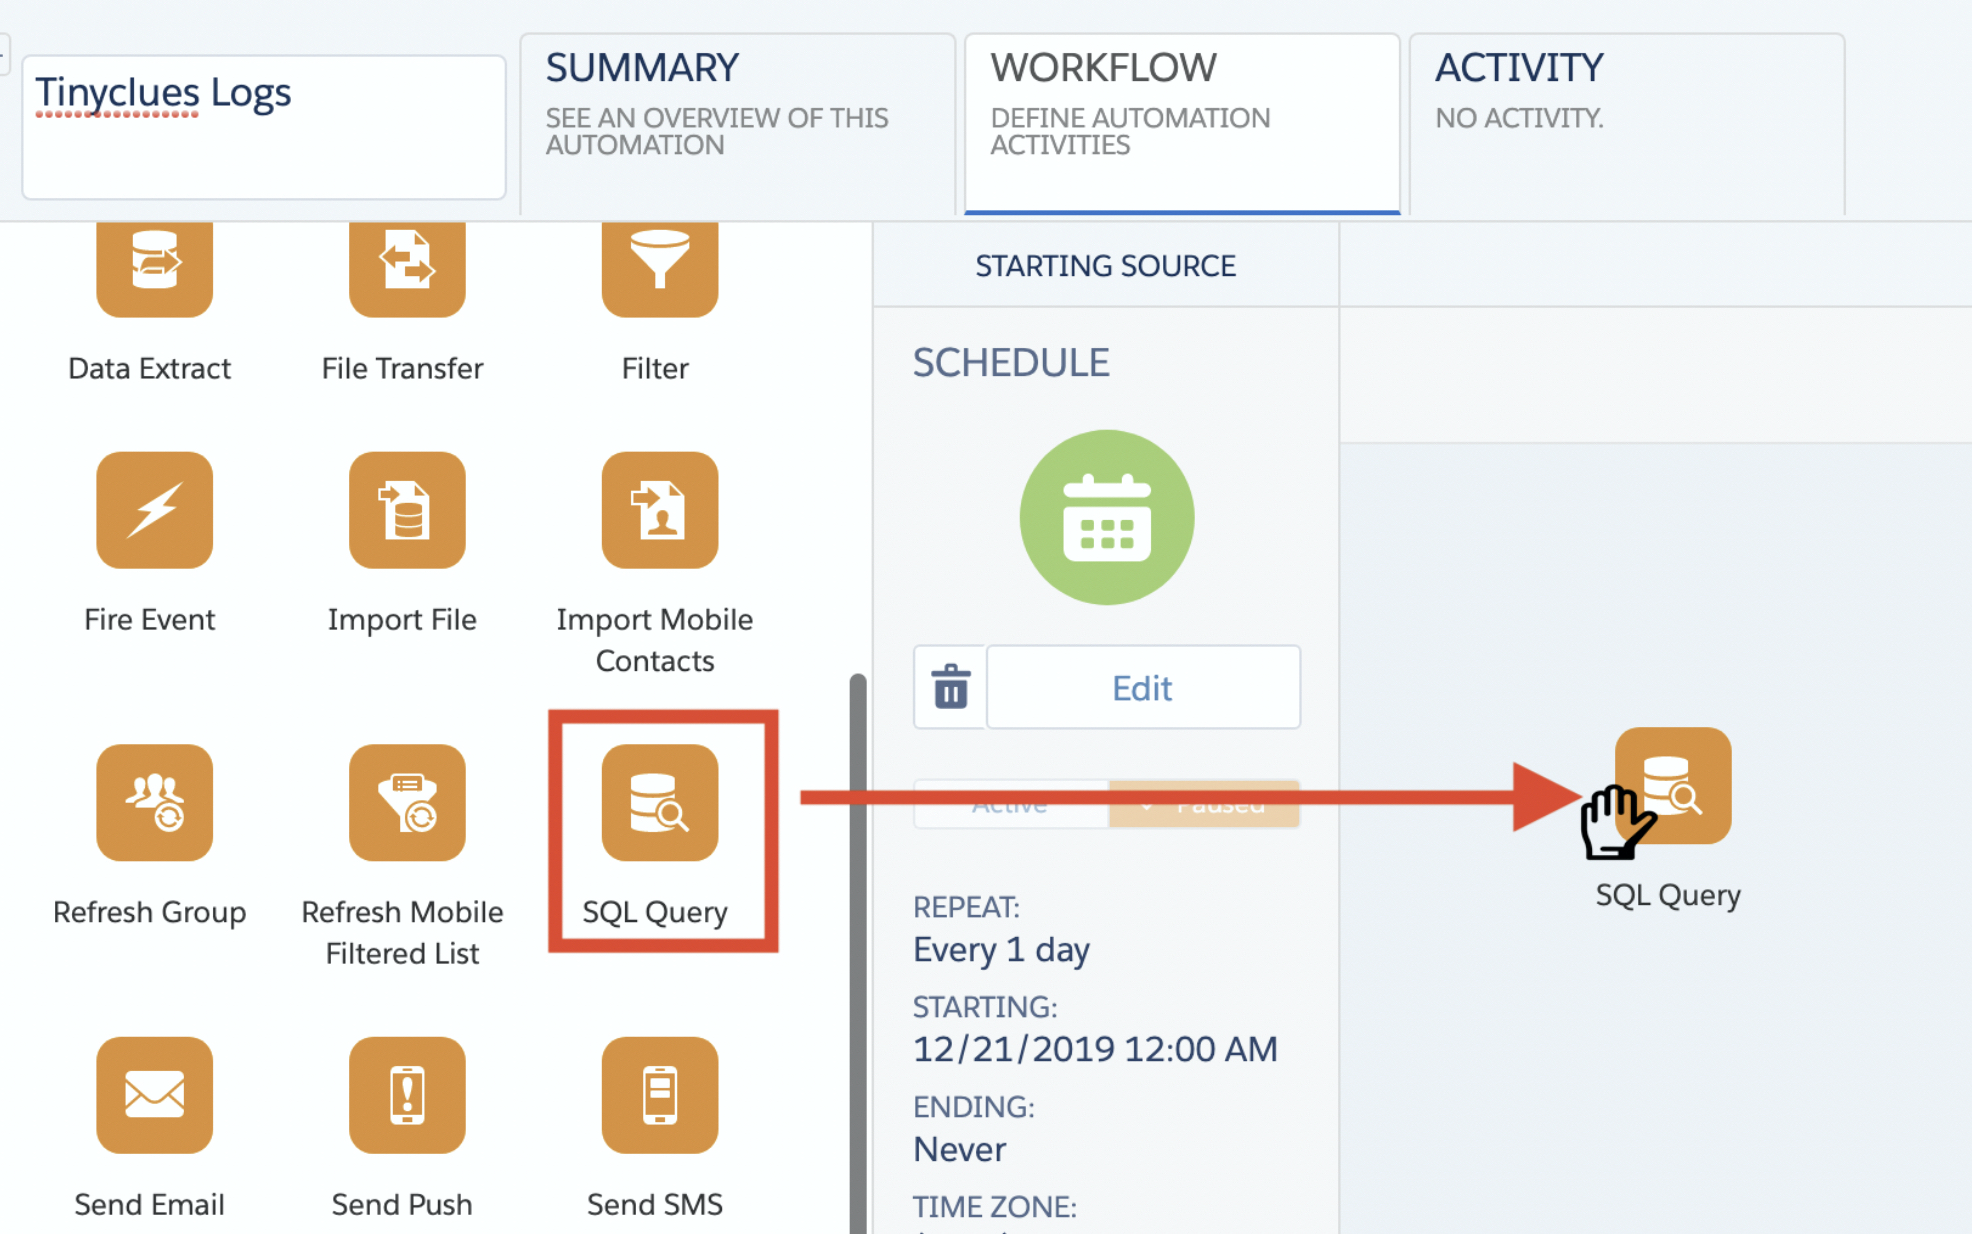
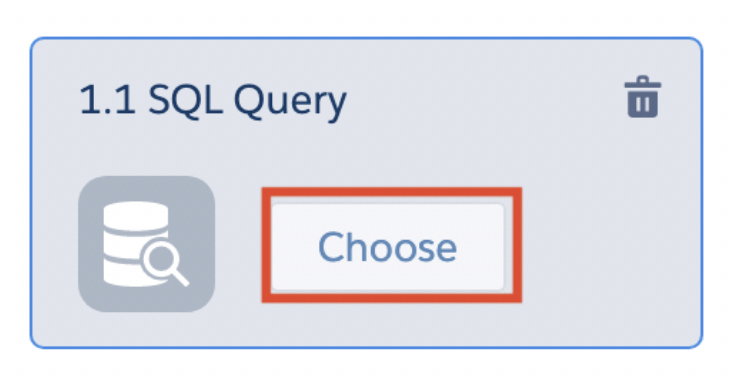
- In the left panel, search for SQL query icon. Drag and drop into the automation section on the right.
Note: If you do not see the SQL query operator, you may need specific access rights. Please ask your Salesforce Marketing Cloud account administrator.
- Click Choose
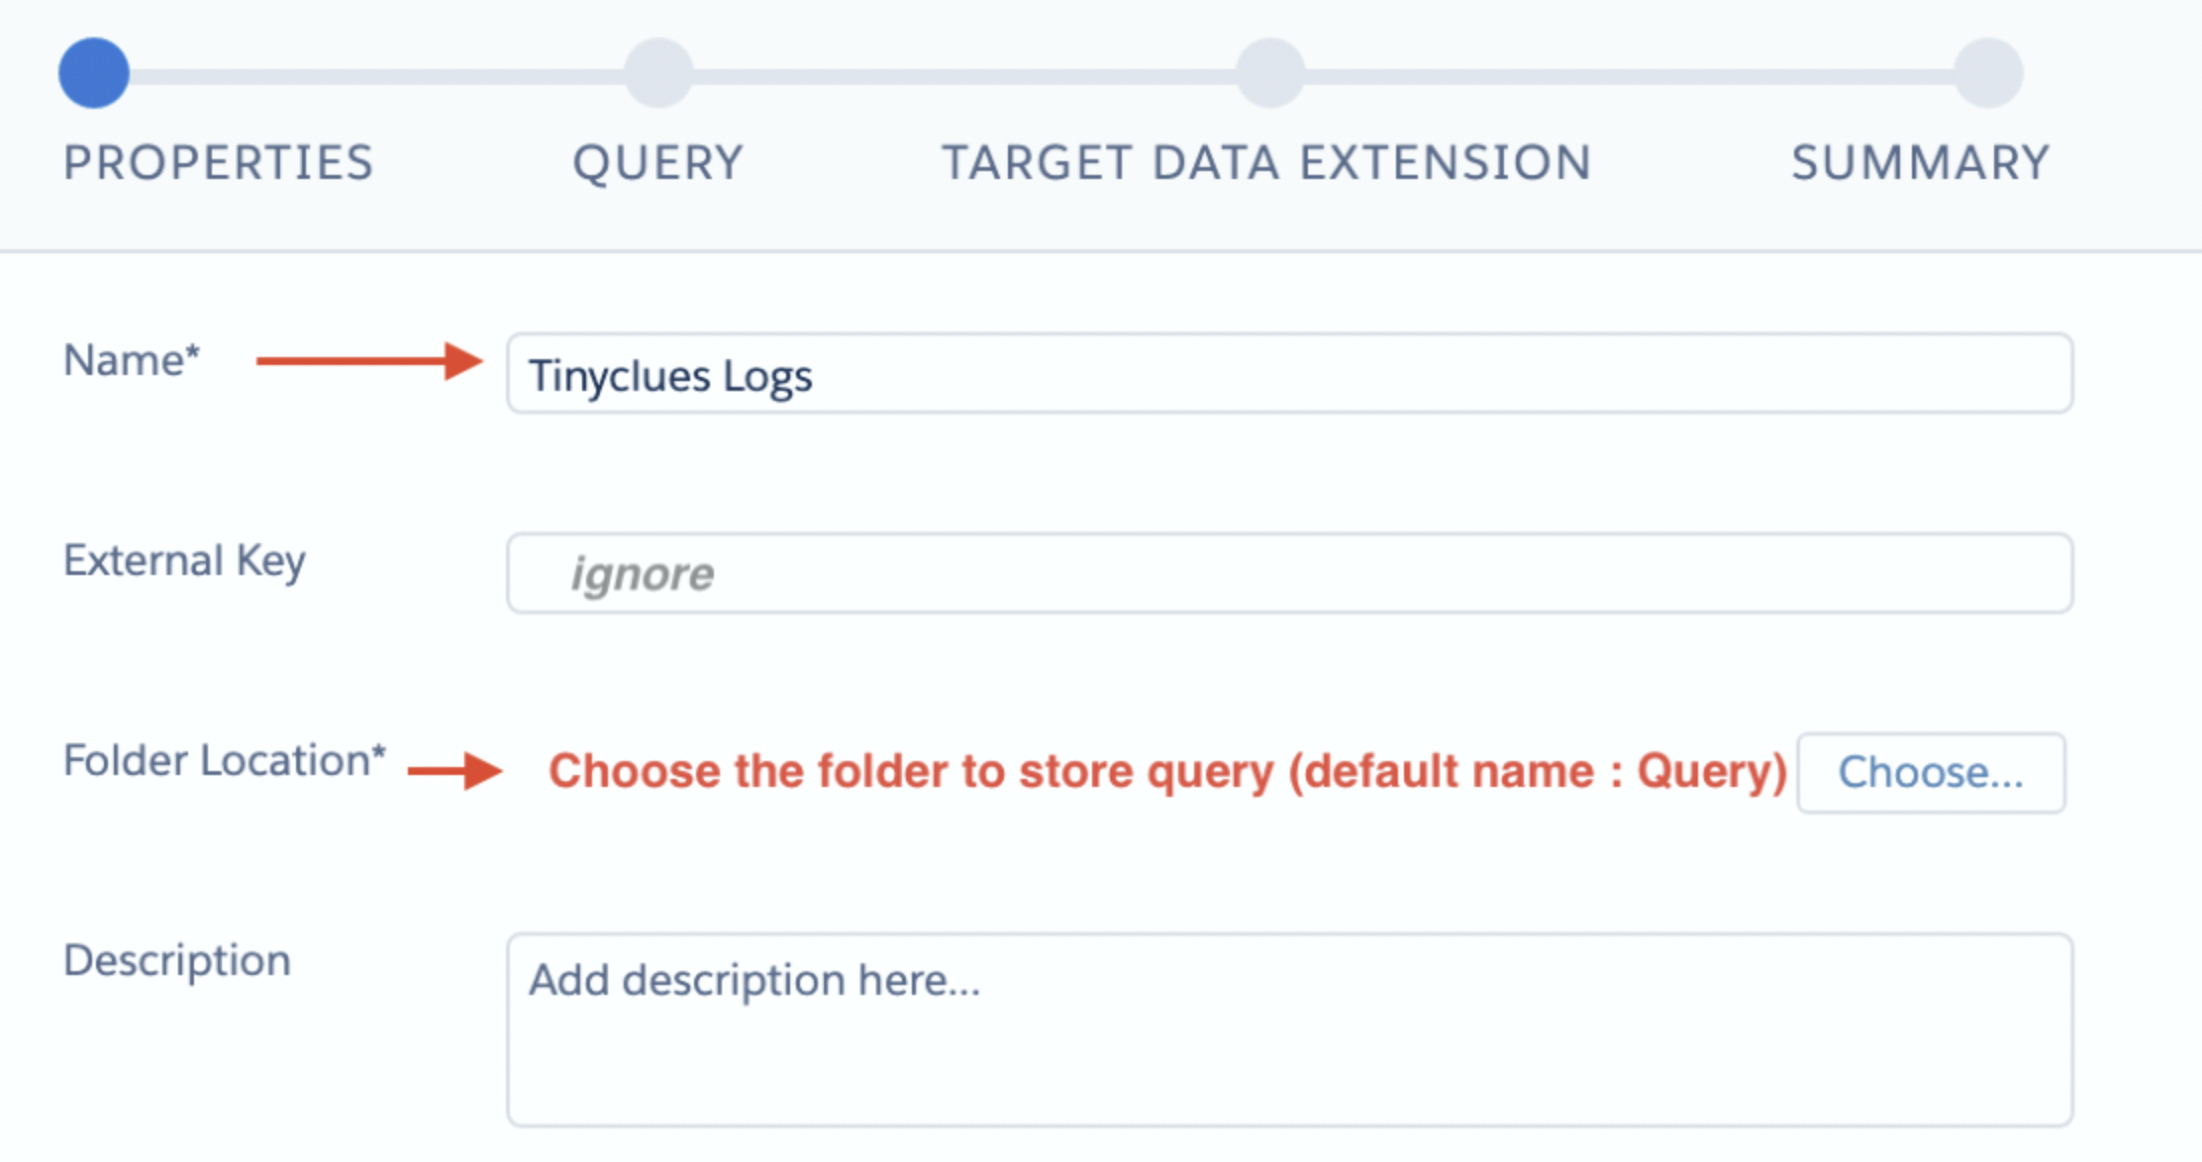
- Create a New Query Activity

- Check the Query Activity properties and click Next.

- Copy & paste the following query into the text field:
SELECT
s.SubscriberKey,
j.EmailName,
j.EmailSendDefinition,
f.ListID,
s.EventDate as SentDate,
o.EventDate as OpenDate,
c.EventDate as ClickDate,
b.EventDate as BounceDate,
b.BounceCategory,
u.EventDate as UnsubscribeDate
FROM _Sent s
LEFT JOIN _Job as j ON s.JobID = j.JobID
LEFT JOIN _Ftaf as f ON s.JobID = f.JobID
LEFT JOIN _Open o ON s.JobID = o.JobID and s.ListID = o.ListID and s.BatchID = o.BatchID and s.SubscriberID = o.SubscriberID and o.IsUnique = 1
LEFT JOIN _Click c ON s.JobID = c.JobID  and s.ListID = c.ListID and s.BatchID = c.BatchID and s.SubscriberID = c.SubscriberID and c.IsUnique = 1
LEFT JOIN _Bounce b ON s.JobID = b.JobID and s.ListID = b.ListID and s.BatchID = b.BatchID and s.SubscriberID = b.SubscriberID and b.IsUnique = 1
LEFT JOIN _Unsubscribe u ON s.JobID = u.JobID and s.ListID = u.ListID and s.BatchID = u.BatchID and s.SubscriberID = u.SubscriberID and u.IsUnique = 1
WHERE s.EventDate >= DATEADD(day,-3,GETDATE())
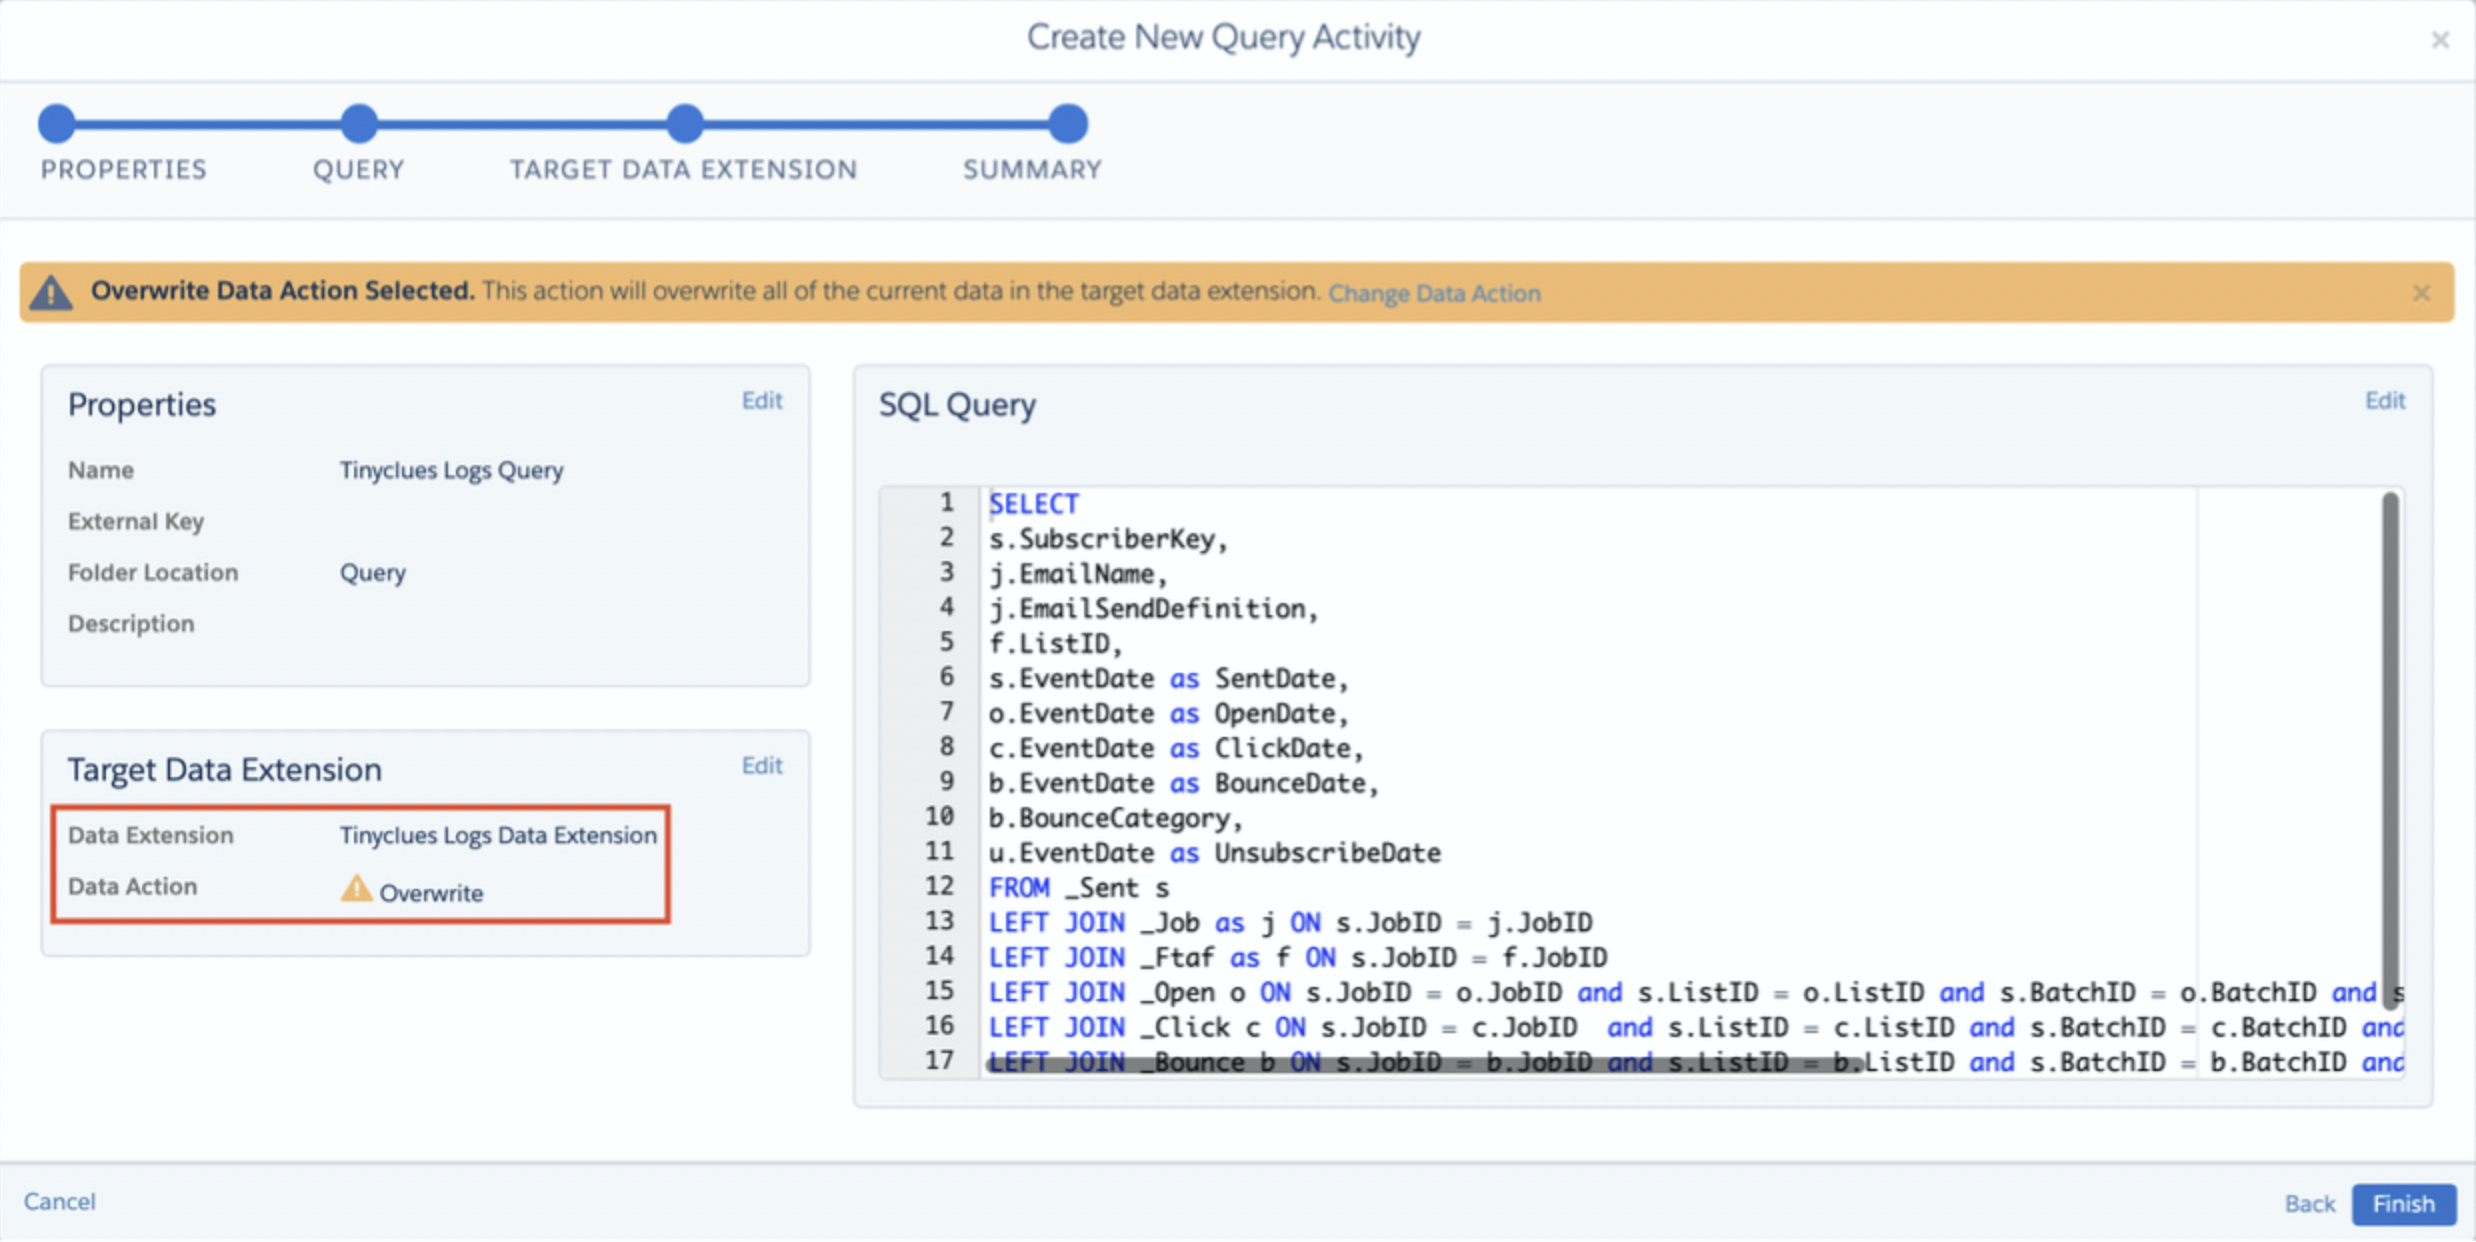
- Click Next and select the Data Extension you created in Part A. Make sure you have selected the Overwrite option.
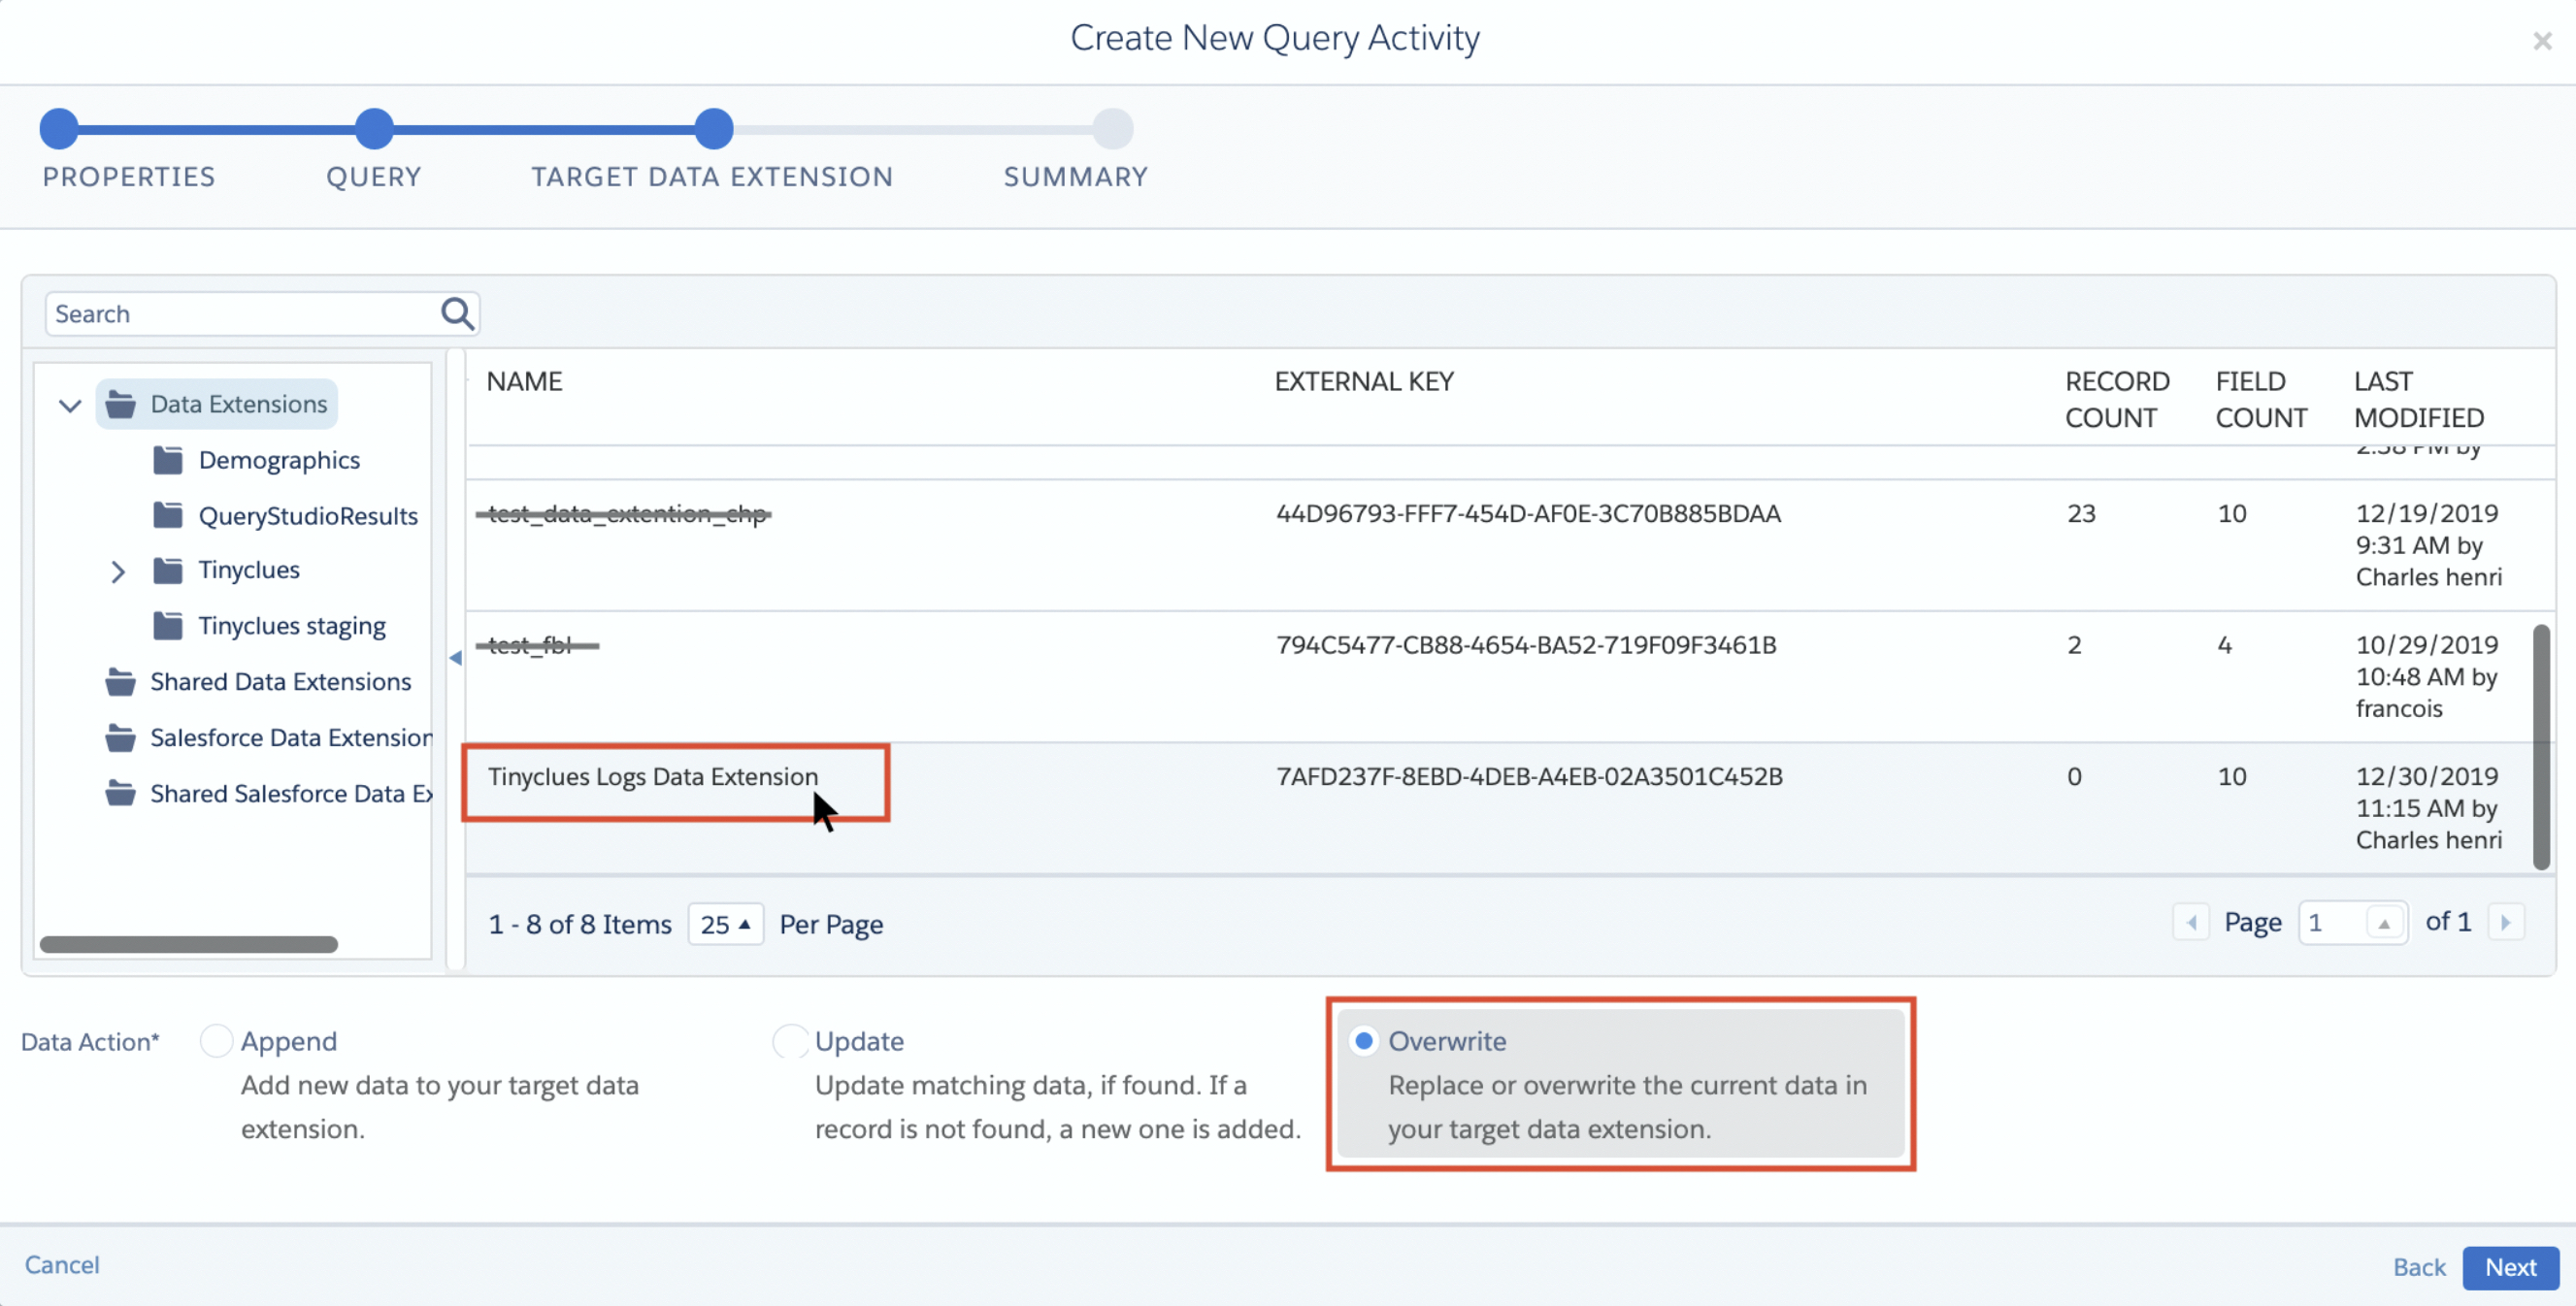
- You should end up with a Summary that looks like this:

- Click Finish. You will get a warning about "Overwrite Data Action Selected." You can ignore this. We want to overwrite the Data Extension and only keep the latest data on there to ensure the file stays light.
Step 3: The Data Extract
- In the left panel, search for the Data Extract icon. Drag and drop into the automation scheme on the right.
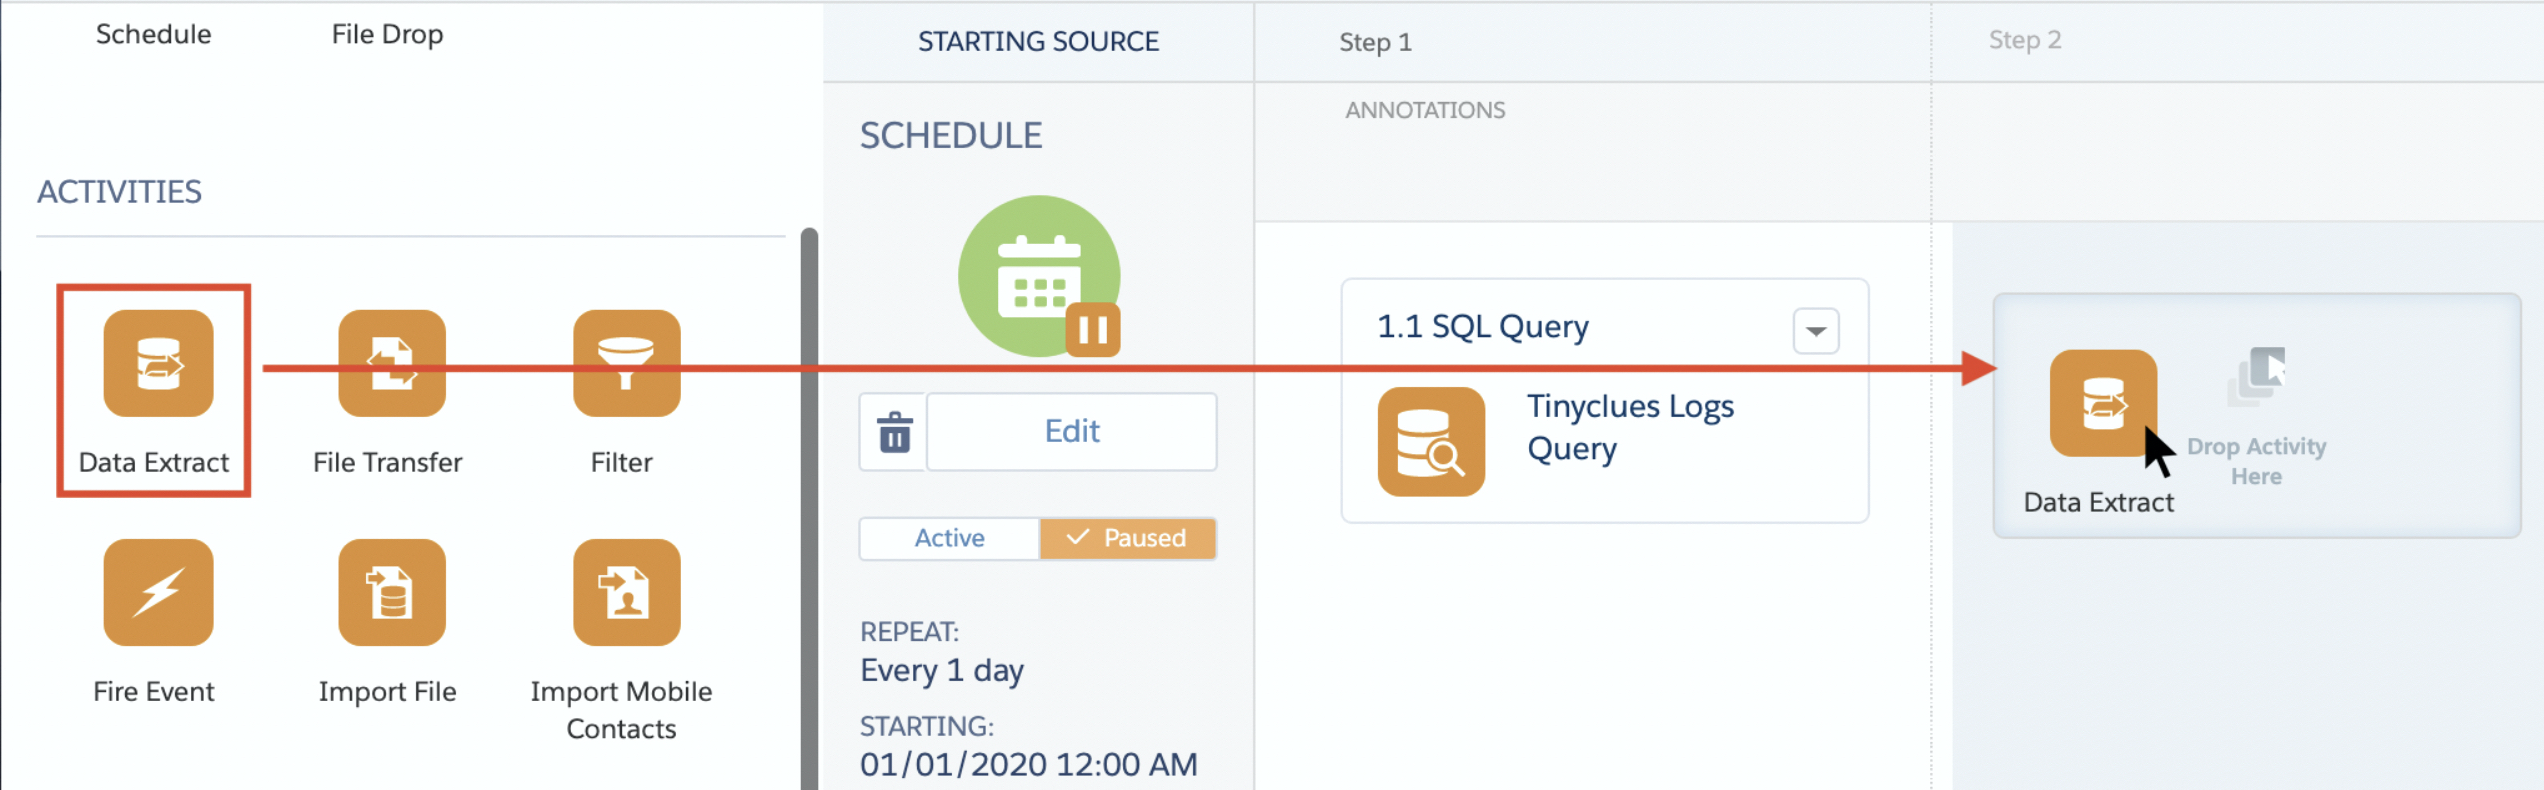
- Click Choose

- Click Create New Data Extract Activity.
- Fill in the following properties:
- File Pattern:
<your_company_name>_Email_Logs_%%Year%%-%%Month%%-%%Day%%.cs - Example of a filename that will be generated using this pattern:
Splio_Client_Name_Email_Logs_2020-02-12.csv
- File Pattern:
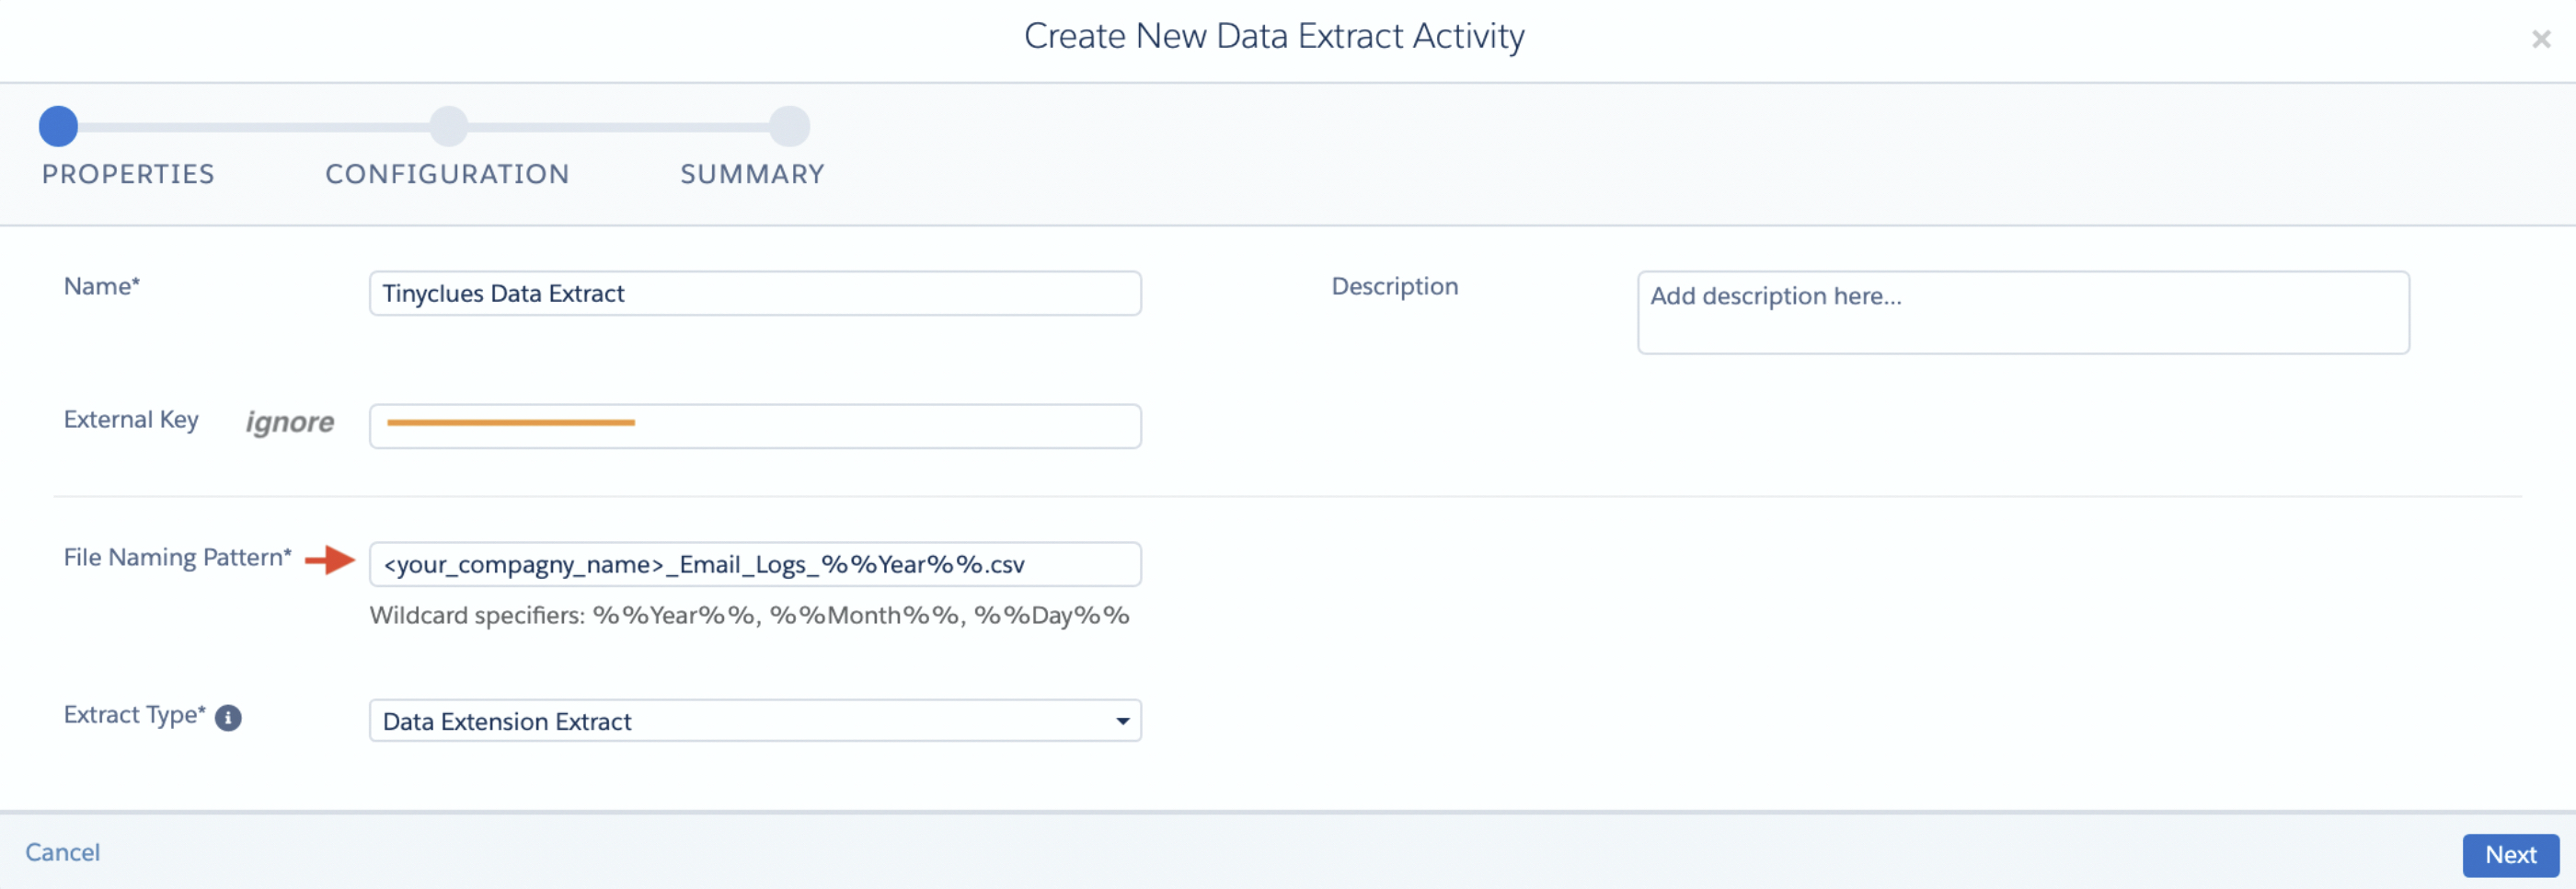
- Copy the File Naming Pattern and keep it handy, you will need it later on.
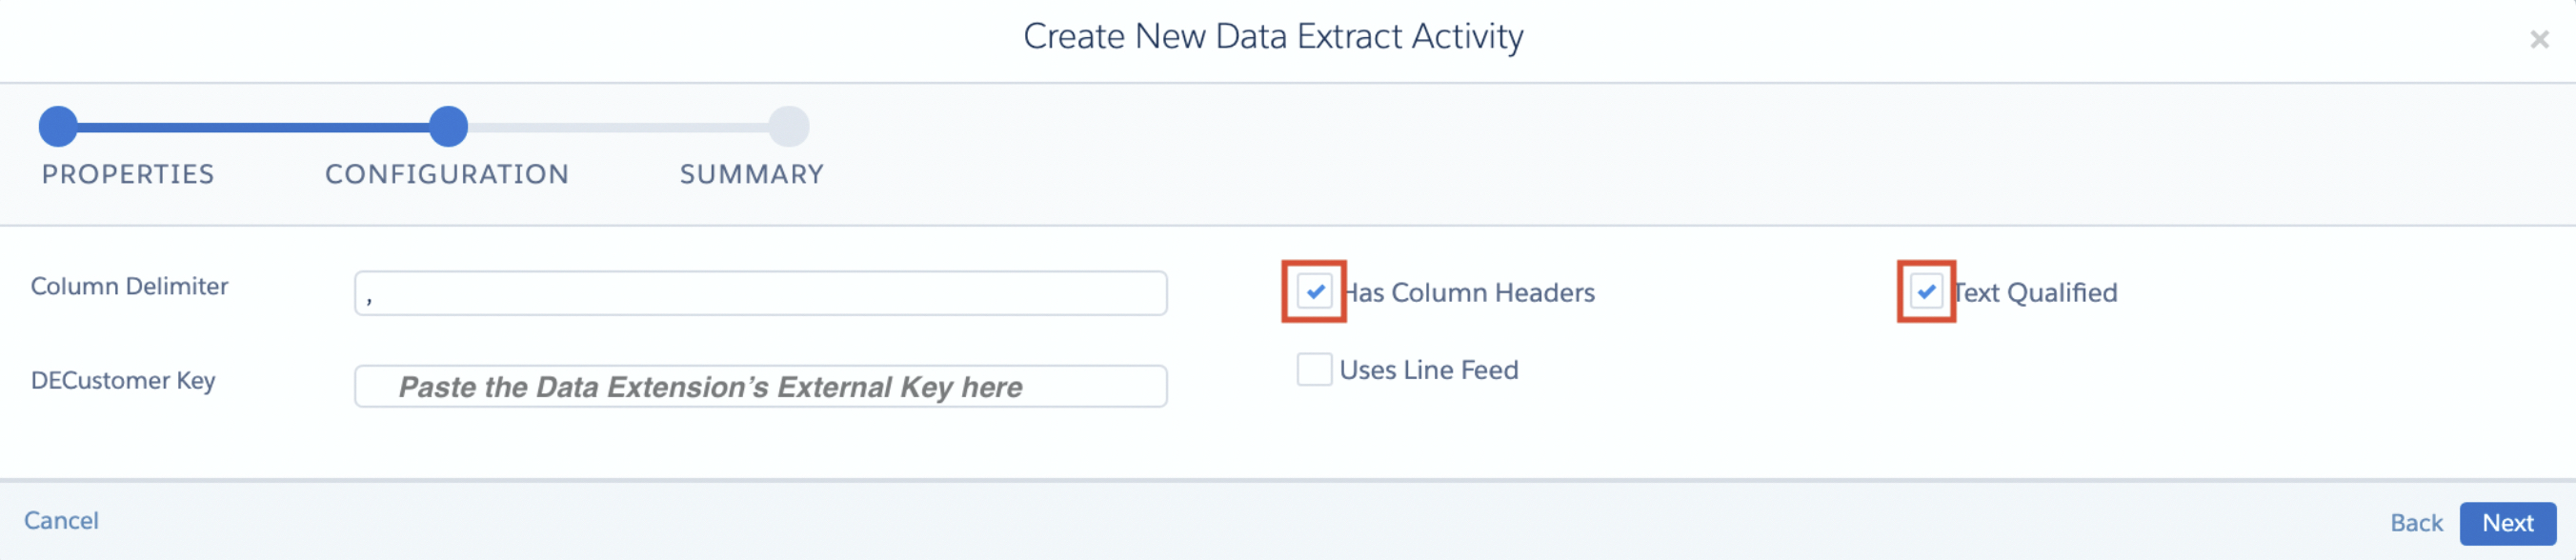
- Click Next and set the following configuration parameters in the DECustomer Key field, copy the Data Extension’s External Key generated earlier.

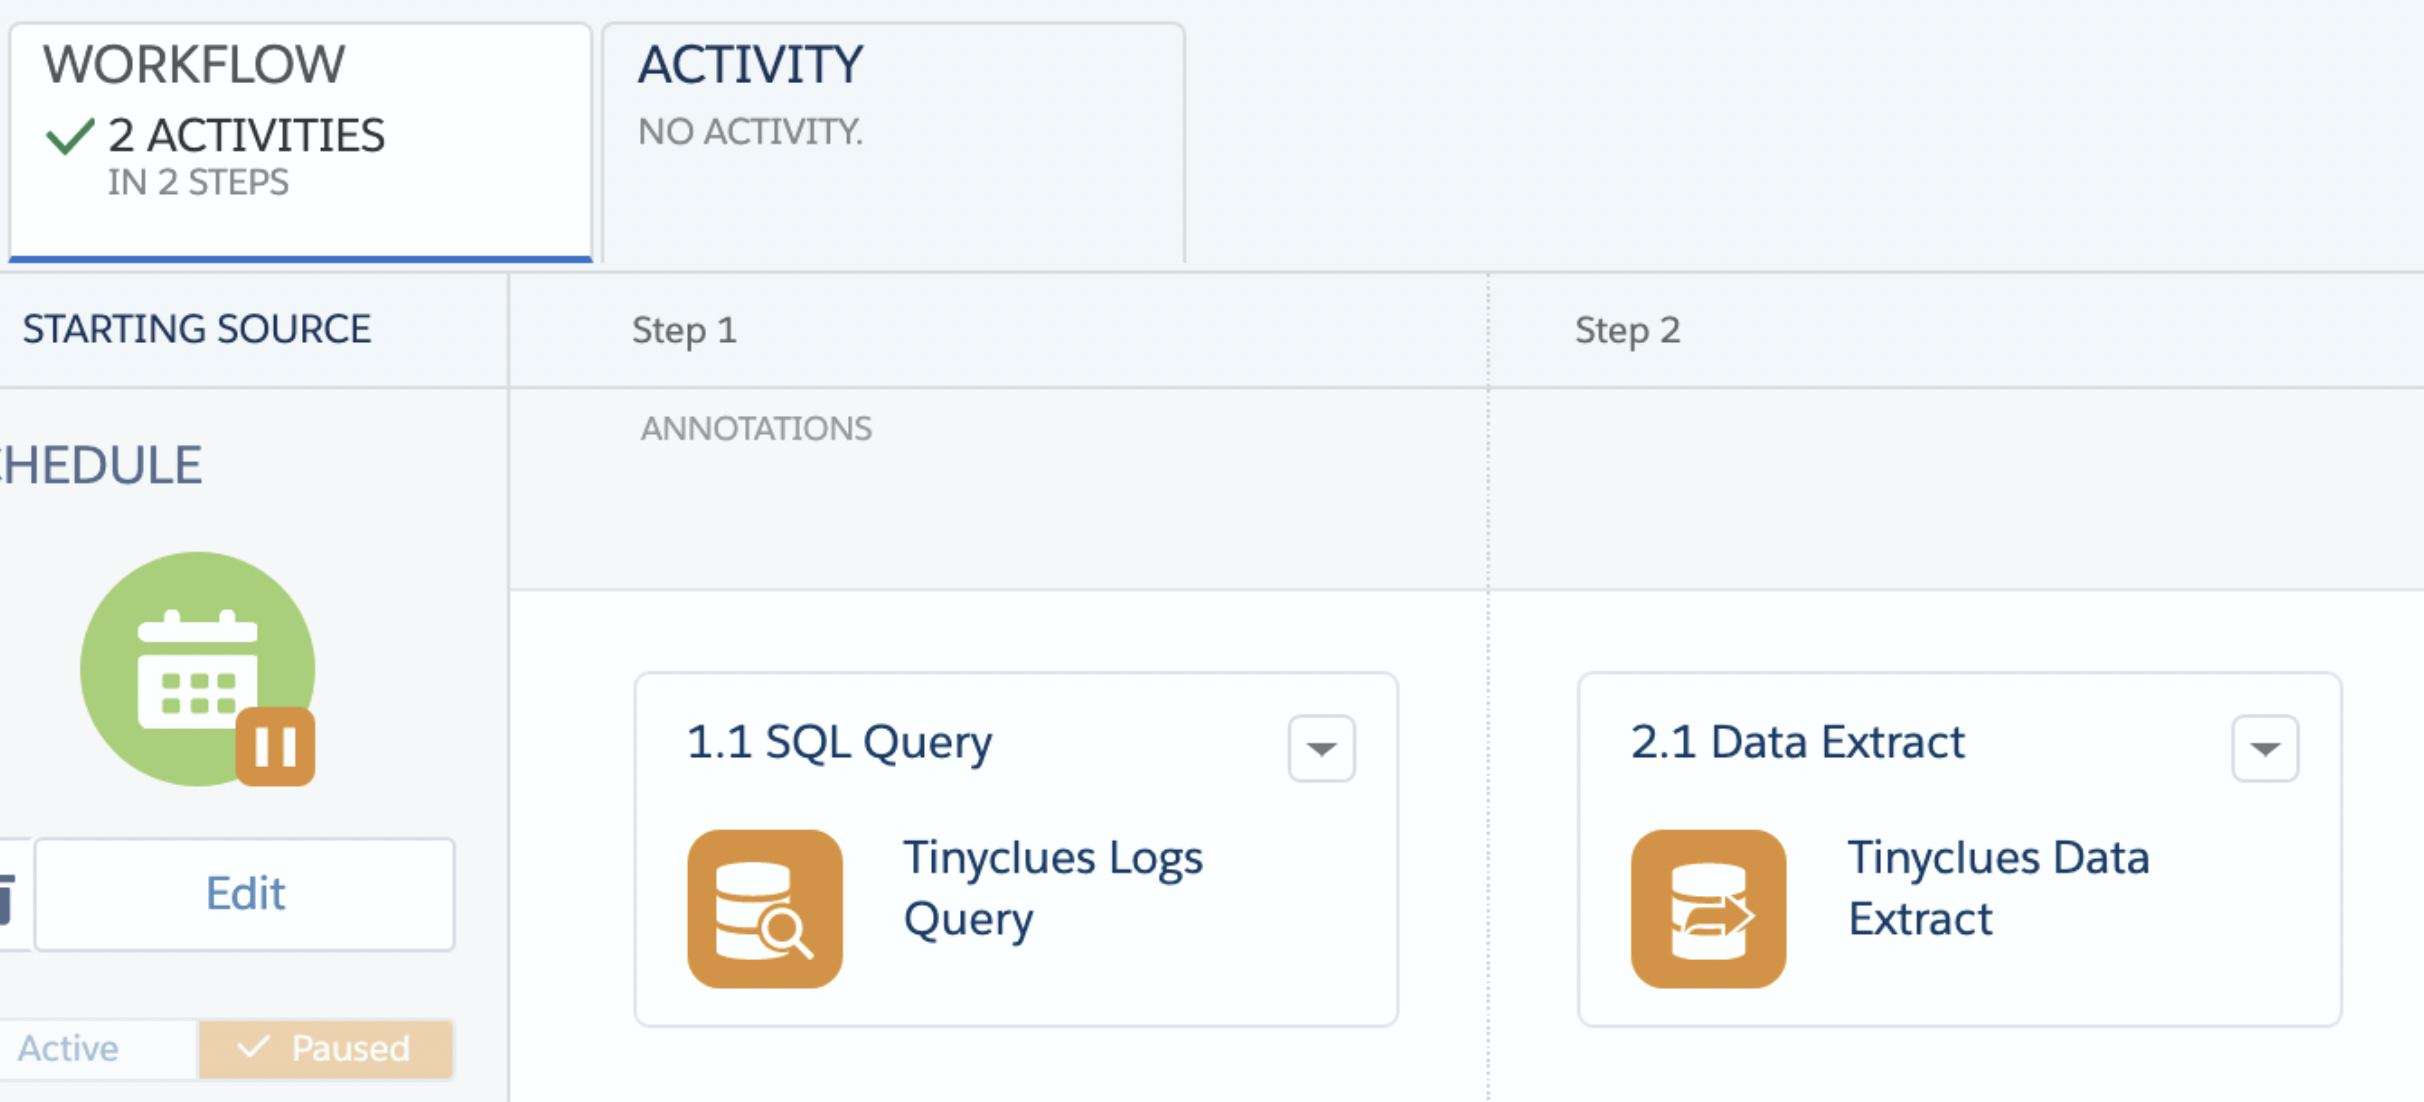
- Click on Next, then Finish, then Save.
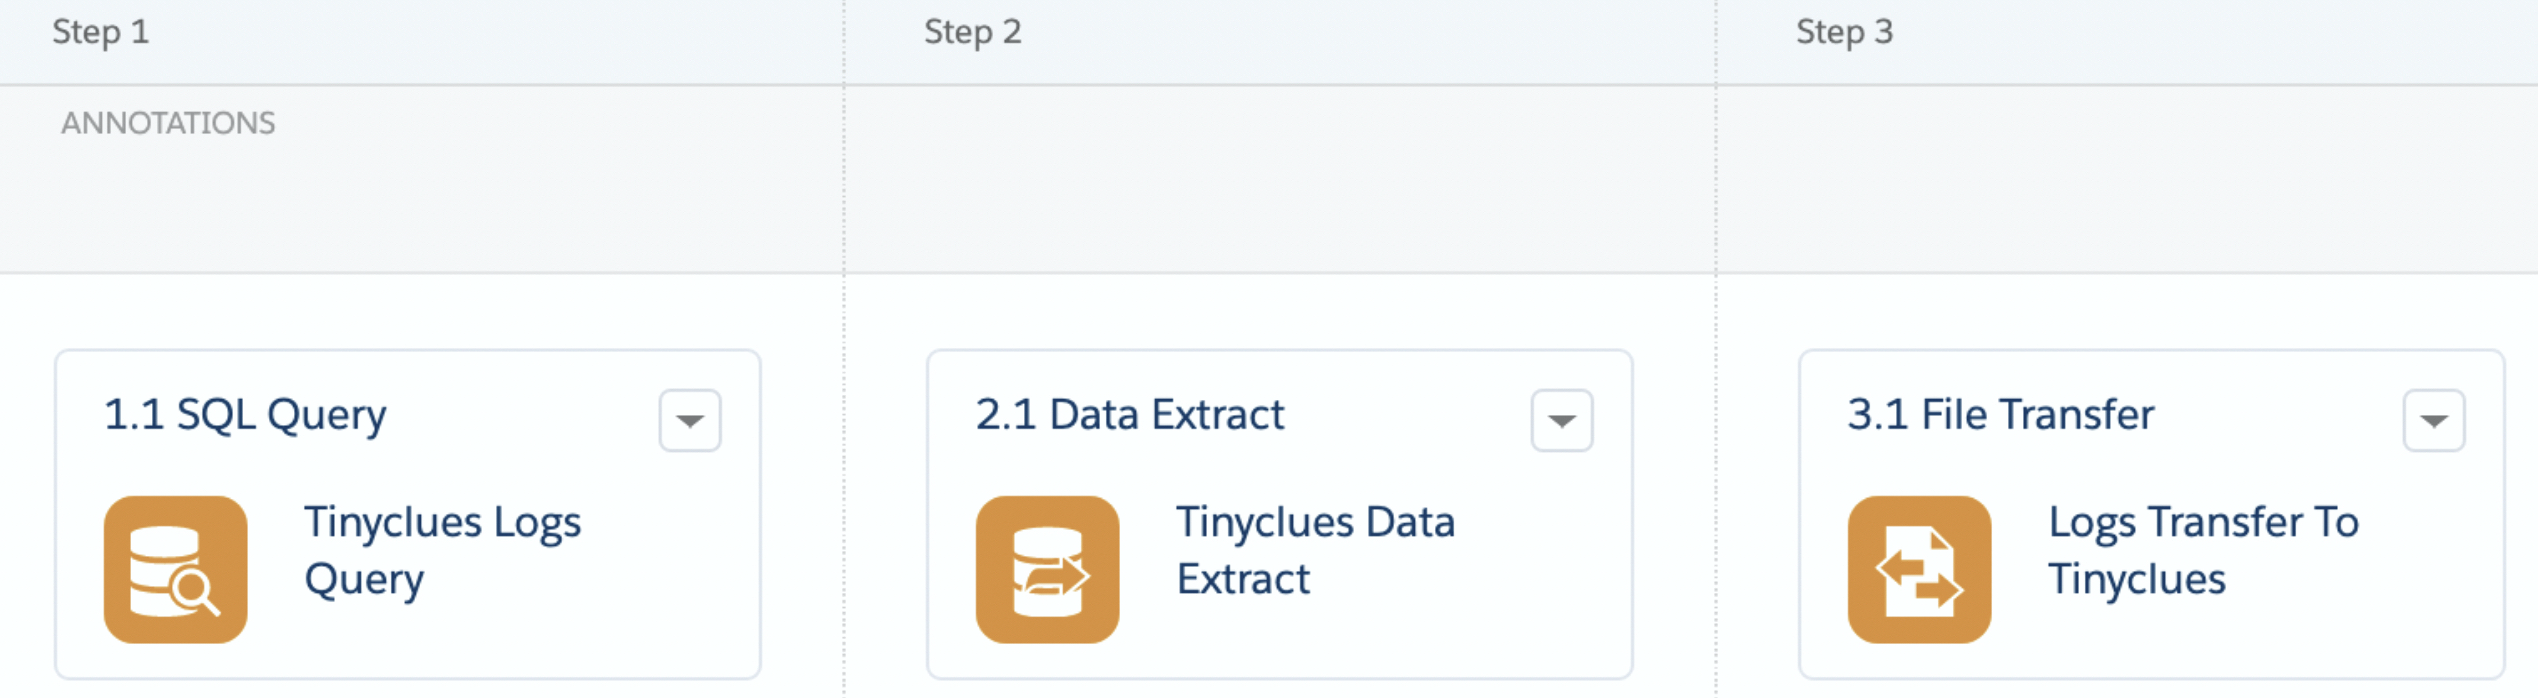
This is what the final result should look like:
Step 4: Set up file transfer to Tinyclues
- In the left panel, search for the File Transfer icon. Drag and drop it into the automation section on the right.
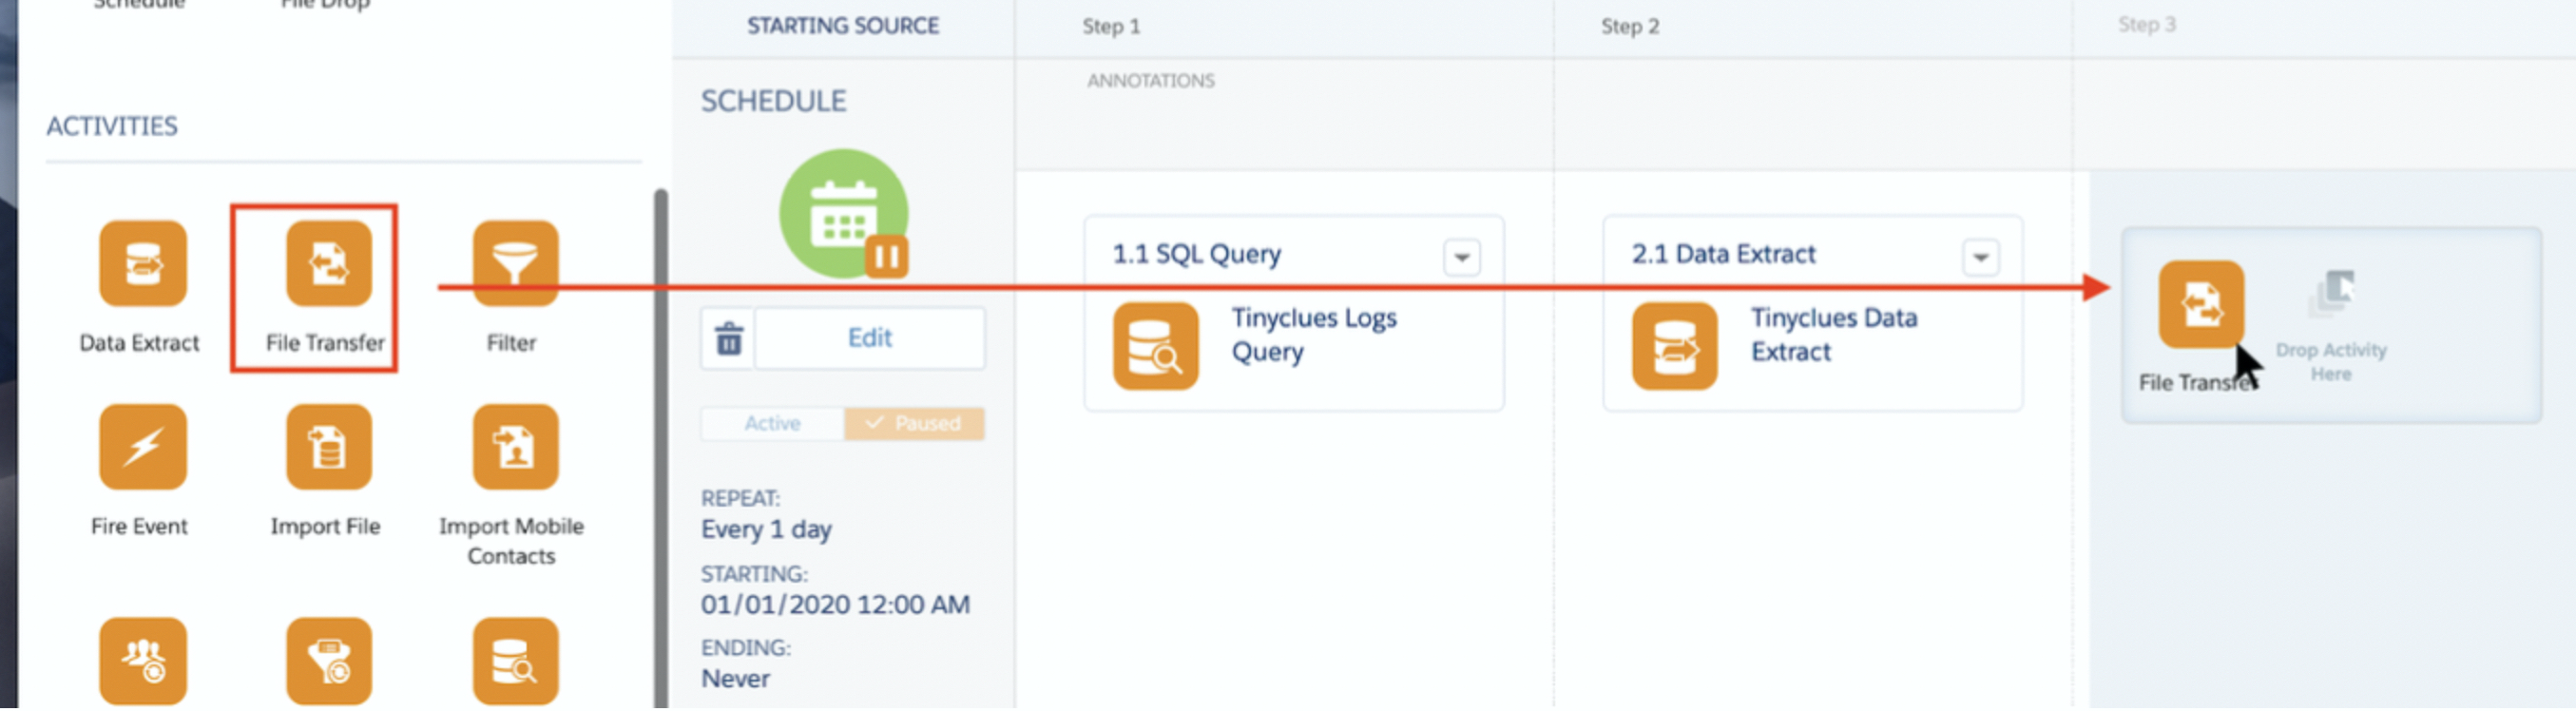
- Click Choose, then Create New File Transfer Activity.
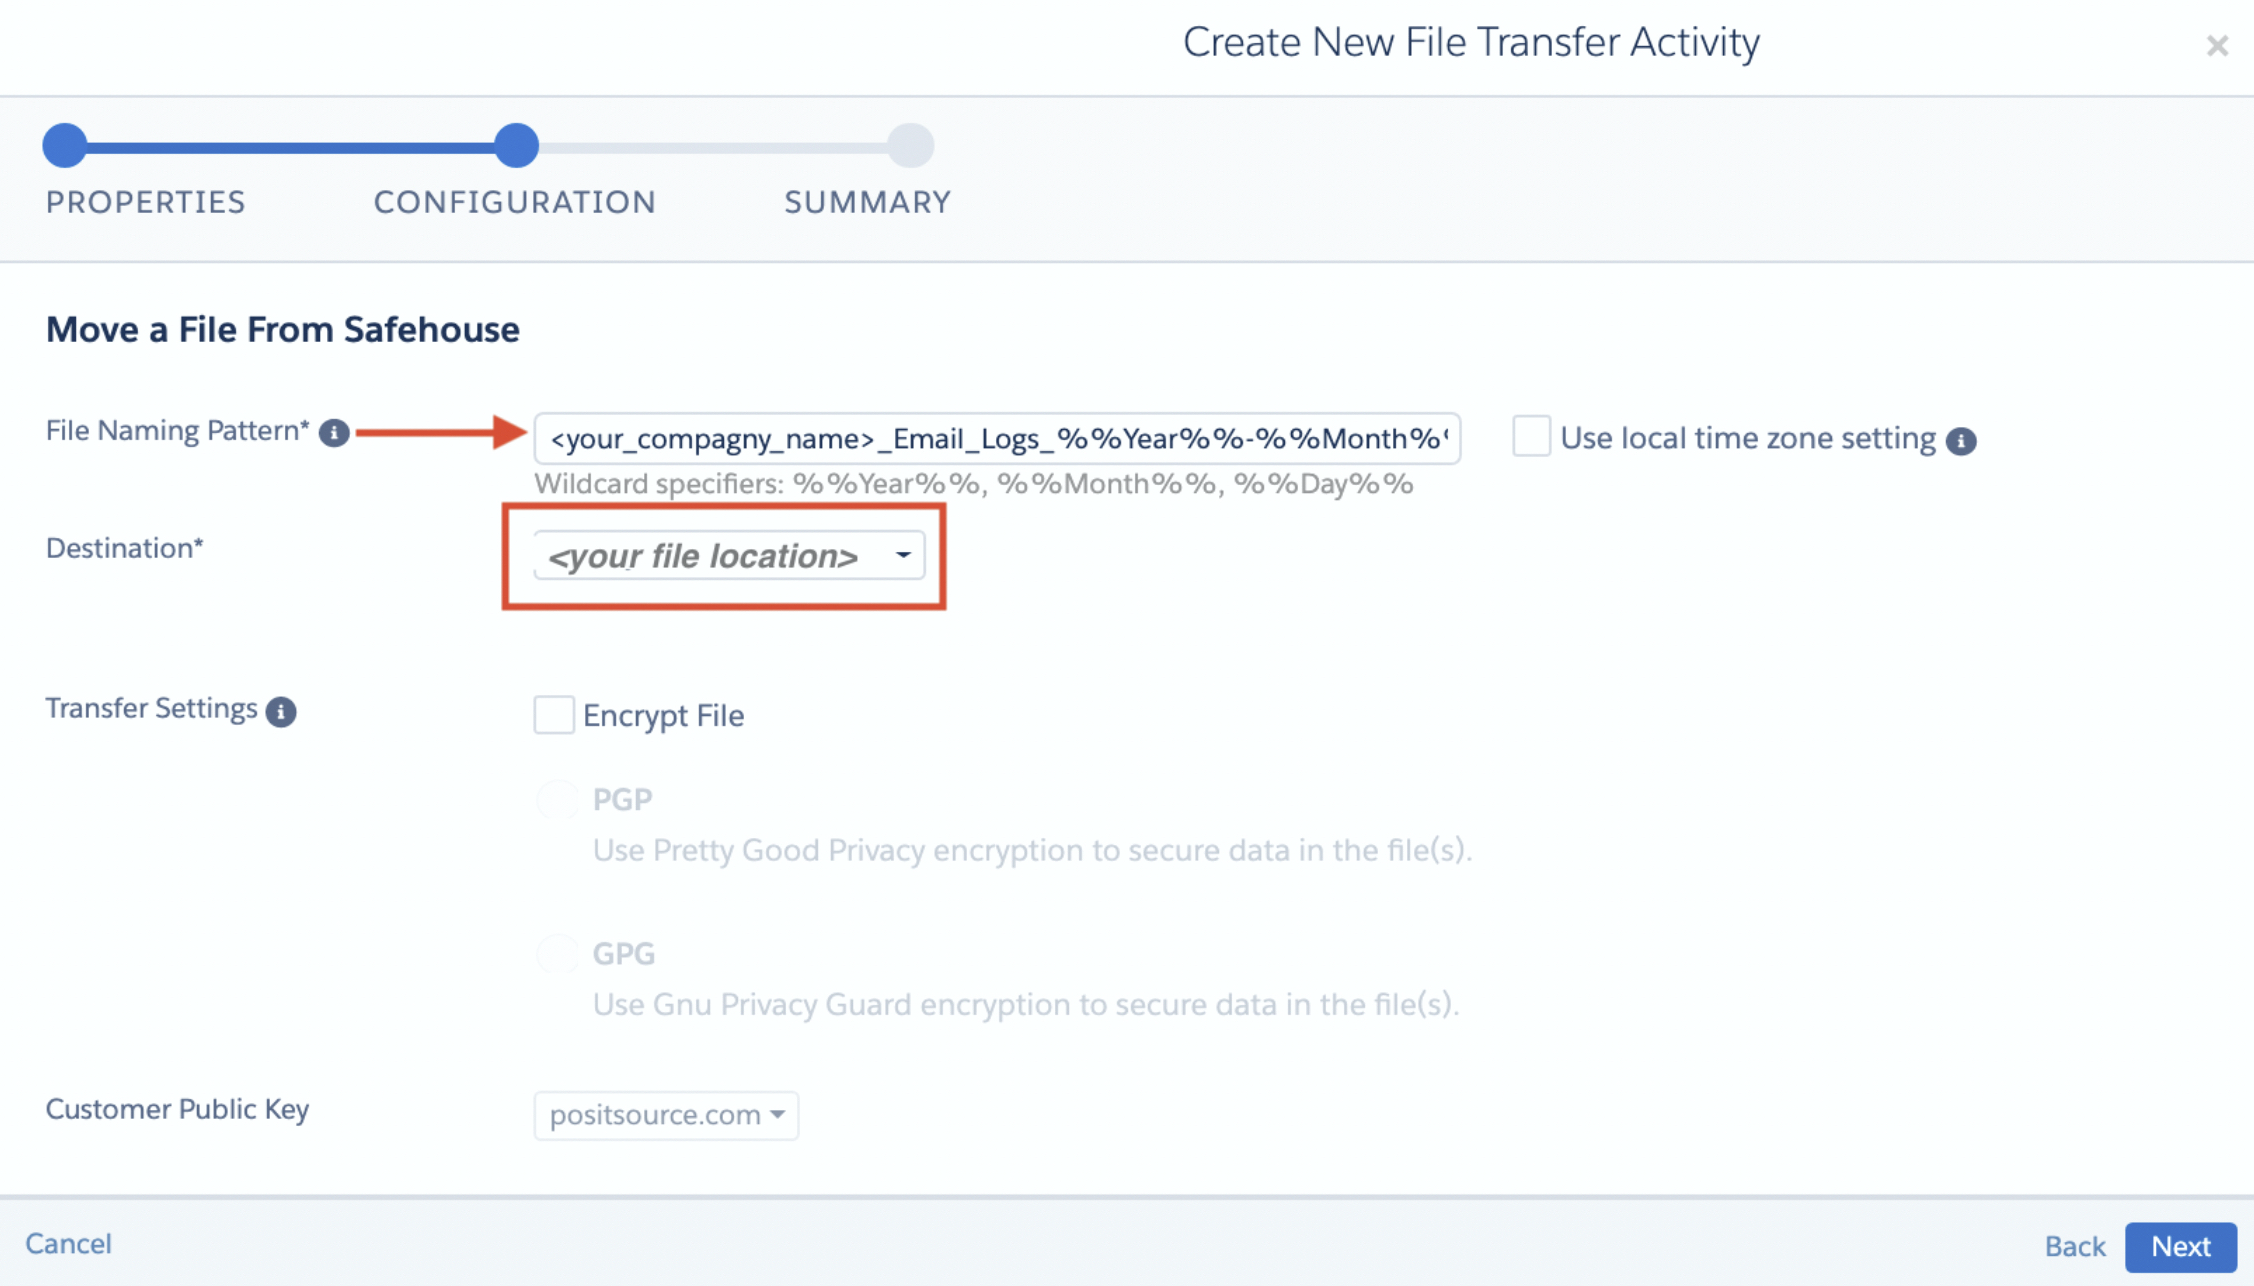
- Set the following properties:

- Click Next and set the following configuration settings:
- File Pattern: must be the one created earlier.
- Destination: must be the File Location you have set for Splio earlier.
- Click on Next, then Finish, then Save.

Automation pipeline for historical data
Step 1: Initiate automation
From the Home page, go to Journey Builder > Automation Studio.

- Click New Automation.
- Name this Automation. For example, "Splio Historical Logs."
- Click Done.
Step 2: Retrieve Data (SQL Query)
Note that in order to get data in the proper schema, SQL activity (rather than just a Data Extract) needs to be used. It will allow you to output one single ready-to-be-used file that will be automatically sent to Splio systems.
- In the left panel, search for SQL query icon. Drag and drop into the automation section on the right.

Note: If you do not see the SQL query operator, you may need specific access rights. Please ask your Salesforce Marketing Cloud account administrator.
- Click Choose.
- Create a New Query Activity.

- Check the Query Activity properties and click Next.
- Copy & paste the following query into the text field:
SELECT

s.SubscriberKey,

j.EmailName,

j.EmailSendDefinition,

f.ListID,

s.EventDate as SentDate,

o.EventDate as OpenDate,

c.EventDate as ClickDate,

b.EventDate as BounceDate,

b.BounceCategory,

u.EventDate as UnsubscribeDate

FROM _Sent s

LEFT JOIN _Job as j ON s.JobID = j.JobID

LEFT JOIN _Ftaf as f ON s.JobID = f.JobID

LEFT JOIN _Open o ON s.JobID = o.JobID and s.ListID = o.ListID and s.BatchID = o.BatchID and s.SubscriberID = o.SubscriberID and o.IsUnique = 1

LEFT JOIN _Click c ON s.JobID = c.JobID  and s.ListID = c.ListID and s.BatchID = c.BatchID and s.SubscriberID = c.SubscriberID and c.IsUnique = 1

LEFT JOIN _Bounce b ON s.JobID = b.JobID and s.ListID = b.ListID and s.BatchID = b.BatchID and s.SubscriberID = b.SubscriberID and b.IsUnique = 1

LEFT JOIN _Unsubscribe u ON s.JobID = u.JobID and s.ListID = u.ListID and s.BatchID = u.BatchID and s.SubscriberID = u.SubscriberID and u.IsUnique = 1
- Click Next and select the Data Extension you created previously. Make sure you have selected the Overwrite option.

- You should end up with a Summary that looks like this:
- Click Finish. You will get a warning about "Overwrite Data Action Selected." You can ignore this. We want to overwrite the Data Extension and only keep the latest data on there to ensure the file stays light.
Step 3: The Data Extract
- In the left panel, search for the Data Extract icon. Drag and drop into the automation scheme on the right.

- Click Choose and New Data Extract Activity.
- Fill in the following properties:
- File Pattern:
<your_company_name>_Email_Logs_%%Year%%-%%Month%%-%%Day%%.csv - Example of filename that will be generated using this pattern:
Splio_Client_Name_Email_Logs_2020-02-12.csv
- File Pattern:

- Copy the File Naming Pattern and keep it handy, you will need later.
- Click Next and set the following configuration parameters in the DECustomer Key field and copy the Data Extension’s External Key.
- Click on Next, then Finish, then Save.
This is what the final result should look like:

Set up file transfer to Tinyclues
- In the left panel, search for the File Transfer icon. Drag and drop it into the automation section on the right.

- Click Choose, then Create New File Transfer Activity.
- Set the following properties:

- Click Next and set the following configuration settings:
- File Pattern: must be the one created previously
- Destination: must be the File Location you have set for Splio

- Click on Next, then Finish, then Save.
Test the overall setup
This part aims to ensure the entire setup is working and should be launched in coordination with your Splio Data Ops representative.
- Click Run Once on the left-hand side of the Automation Studio

If the Run Once button is greyed, click Save again.
- Select each step then click Run.
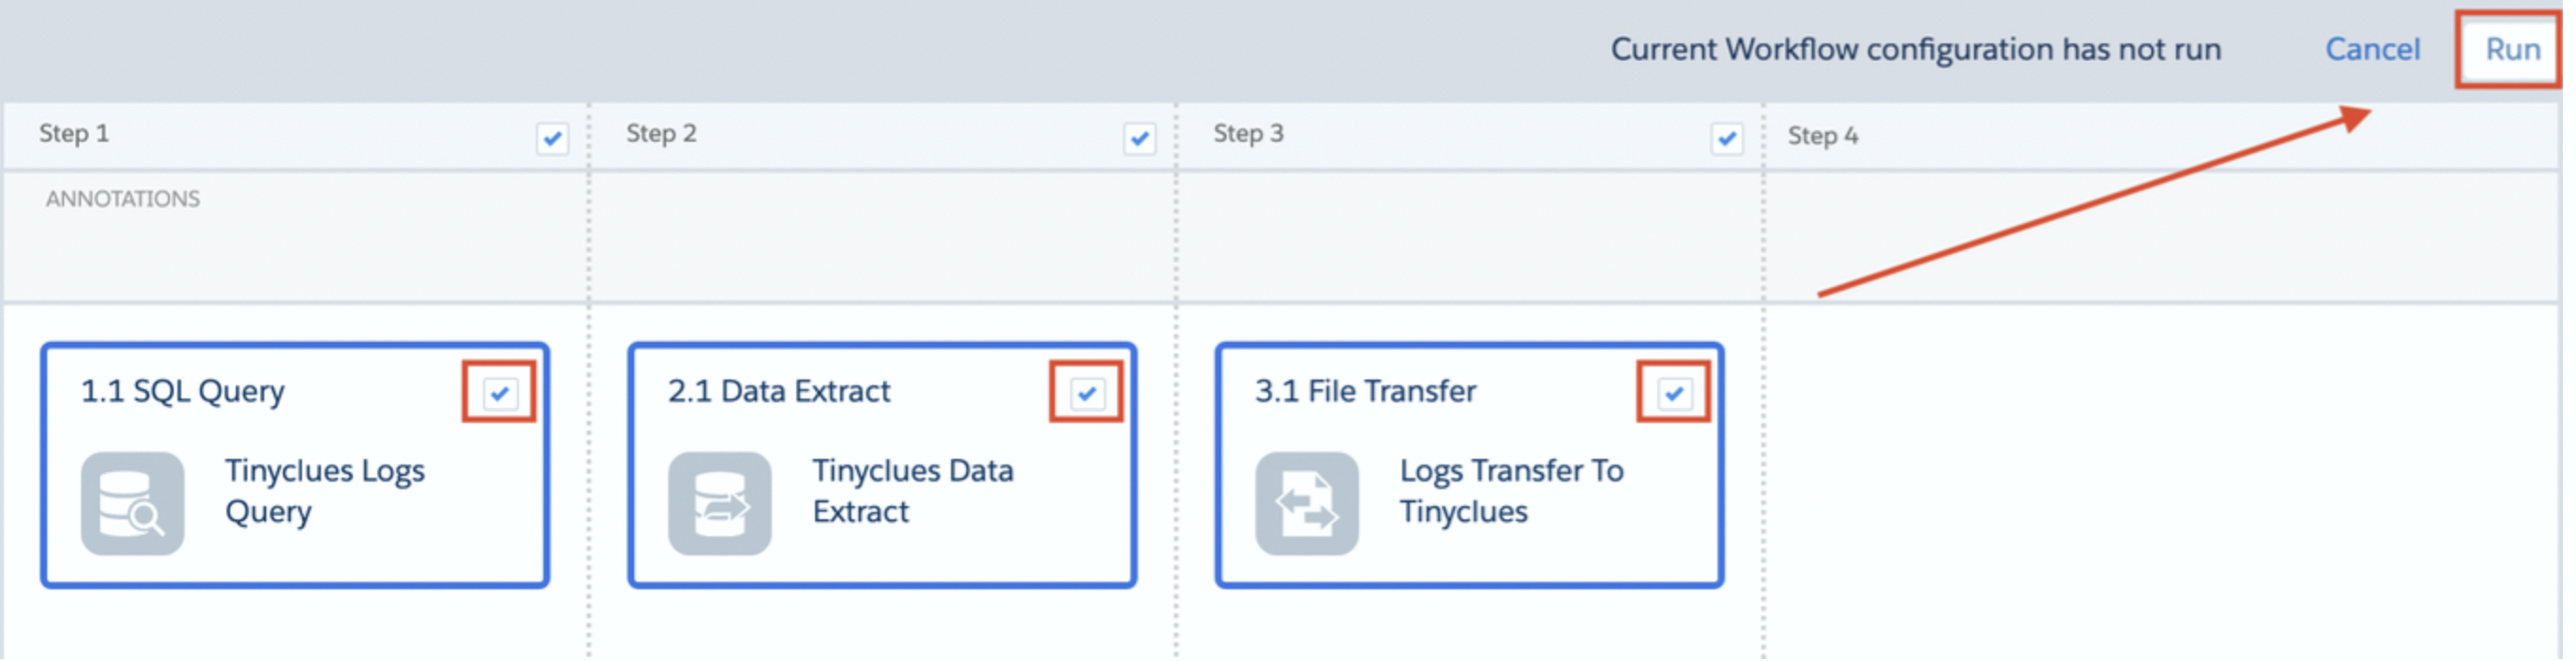
- Click Run Now.
- Click on the Activity Tab.
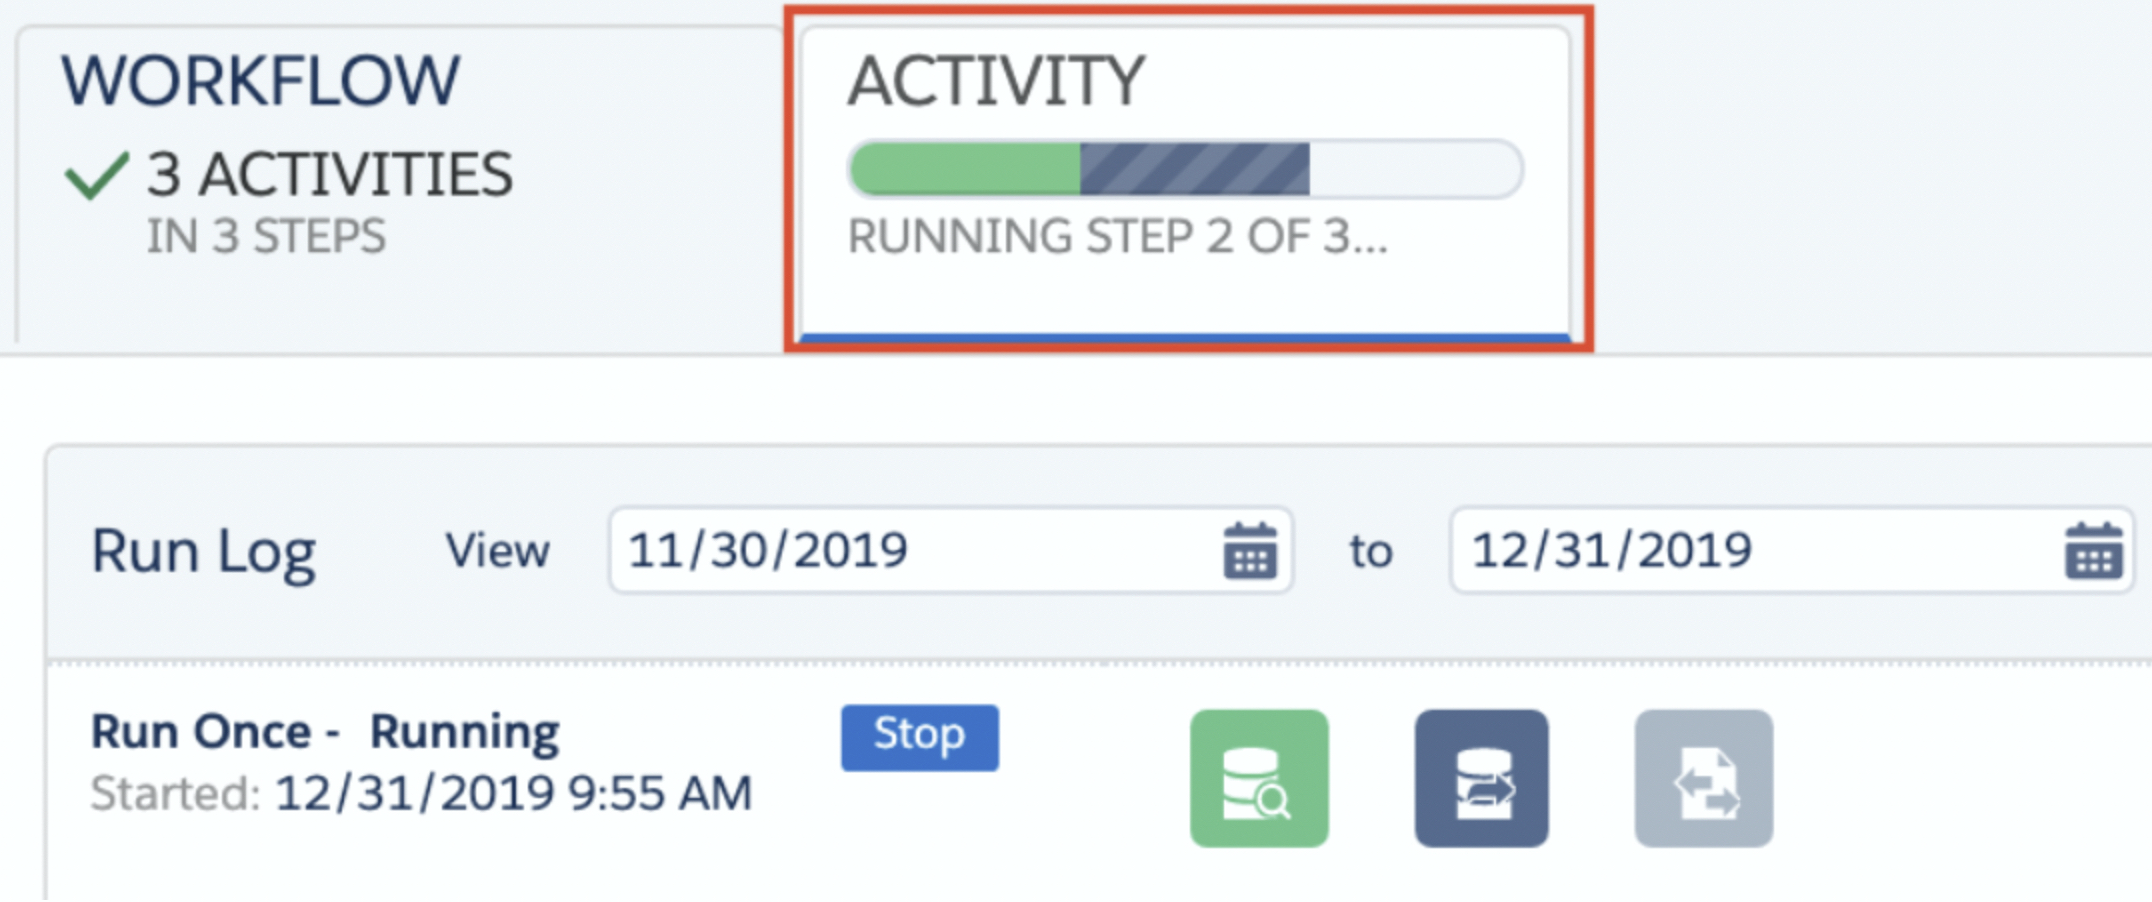
- After a few minutes, you should see the Activity in Success.

If you see an error, please verify each step. If you still encounter problems, please contact us.
- Check with your DataOps representative that the files have been correctly received.
You should now have:
✅ Created a Data Extension
✅ Configured an Authentication Key & File Location
✅ Set up Automatic Pipelines for Daily Updates
✅ Set up Automatic Pipelines for Historical Data
✅ Tested the overall setup
Updated about 2 months ago